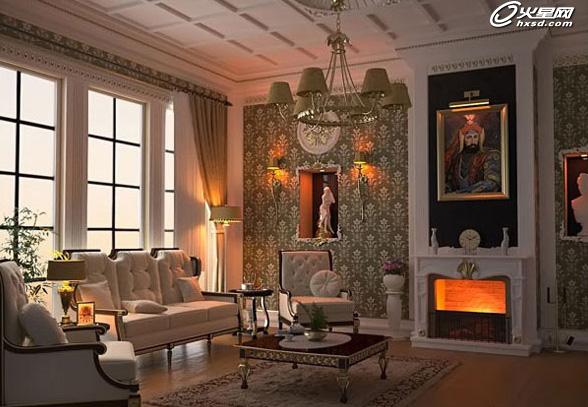
今天和大家分享如何利用3ds Max打造欧式古典风格效果图的方法,先来看看最终的效果图。喜欢的就一起学,不喜欢的请飘过。
在这篇制作教程中,我主要探讨了制作新古典客厅的渲染和照明调整。我激活了Maxwell渲染,并将Material Editor中的材质设置为Maxwell材质。
照明
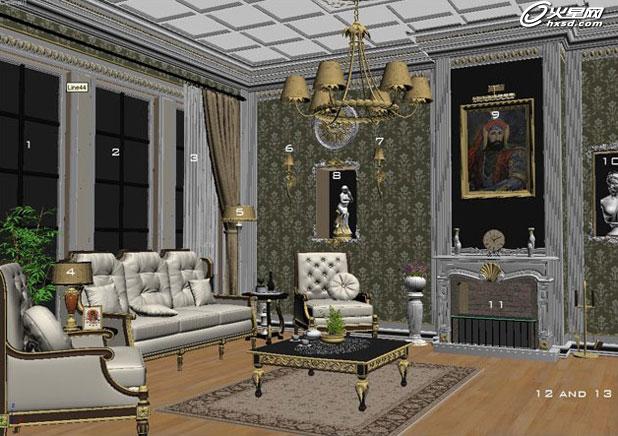
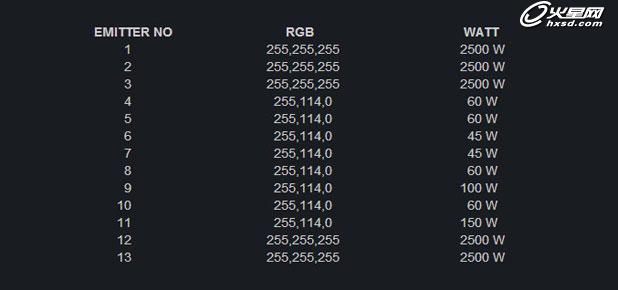
下图中的数值表明了场景中照明位置的设置。我想将场景还原为真实效果,因此根据现实生活中光线的角度为其设置了照明。在这个场景中,我选择把照明资源变成立方体。
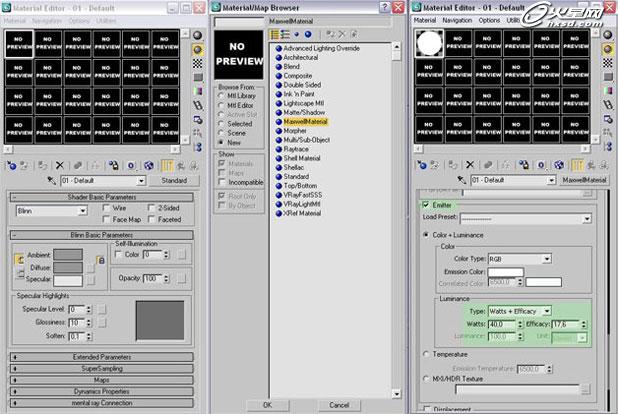
当然,为了做这些发光的物体,需要发射器。我打开了Material Editor来获得这个效果,并将发射器添加到立方体上,如下图。
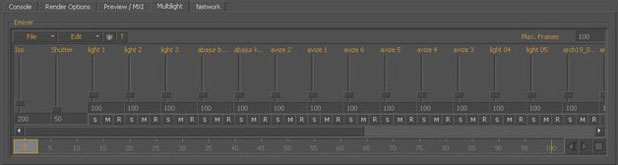
Multilight
在Multilight菜单中我发现了一个控制面板,看起来像一个均衡器。在这里我可以调节灯光的强度。
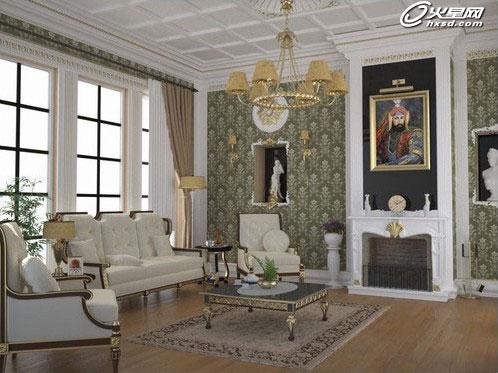
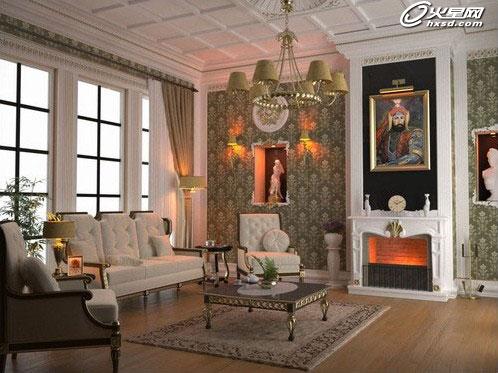
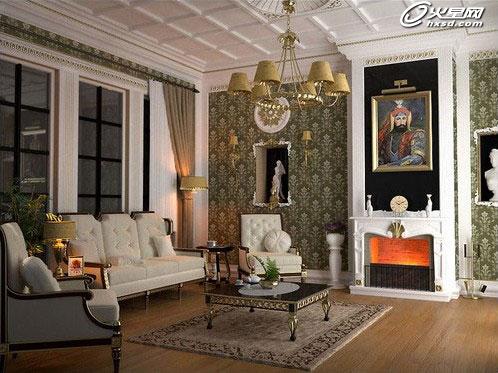
在下面4张图中,你们可以看到,用Multilight获得高效率的效果是可能的。要记住的一点是,如果你想得到有较少污点的白色墙壁的话,你需要将RGB数值设定为242,242,242,而不是255,255,255。

渲染
参数如下图:
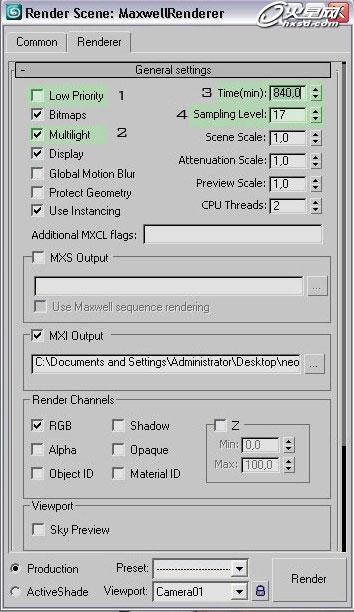
Low Priority—如果你激活这个选项,用作渲染的RAM数值最好较低,这样你就可以很容易运行其他的应用。如果不是,RAM用途会更多,这意味着其他应用运行起来会很慢,但是同时渲染的质量会更好。
Multilight—像上面陈述的那样,这个工具可以让你在渲染后调整照明的强度。
Time(最小值)—你可以进入到时间面板,根据分钟来完成渲染。
Sampling Level—这个参数直接影响到渲染时间。比如用很低的Sampling Level(5),即使你平时的渲染时间是5小时,用这个设定渲染时间至少是5小时以下。Sampling Level设定得越高,渲染质量越高,渲染效果也越好,但是电脑很难掌控这个过程。在很多案例中,Sampling Level都应该设置在15到20之间。
相机设定
相机设定如下:
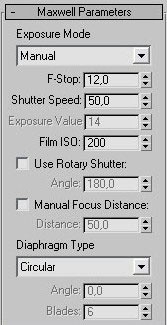
F-Stop—随着F-Stop数值的增高,光圈就会减少,如果光圈变得更窄,景深随之增加。这个设定帮助我们得到一个清晰的效果,但是如果光圈变窄了,场景的亮度也会减弱。
Shutter Speed—这是一个机械系统,决定了光反射持续的时间。时间大多数情况下是根据秒钟决定的,比如1/1,1/2,1/4,1/8,1/15,1/30,1/60,1/125,1/250,1/500 和1/1000,时间越高,意味着会更多照明。
ISO—这是一个标准的测量系统,可以测量光的灵敏度。更高的ISO意味着场景的亮度更高,也会有更高的噪音率。
局部及最终效果图如下: