

上个周六,我在Dribble上找灵感时看到了一个葡萄牙的设计师的一些漂亮的金属效果图标,所以我决定在photoshop中实现他
因此在本教程中,我将叫你如何用图层样式制作漂亮的金属按钮
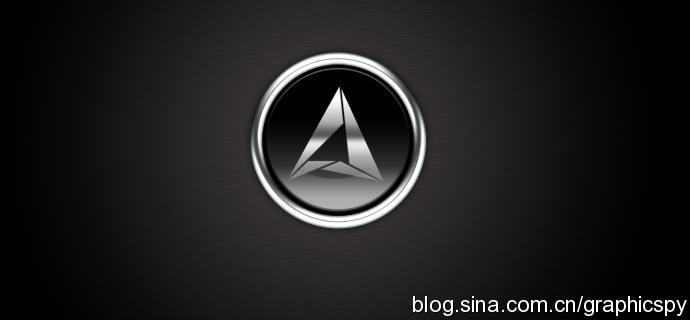
效果图:
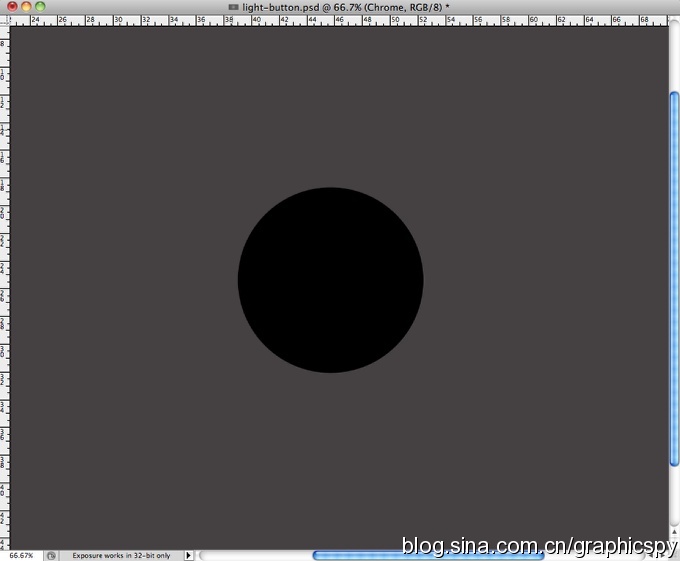
第1步
打开photoshop创建新的文档,我选择2560x1440px,因为这是个不错的高清壁纸大小,使用椭圆工具,创建一个黑色的圆
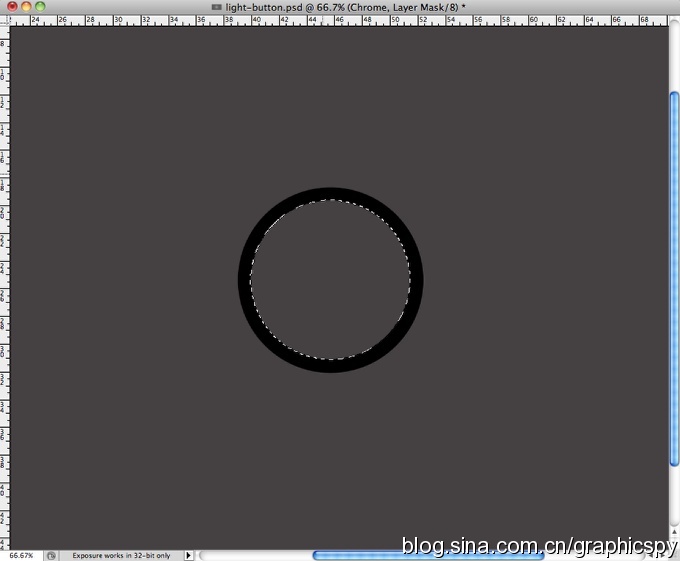
第2步
在创建一个小一点的圆,放在中间,并得到他的选区

第3步
选择大圆的图层,点击图层>图层蒙版>隐藏选区,你将得到一个不错的戒指
第4步
进入图层样式,选择颜色叠加,颜色选择暗灰色

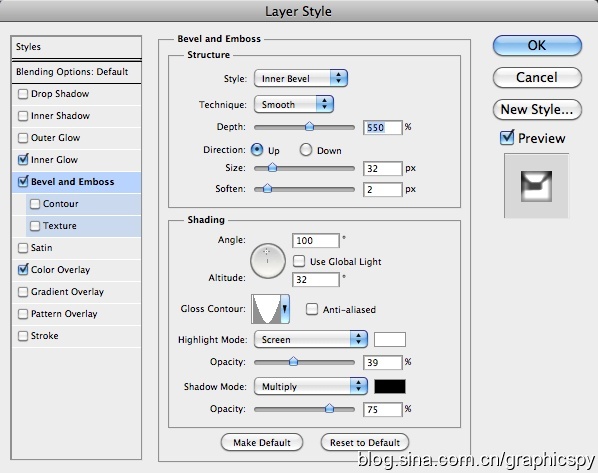
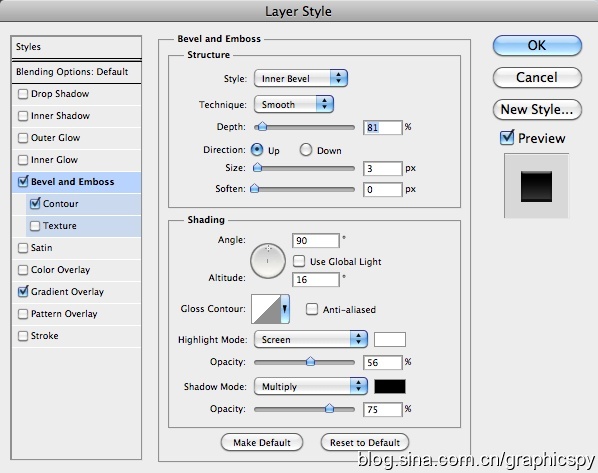
第5步
选择斜面和浮雕,样式为内斜面,方法为平滑,深度为550%,角度:向上,其他设置如下,注意等高线的变化
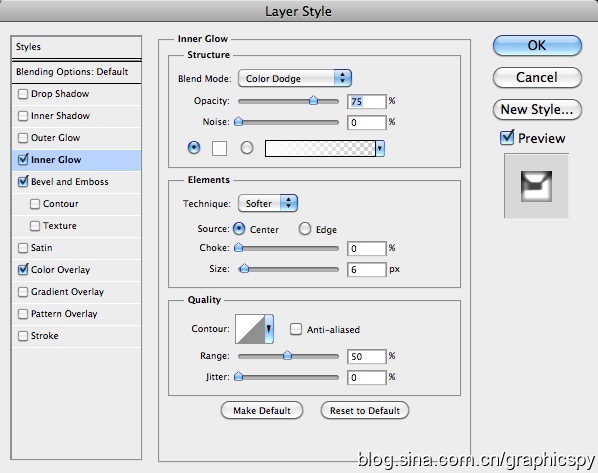
第6步
选择内发光,使用颜色减淡的混合模式,不透明度75%,颜色为白色,其他设置如下
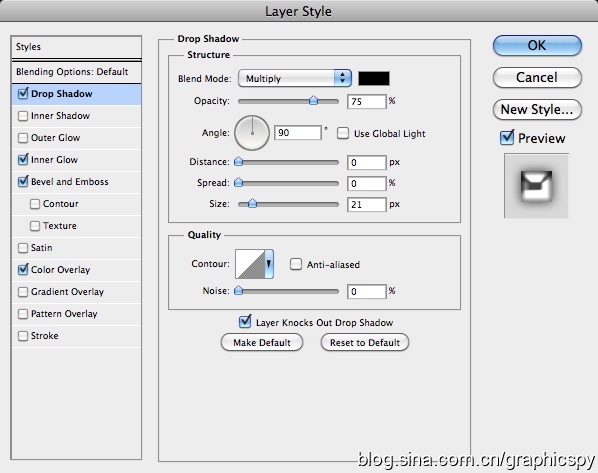
第7步
选择阴影,正片叠底混合模式,颜色为黑色,其他设置如下,不要是用全局光,角度为90度
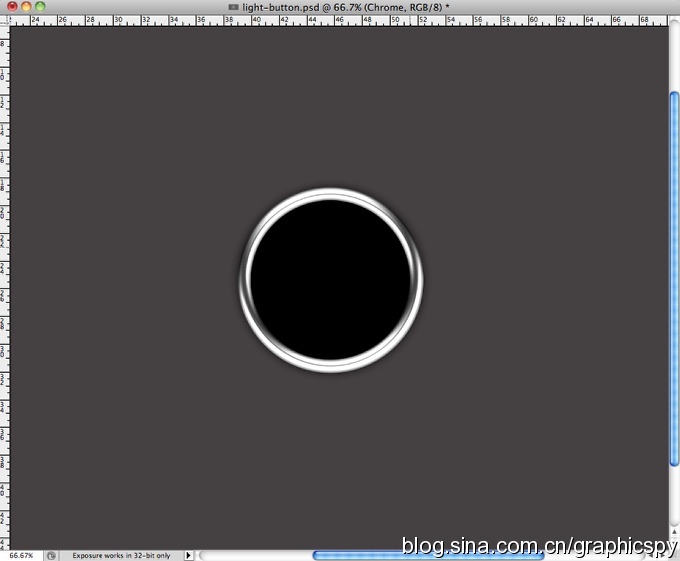
第8步
创建一个黑色的圆圈在铁环的中间,然后添加一个稍微小一点的,用来制作按钮的中间部位
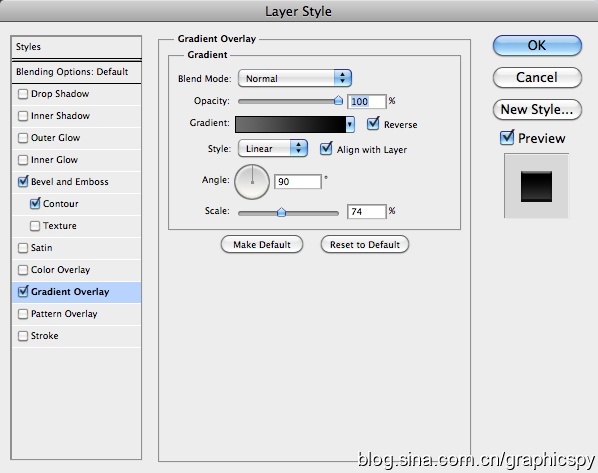
第9步
选择中间的小圈子,进入图层样式,选择渐变叠加,模式正常,样式为线性,颜色由黑色到灰色,其他设置如下所示
第10步
选择斜面与浮雕,样式为内斜面,深度为80%,其他设置如下
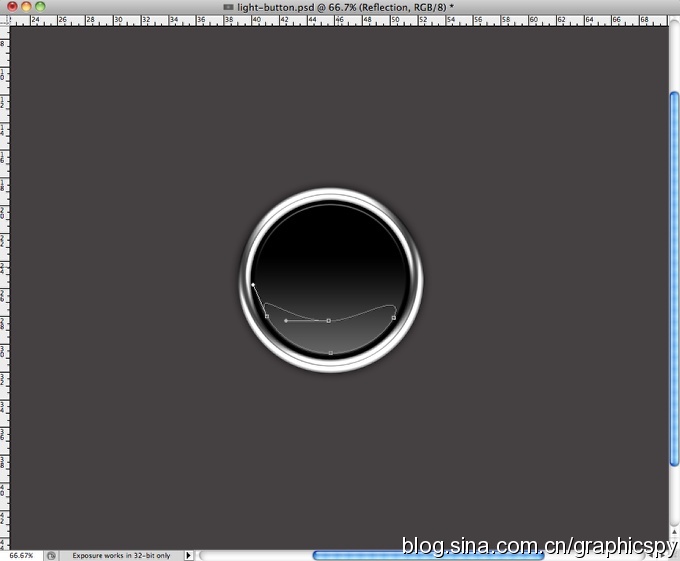
第11步
新建一个图层,使用钢笔工具,做出下图一样的选区
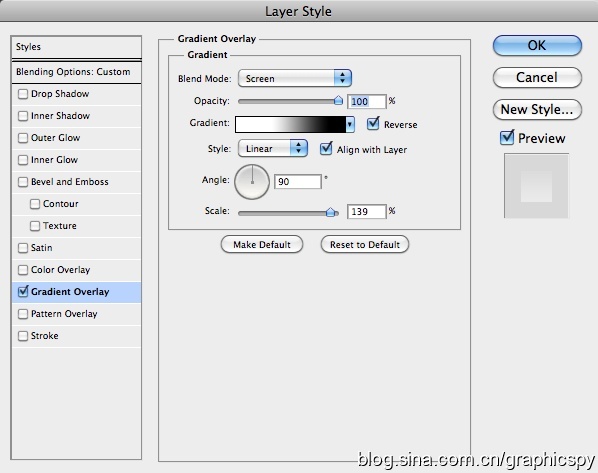
第12步
打开图层样式,选择渐变叠加,混合模式为滤色,白色像黑色,样式为线性,其他设置如下
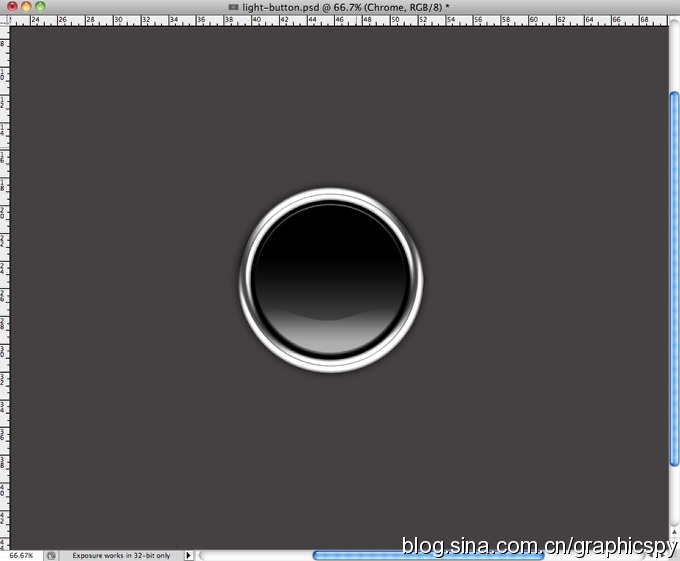
第13步
这就是最后的结果,现在加入你的logo
第14步
选择你的logo,打开图层样式,选择渐变叠加,混合模式为正常,样式为线性,渐变颜色设置如下,然后选择斜面与浮雕,内斜面,平滑,
其他设置如下
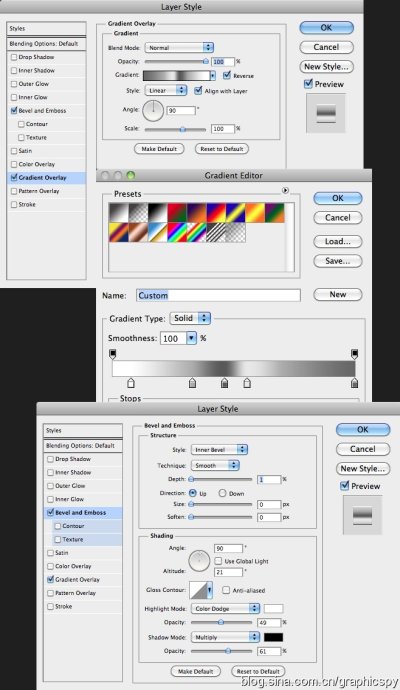
第15步
现在这就是logo最后的效果
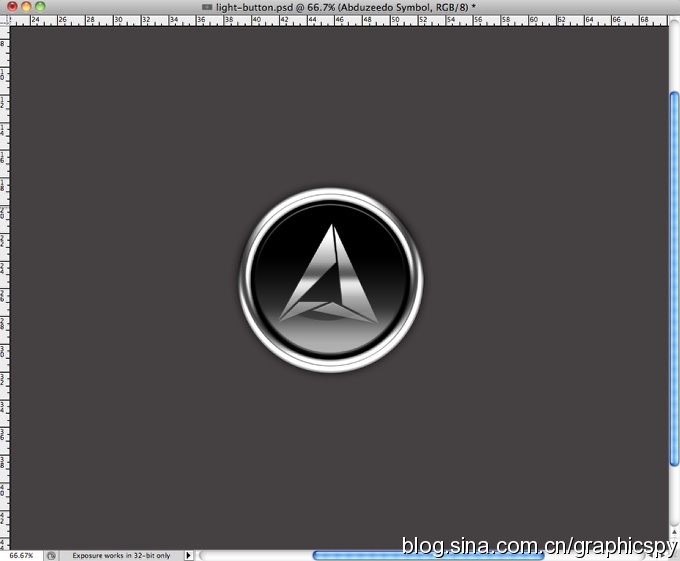
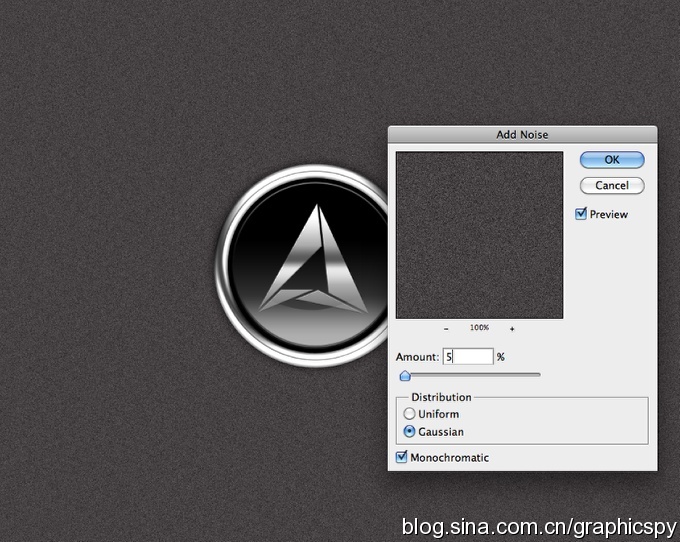
第16步
现在来制作一个不错的背景,选择背景图层,打开滤镜,添加杂色,勾选高斯分布,其他设置如下
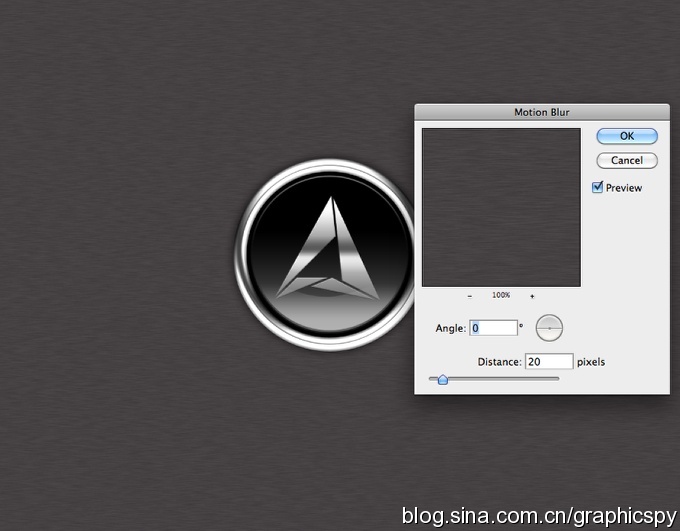
第17步
选择滤镜>模糊>动感模糊,角度为0 ,距离为20像素
第18步
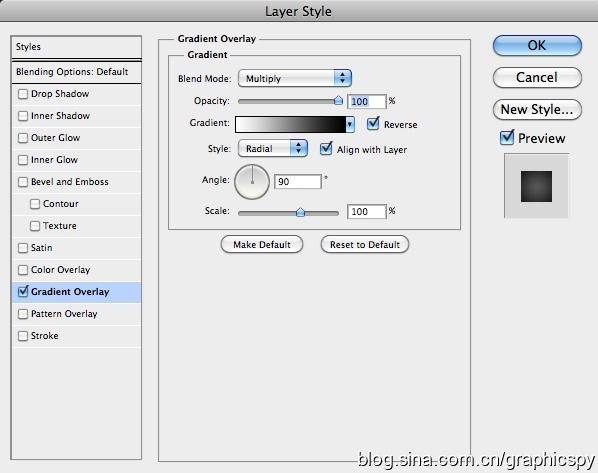
打开图层样式,选择渐变叠加,正片叠底的混合模式,样式为径向,角度为90度,其他设置如下
结论
正如你所看到的,整个过程超级简单,我们只用了图层样式,就制作出了惊人的金属效果,这种效果是惊人的,如果你想制作一家汽车公司的logo,
实践并且尝试不同的变化吧