

Photoshop设计夜蓝转圈进度条教程
发布时间:2015-05-12 来源:查字典编辑
摘要:最终效果图教程图01、选择“文件/新建”菜单,打开“新建”,宽度:为685像素,高度:为44...
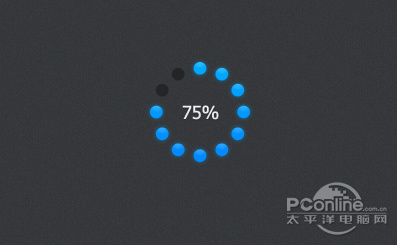
最终效果图
教程图0
1、选择“文件/新建”菜单,打开“新建”,宽度:为685像素,高度:为443像素,“分辨率”为72 , “模式”为RGB颜色的文档,如图1所示。
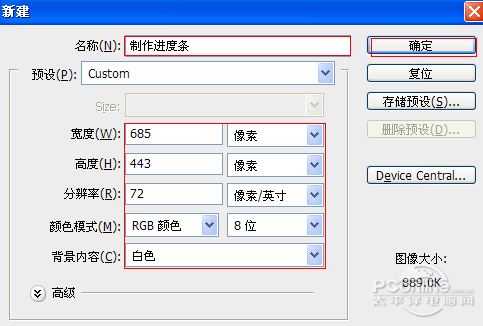
图1
2、创建新图层按钮,新建一个图层,接着在工作区填充,设置前景为灰色,设置RGB值分别为:55/56/58,接着按键盘快捷键Alt+Delete填充,并按键盘Ctrl+D取消,如图2所示。

图2
3、执行菜单:“滤镜”/“渲染”/“杂色”/“添加杂色”,设置数量1%,分布勾选平均分布,勾选单色,如图3所示。效果如图4。
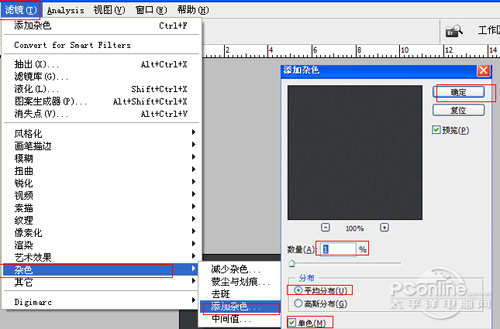
图3
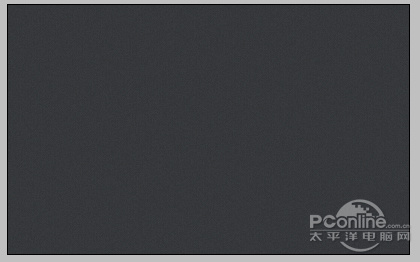
图4