

photoshop抽出滤镜抠图方法
发布时间:2015-05-12 来源:查字典编辑
摘要:使用Photoshop的抽出滤镜来抠出MM细小的发丝,抽出滤镜是PS中一款比较好用的抠图功能,但是不知何故PhotoshopCS4版本取消了...
使用Photoshop的抽出滤镜来抠出MM细小的发丝,抽出滤镜是PS中一款比较好用的抠图功能,但是不知何故Photoshop CS4版本取消了这个功能,作者为怀恋抽出滤镜特制作了本教程,希望能给朋友们带来帮助~~
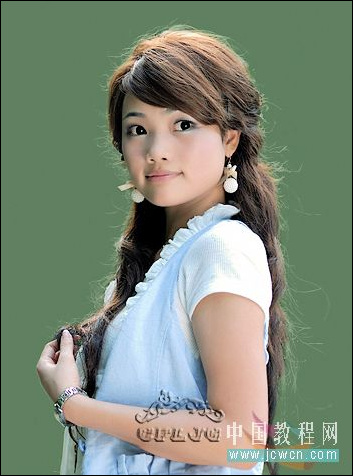
先看看原图和效果图:

原图
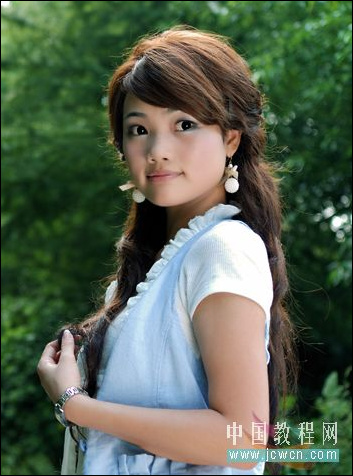
原图
效果图:
效果图教程步骤:
1、打开图片,Ctrl+J 3次,分别得到图层1、图层1副本和图层1副本2,点击红圈处新建图层2,放于图层1和背景层之间。
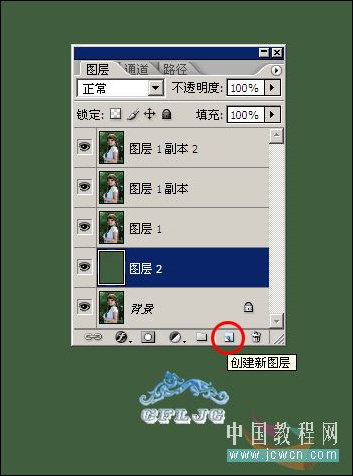
图1
2、在图层1执行滤镜--抽出,在强制前景处打勾,颜色设定为白色,用边缘高光器工具按图示涂抹绿色,需要注意的是细心与否是成败的关键,在边缘的发丝处用小一点的笔触(这里选择了5)一根一根的涂抹(若看不清可用放大镜工具把图放大),中间的部分可用大一些的笔触涂抹,以节省时间。
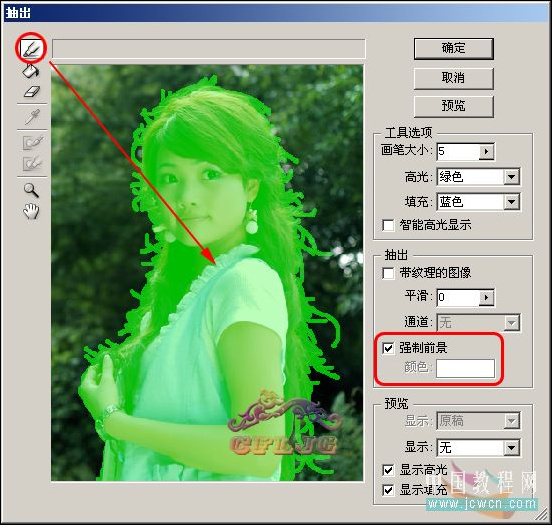
图2