PS抠发丝只需1分钟
发布时间:2015-05-12 来源:查字典编辑
摘要:图1:要把头发从纯色背景分离出来图2:从菜单栏选择“滤镜/抽出”图3:点击“边缘高光器工具”...
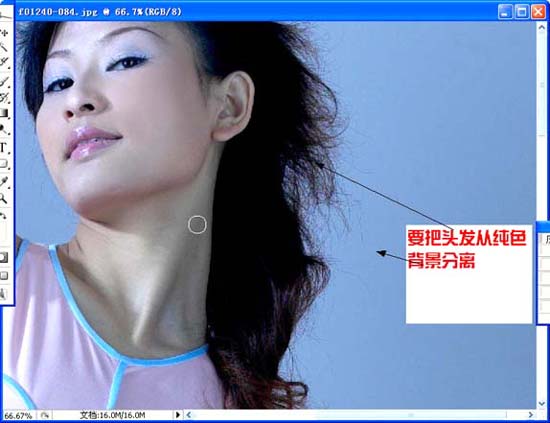
图1:要把头发从纯色背景分离出来
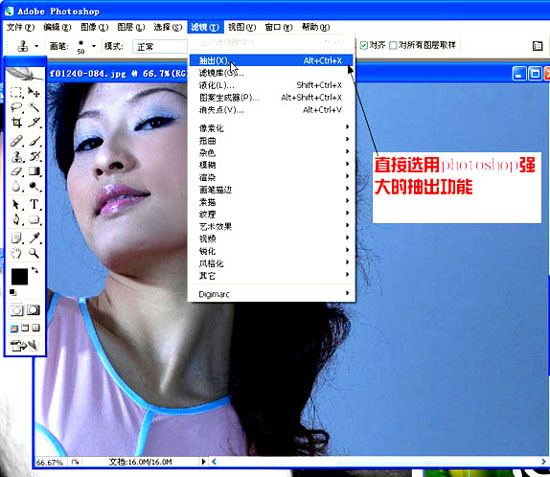
图2:从菜单栏选择“滤镜/抽出”
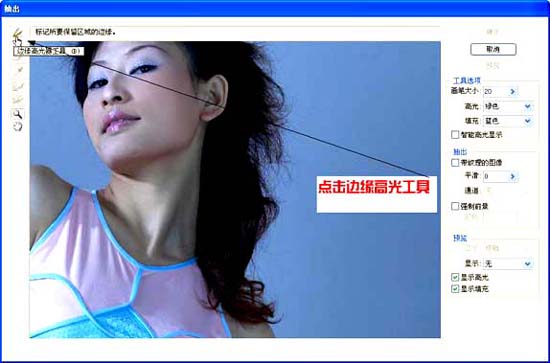
图3:点击“边缘高光器工具”(界面左侧第一个图标,像个笔头)
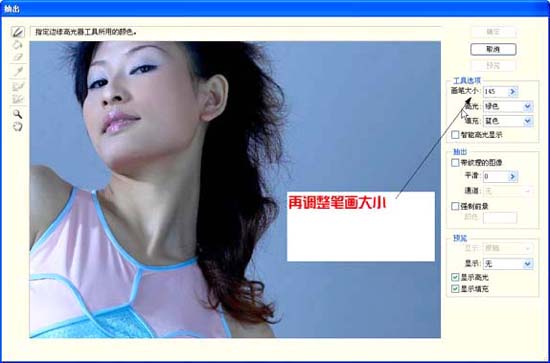
图4:调整画笔大小(点击 > 符号,之后进行调节)
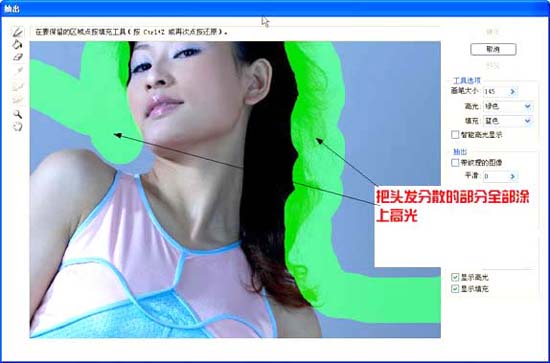


图1:要把头发从纯色背景分离出来
图2:从菜单栏选择“滤镜/抽出”
图3:点击“边缘高光器工具”(界面左侧第一个图标,像个笔头)
图4:调整画笔大小(点击 > 符号,之后进行调节)