

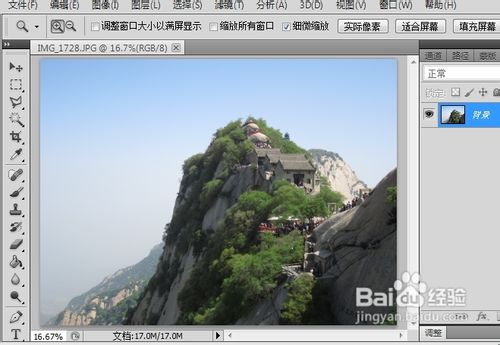
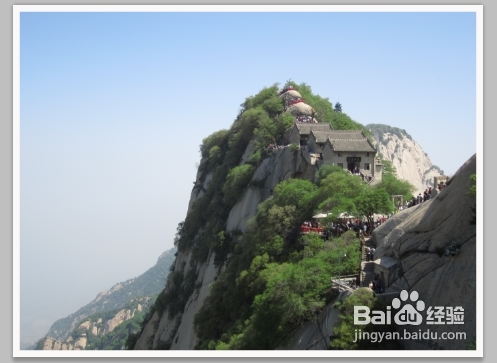
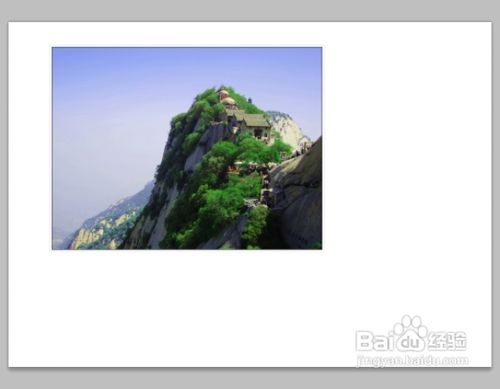
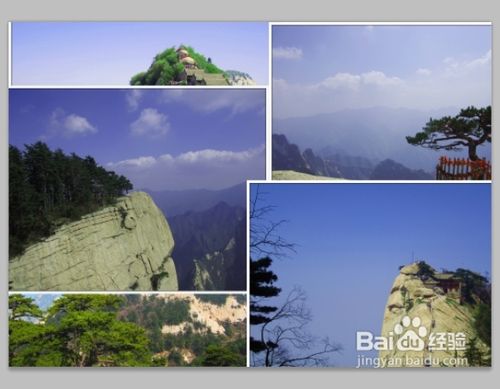
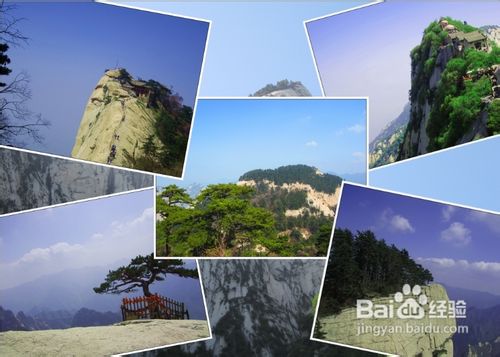
单张照片无法表现出的效果可以通过多张图片同时表现,这里我就教大家怎样用photoshop制作多张图片叠加的效果,下面这张是利用我拍摄的华山风景合成叠加后的效果图。

工具/原料
photoshop
步骤/方法
1
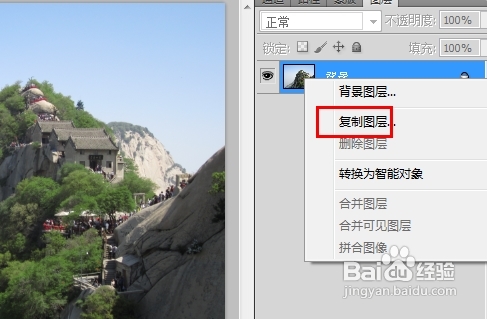
用photoshop打开第一张图片,右键单击背景图层,选择【复制图层】,复制新图层
2
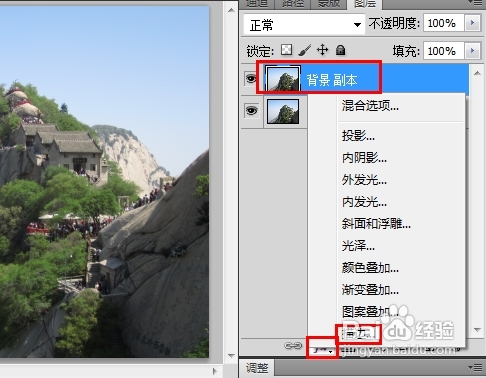
选择【背景 副本】图层,在图层面板下方选择【添加图层样式】-然后选择【描边样式】
3
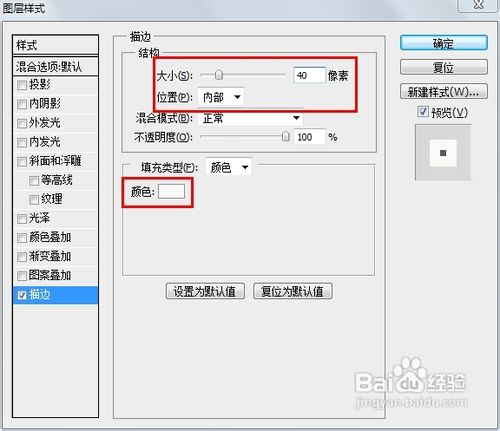
在打开的图层样式窗口中,选择【描边】,根据自己图片大小设定描边大小,然后选择位置为【内部】,填充颜色为白色,为照片添加白色边框;为其他所有素材照片按照同样步骤添加边框。
4
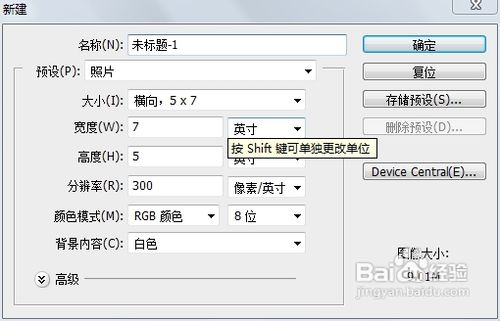
在photoshop中使用【文件】-【新建】命令新建照片模式下横向,5*7大小的画布
5
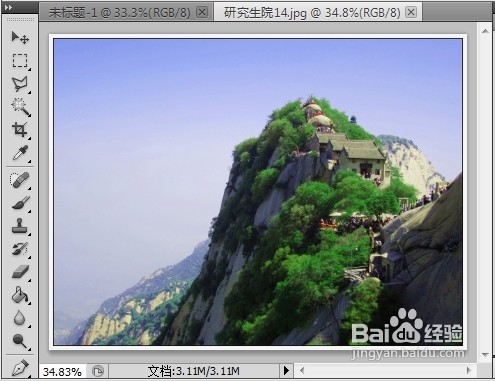
在photoshop中使用【文件】-【打开】命令,打开所有的素材图片

6
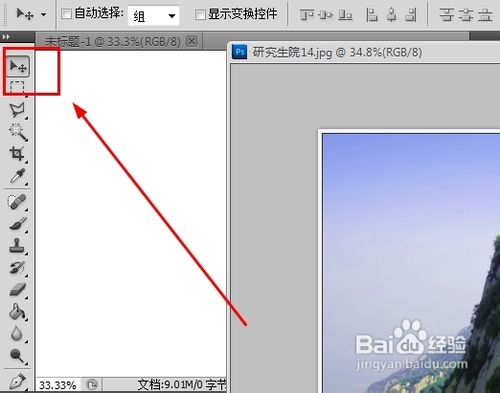
使用工具栏的【移动工具】,移动素材图片到新建的画布中,点住素材图片,拖拽到画布就完成了
7
使用同样步骤,把所有的素材图片拖拽添加的画布中
8
按照以上方法,继续为画布添加一张大的背景图层

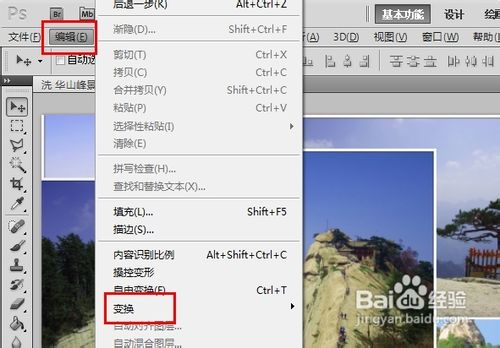
9
使用【编辑】-【变换】-【缩放】命令,调整各个素材照片的大小到合适画布为止(自己根据布局把握)
10
在变换完一张素材后,选择其他素材使用【编辑】-【变换】-【再次】命令,可以快速按照上一张图片缩放比例快速完成图片缩放

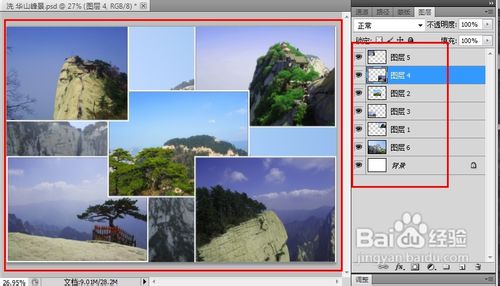
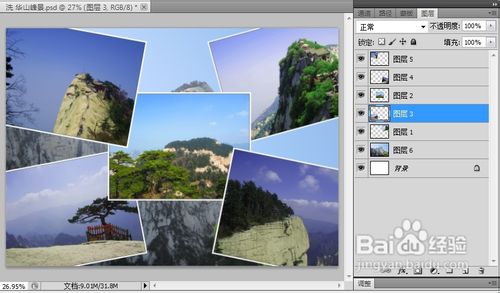
11
调整图层,完成初始布局的图片叠盖关系,背景图层仅在画布上层,然后依次是各个素材图片
12
选择各个素材图片,使用【编辑】-【自由变换】命令,按照自己的喜好和布局设想调整图片旋转角度
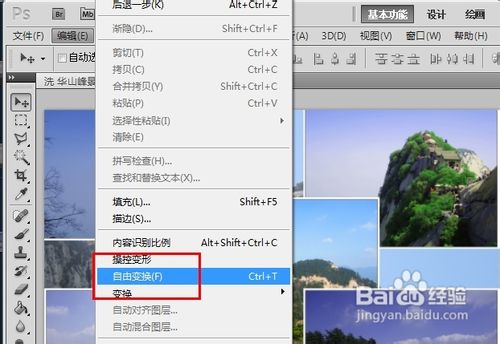
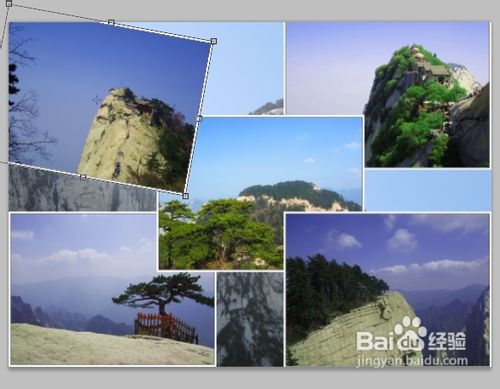
13
依次完成除背景图层外所有图层的自由变换,尽力对称或者有一定的规律。
14
大功告成,一张华山风景照就叠加合成完毕,是不是更加的有气魄了?
注意事项
为素材图片添加边框可以利用一些傻瓜照片处理软件,可以批量完成边框添加
合成前需要先设想好布局,然后根据布局添加一定数量的图片,然后调节图片大小
素材图片大小不一定一直,可以有大有小,根据布局而定
注:更多精彩教程请关注三联photoshop教程栏目,三联PS群:182958314欢迎你的加入