

photoshop绘制飞舞的蝴蝶教程
发布时间:2015-05-12 来源:查字典编辑
摘要:最终效果图1.新建一个800*600的透明文件,用钢笔工具画出蝴蝶翅膀的路径。用钢笔工具画出蝴蝶翅膀的路径2.单击路径面板上的路径转为选区按...
最终效果图

1.新建一个800*600的透明文件,用钢笔工具画出蝴蝶翅膀的路径。
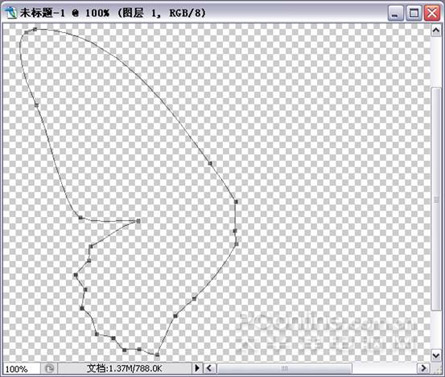
用钢笔工具画出蝴蝶翅膀的路径
2.单击路径面板上的路径转为选区按钮,将路径转换为选区,填充上比纯黑浅些的颜色。

将路径转换为选区
3.按CTRL+J复制一个翅膀,按编辑—变换—水平翻转,移动到合适的位置。
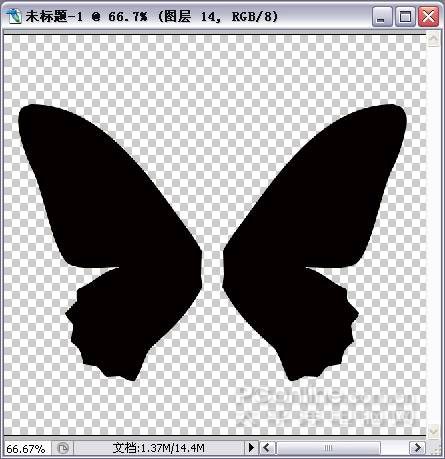
复制一个翅膀