

Photoshop制作金属嵌钻图案效果的字效
发布时间:2015-05-12 来源:查字典编辑
摘要:介绍如何使用Photoshop制作釉光嵌钻文字特效,制作起来不是很难,通过简单的图层样式调整即可,如果你感兴趣可以和我一起制作。最终效果图p...
介绍如何使用Photoshop制作釉光嵌钻文字特效,制作起来不是很难,通过简单的图层样式调整即可,如果你感兴趣可以和我一起制作。
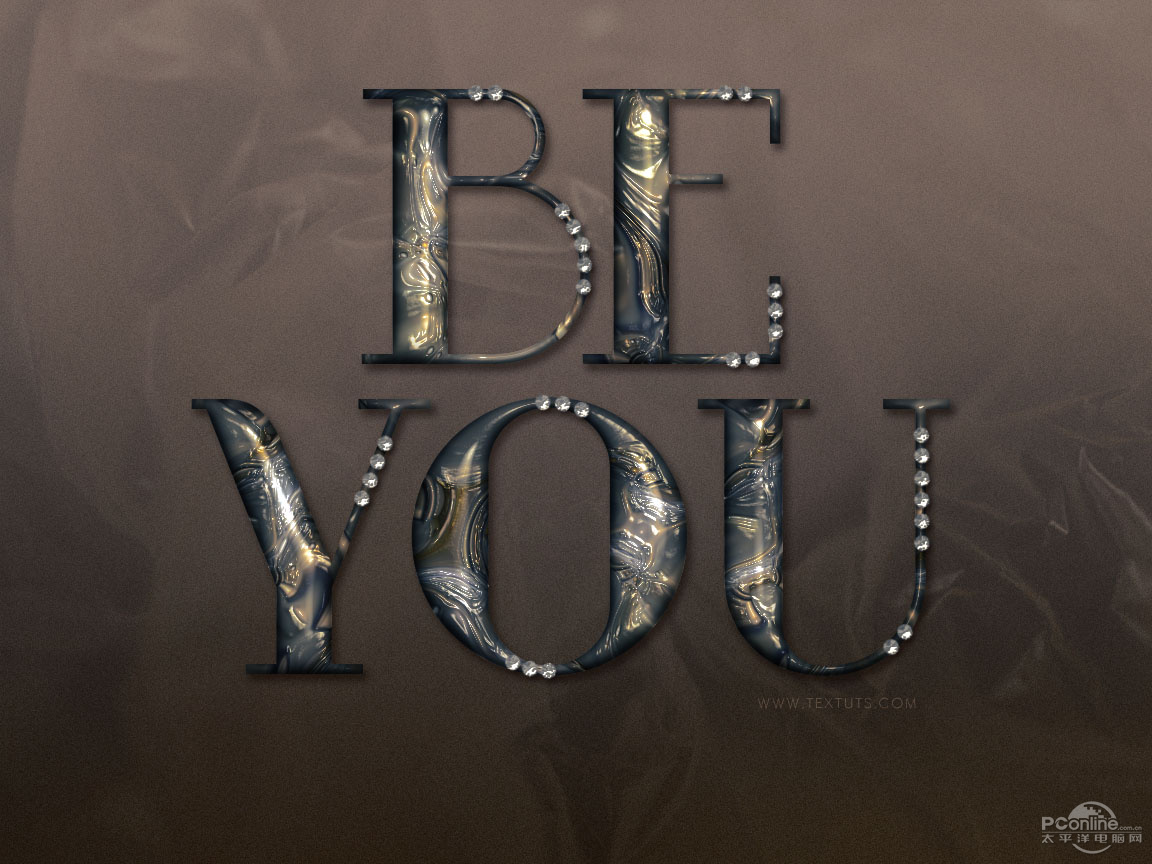
最终效果图
photoshop教程图0
1.创建一个1152*864像素的文档,如下图所示设置前景与背景色,选择“渐变工具”,点击“线性渐变”按钮,从上到下拉出渐变。
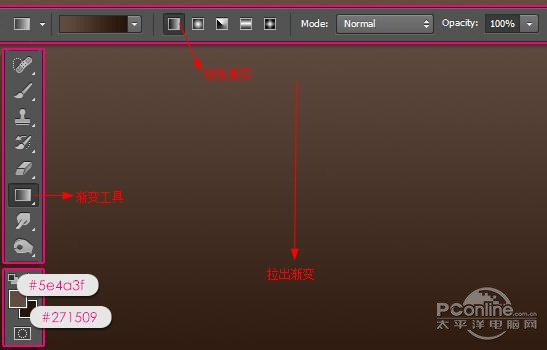
图1
完成后我们在选择菜单中的“滤镜>杂色>添加杂色”,在弹出的对话框中设置数量为1,选择“高斯分布”
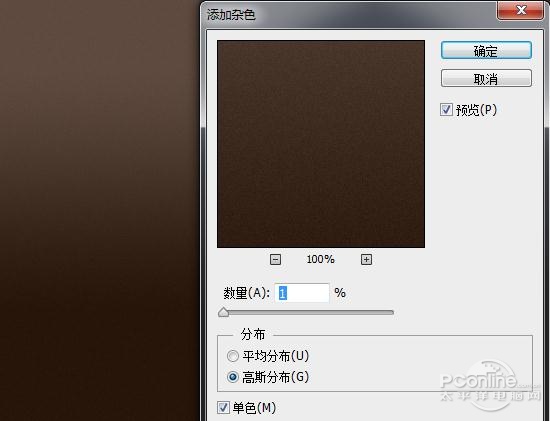
图2
2.在画布上输入文本“BEYOU”,并如下设置文本参数

图3
然后复制文本层,得到文本副本,将文本副本的填充设置为0%,在复制文本副本得到文本副本2
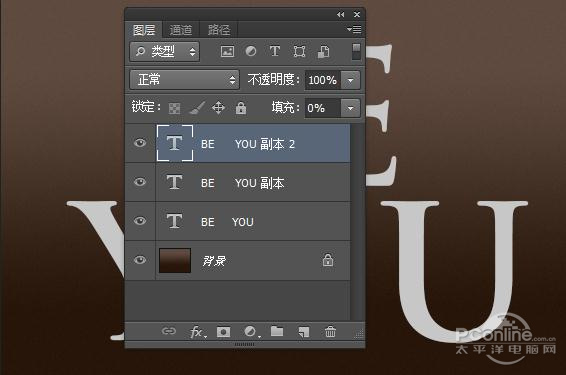
图4
3.双击文本层,调出“图层样式”设置如下选项
斜面与浮雕
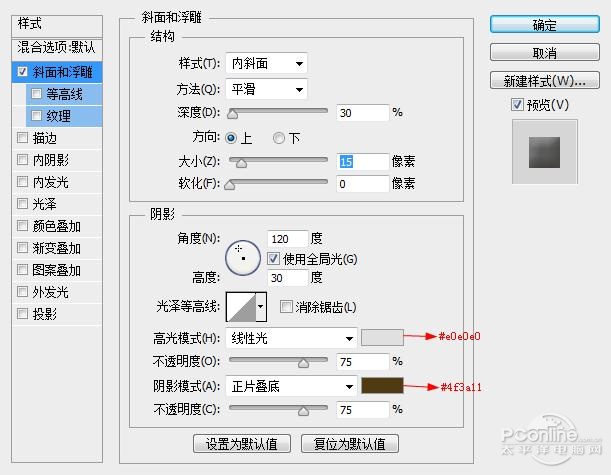
图5
内阴影
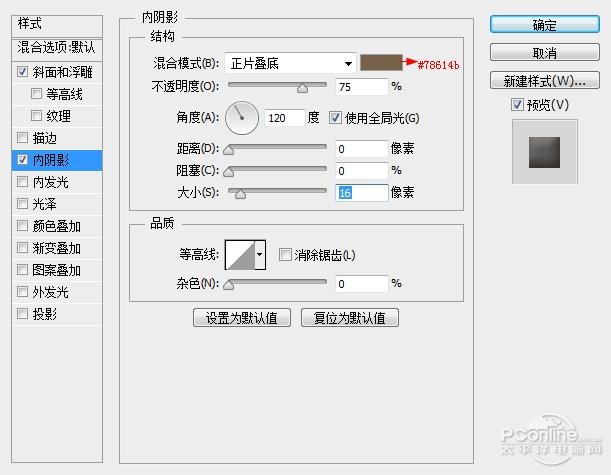
图6
图案叠加:这里要载入“大理石”纹理图案,如果你需要这个纹理可以问题群中索取“72128648”.注:图案载入,点击图案略缩图旁边的下拉菜单,在弹出的图案预览对话框旁选择“设置下拉按钮”,在菜单中选择“载入图案”,载入我提供的纹理,选择后如我下图设置即可。
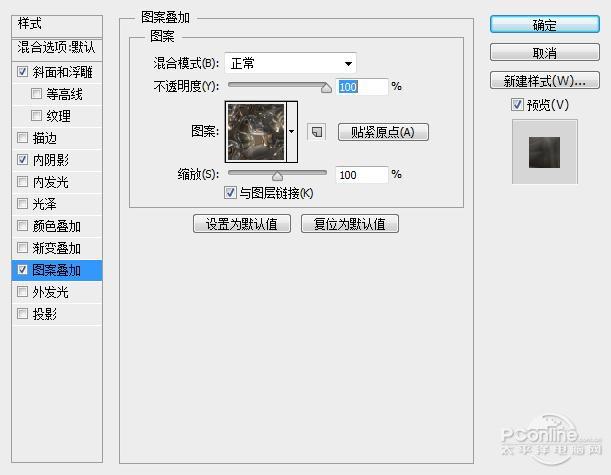
图7