

利用PS通道替换给外景照片加上蓝色调技巧
发布时间:2015-05-12 来源:查字典编辑
摘要:单色图片用通道替换来调都很快,替换后得到颜色较少的图片。后期用调色工具可以快速转为自己想要的单色,再微调一下高光及人物颜色即可。原图教程最终...
单色图片用通道替换来调都很快,替换后得到颜色较少的图片。后期用调色工具可以快速转为自己想要的单色,再微调一下高光及人物颜色即可。
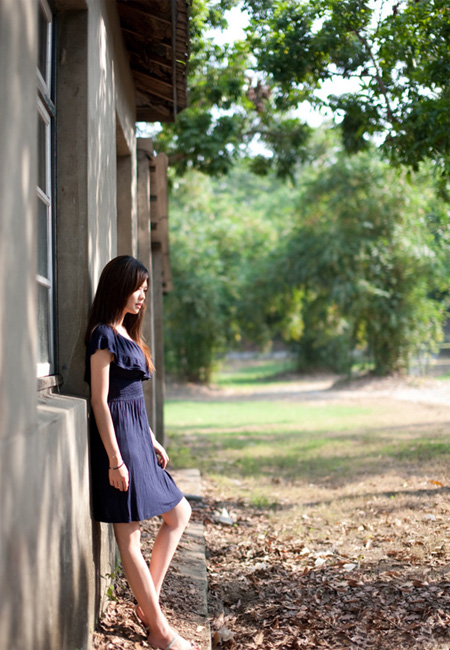
原图
<点小图查看大图>
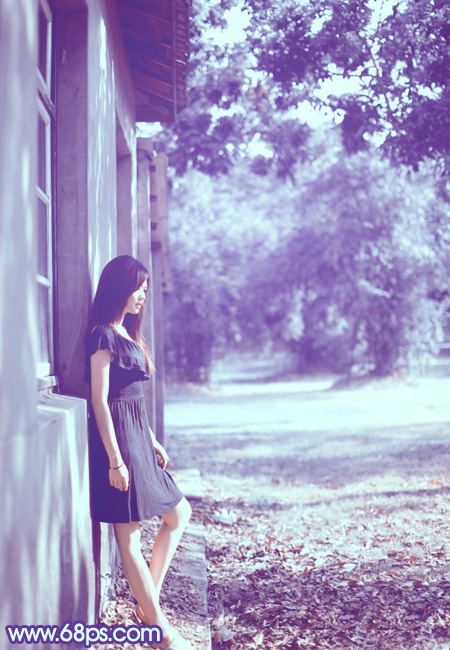
教程最终效果
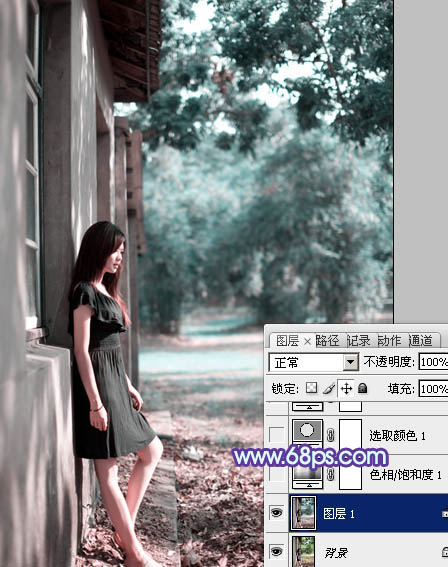
1、打开素材图片,按Ctrl + J 把背景图层复制一层。进入通道面板,选择绿色通道,按Ctrl + A 全选,按Ctrl + C 复制,选择蓝色通道,按Ctrl + V 粘贴,点RGB通道返回图层面板,效果如下图。
<图1>
2、创建色相/饱和度调整图层,对红,青进行调整,参数设置如图2,3,确定后把图层不透明度改为:80%,效果如图4。这一步适当降低红色及青色饱和度,得到类似中性色图片。
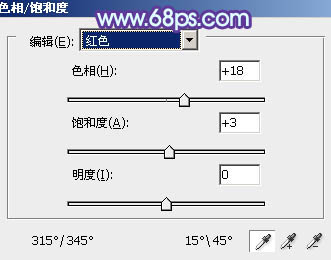
<图2>
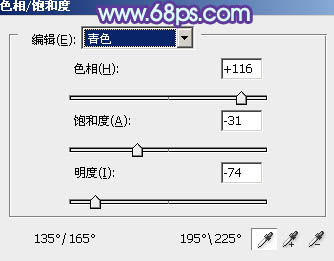
<图3>