

Photoshop照片转成彩色潮流插画
发布时间:2015-05-12 来源:查字典编辑
摘要:老规矩,先看效果图:人物素材:Photoshop将照片转成彩色潮流插画过程教程开始:1.打开人物素材,复制一层。图象–调整&nd...
老规矩,先看效果图:

人物素材:

Photoshop将照片转成彩色潮流插画过程 教程开始:
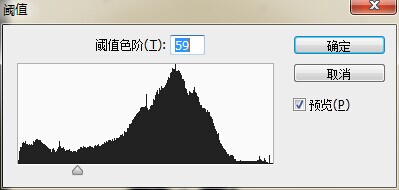
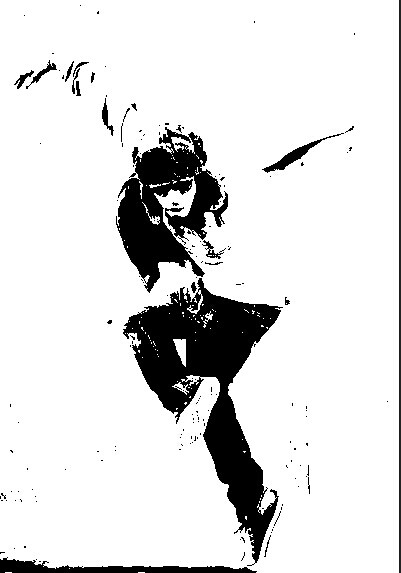
1.打开人物素材,复制一层。图象–调整–阈值
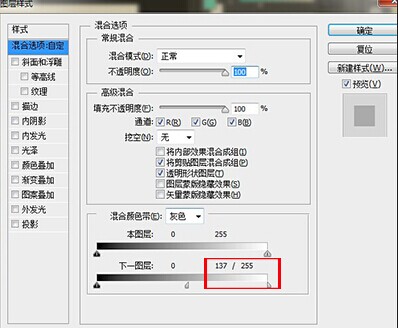
2.双击人物图层,设置图层样式,按住alt键点击下个图层右边的三角形,往左边拉到157


3.新建图层,用柔软的画笔随意的添加颜色

4.双击色彩图层,设置图层样式,同样拉三角形

5.用白色的柔软画笔在人物副本图层上将黑色地方擦拭掉,完工。
注:更多精彩教程请关注三联photoshop教程栏目,三联PS群:182958314欢迎你的加入