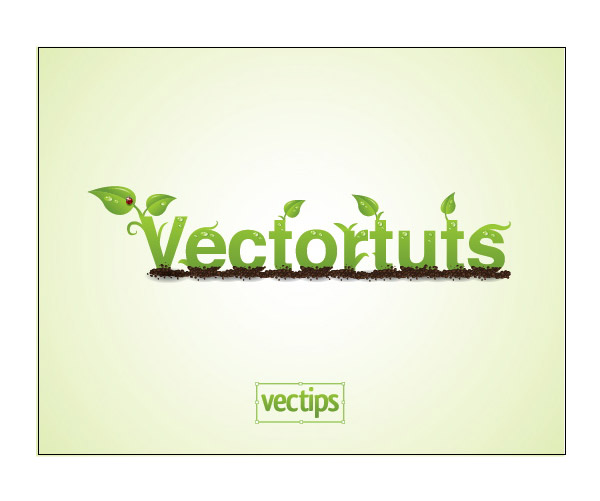
First, let's take a look at the image we'll be creating.
首先,让我们考虑一下的形象,我们将创造。
Below is the completed illustration to see what you'll be working toward.
下面是完成的例子,看看有什么您的工作走向。

Step 1
第1步
Create a document that is 8.5 inches by 11 inches.
创建一个文档是8.5英寸11英寸。
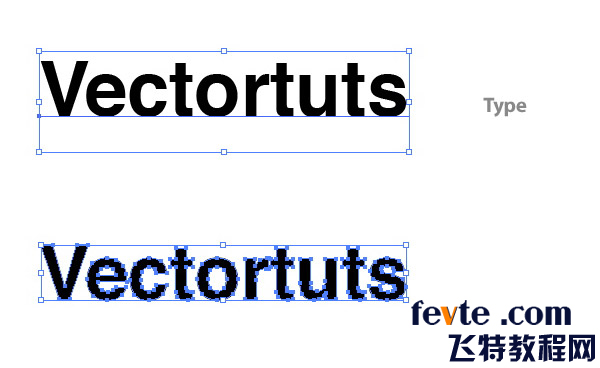
Choose a typeface for the type treatment (I used Helvetica Bold) and type out what you want.
选择字体为类型治疗(我用helvetica大胆)和类型是什么您想要。
Next, Outline the text by going to Type > Create Outlines.
其次,纲要文本,前往类型> "创建概述。

Step 2
第2步
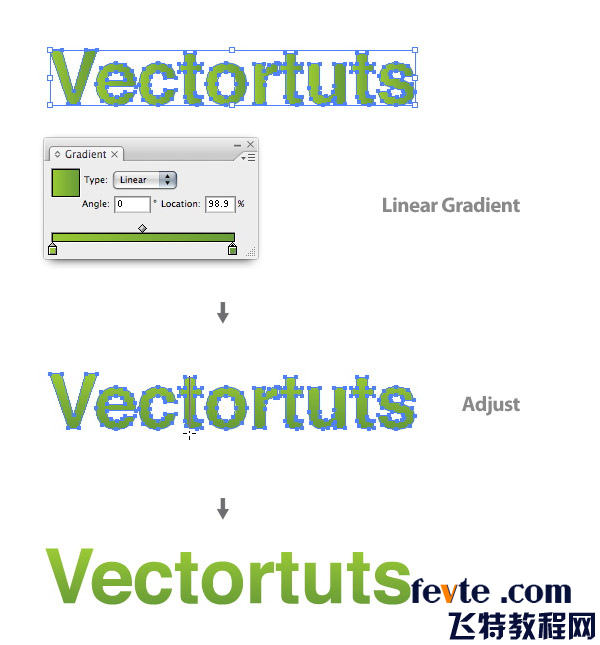
With the text selected, create a Linear Gradient from the Gradient Panel.
与选定的文本,创建一个线性梯度从梯度小组。
Change the color of the first swatch on the Gradient Slider (left swatch) to a light green (I used these CMYK values: C=40, M=0, Y=100, and K=0).
改变颜色的第一Swatch的关于梯度滑块(左Swatch的)一个浅绿色(我用这些的CMYK值中: C = 40 ,男= 0 ,为Y = 100 ,和K = 0 ) 。
Change the second swatch on the Gradient Slider to a darker green (C=60 M=16 Y=100 K=0).
变更第二个Swatch的关于梯度滑块到一个较深的绿色(三= 60米= 16为Y = 100当K = 0 ) 。
Use the Gradient Tool (G) to adjust the gradient by clicking at the top of the type and dragging to the bottom of the type so the dark part is at the bottom.
使用梯度工具(七)调整梯度按一下在顶部的类型和拖延,以底部的类型,以便黑暗中的一部分,是在底部。

Step 3
第3步
Now we're going to create some leaves.
现在我们要创造一些叶片。
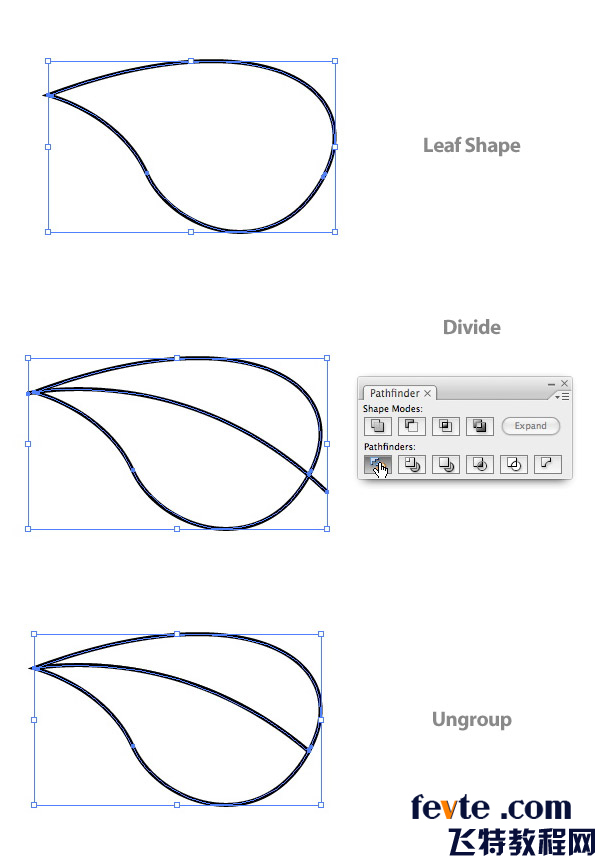
Start by drawing a leaf shape with the Pen Tool (P).
开始画叶形与钢笔工具性( P ) 。
Again, with the Pen Tool (P), draw a line that starts at the tip of leaf and ends in the middle of the bottom part of the leaf.
再次,随着钢笔工具( p )项,制定的路线,开始在尖叶和结束在中东的底部的一部分,叶。
After selecting the line and the leaf shape, press the Divide button in the Pathfinder Panel, located on the bottom left side of the panel.
后选择路线和叶形,按下按钮鸿沟,在探路小组,设于底部左边的小组。
Ungroup (Command+Shift+G) the objects so you have two separate shapes.
取消群组(指挥+转移+克)的物体,使你有两个不同的形状。

Step 4


