

PhotoSwipe.js官网:http://photoswipe.com/ ,在这个网站上可以下载到PhotoSwipe的文件以及相关的例子。
这个组件主要是用来展示图片、相册用的,还是很实用的。
一、使用这个组件需要引入两个js文件
1 <script type="text/javascript" src="simple-inheritance.min.js">
2 <script type="text/javascript" src="code-photoswipe-1.0.11.min.js"> <>
二、然后页面结构可以是这样子的
<div id="Gallery"> <div> <div><a href="images/full/01.jpg"><img src="images/thumb/01.jpg" alt="Image 01" /></a></div> <div><a href="images/full/02.jpg"><img src="images/thumb/02.jpg" alt="Image 02" /></a></div> <div><a href="images/full/03.jpg"><img src="images/thumb/03.jpg" alt="Image 03" /></a></div> </div> <div> <div><a href="images/full/04.jpg"><img src="images/thumb/04.jpg" alt="Image 04" /></a></div> <div><a href="images/full/05.jpg"><img src="images/thumb/05.jpg" alt="Image 05" /></a></div> <div><a href="images/full/06.jpg"><img src="images/thumb/06.jpg" alt="Image 06" /></a></div> </div> </div>
其实在这段html代码中除了页面结构外,真正有用的只有 id="Gallery"和<a href="图片路径"></a>(在后面会有说明),其他的class神马的只是起到美化最初的页面结构的作用(和你真正想要的效果的页面不同,也就是说,你只要按照上述页面的结构进行排版,你想要的页面效果是插件js自身完成的,是不需要你写效果布局的)。
页面需要的js和页面结构都有了,下面就是使用插件了。
三、你可以采用两种方式进行插件的声明
1、是用浏览器默认的方式addEventListener()的方式进行
document.addEventListener("DOMContentLoaded",function(){ Code.photoSwipe('a','#Gallery'); //此处就涉及到上述页面结构中的 id="Gallery"和<a href="..."></a>,其中id="Gallery"是容器 //<a href="图片路径"></a>,此处href中一定是当前所指向的图片的路径 },false);
2、使用Jquery的方式:
$(document).ready(function(){ $("#Gallery a").photoSwipe(); });
四、通过这样的设置你的页面大概会是这样的
一开始的页面效果:

点击任意一张图片后页面的形式变成如下(这个页面其实才是我真正想要的页面):

可以明显的看到页面上方<img />中的alt中的内容,下方会有四个按钮,依次代表:关闭页面回到最初显示的样子(就是上上图)、自动播放、上一页图片、下一页图片。
这样一个相册的效果就出现了。当然在这个页面可以使用鼠标左右滑动进行切换,如果在手持设备上还可以通过手指的左右滑动进行。
这个插件还有很多自己的属性:
allowUserZoom: 允许用户双击放大/移动方式查看图片. 默认值 = true
autoStartSlideshow: 当PhotoSwipe激活后,自动播放幻灯片. 默认值 = false
allowRotationOnUserZoom: 只有 iOS 支持 - 允许用户在缩放/平移模式下 用手势旋转图像. 默认值 = false
backButtonHideEnabled: 按返回键隐藏相册幻灯片. 主要是 Android 和 Blackberry使用. 支持 BB6, Android v2.1, iOS 4 以及更新版本. 默认值 = true
captionAndToolbarAutoHideDelay: 标题栏和工具栏自动隐藏的延迟时间. 默认值为 = 5000(毫秒). 如果设为 0 则不会自动隐藏(tap/单击切换显隐)
captionAndToolbarFlipPosition: 标题栏和工具栏切换位置(让 caption显示在底部而 toolbar显示在顶部). 默认值 = false
captionAndToolbarHide: 隐藏 标题栏和工具栏. 默认值 = false
captionAndToolbarOpacity: 标题栏和工具栏 的透明度(0-1). 默认值 = 0.8
captionAndToolbarShowEmptyCaptions: 即使当前图片的标题是空,也显示标题栏. 默认值 = true
cacheMode: 缓存模式,Code.PhotoSwipe.Cache.Mode.normal (默认,正常) 或者 Code.PhotoSwipe.Cache.Mode.aggressive(激进,积极). 决定 PhotoSwipe 如何管理图片缓存 cache.
Aggressive 模式将会积极地地设置非 "当前,上一张,下一张"的图片为空的类型. 对于老版本iOS 浏览器下的大图片内存溢出将会很有用. 大多数情况下,normal模式就可以了。
doubleTapSpeed: 双击的最大间隔. 默认值 = 300(毫秒)
doubleTapZoomLevel: 当用户双击的时候,放大的倍数, 默认的 "zoom-in"(拉近) 级别. 默认值 = 2.5
enableDrag: 允许拖动上一张/下一张图片到当前界面. 默认值 = true
enableKeyboard: 允许键盘操作(左右箭头切换,Esc退出,Enter自动播放,空格键 显/隐标题栏/退出). 默认 = true
enableMouseWheel: 允许鼠标滚轮操作. 默认 = true
fadeInSpeed: 淡入效果元素的速度(持续时间),毫秒. 默认 = 250
fadeOutSpeed: 淡出效果元素的速度(持续时间),毫秒. 默认 = 250
imageScaleMethod: 图片缩放方法(模式). 可选值: "fit", "fitNoUpscale" 和 "zoom". 模式"fit" 保证图像适应屏幕. "fitNoUpscale" 和 "fit"类似但是不会放大图片. "zoom"将图片全屏, 但有可能图片缩放不是等比例的. 默认 = "fit"
invertMouseWheel: 反转鼠标滚轮。默认情况下,鼠标向下滚动将切换到下一张,向上切换到上一张 . 默认 = false
jQueryMobile: 指示 PhotoSwipe 是否集成进了 jQuery Mobile 项目. 默认情况下, PhotoSwipe will try and work this out for you
jQueryMobileDialogHash: jQuery Mobile的window,dialog页面 所使用的hash标签。 默认值 = "&ui-state=dialog"
loop: 相册是否自动循环. 默认 = true
margin: 两张图之间的间隔,单位是像素. 默认 = 20
maxUserZoom: 最大放大倍数. 默认 = 5.0 (设置为0将被忽略)
minUserZoom: 图像最小的缩小倍数. 默认 = 0.5 (设置为0将会忽略)
mouseWheelSpeed: 响应鼠标滚轮的灵敏度. 默认 = 500(毫秒)
nextPreviousSlideSpeed: 当点击上一张,下一张按钮后,延迟多少毫秒执行切换. 默认 = 0 (立即切换)
preventHide: 阻止用户关闭 PhotoSwipe. 同时也会隐藏 工具栏上的"close"关闭按钮. 在独享的页面使用 (示例是源码中的 examples/08-exclusive-mode.html). 默认 = false
preventSlideshow: 阻止自动播放模式. 同时也会隐藏工具栏里的播放按钮. 默认 = false
slideshowDelay: 自动播放模式下,多长时间播放下一张. Default = 3000(毫秒)
slideSpeed: 图片滑进视图的时间. 默认 = 250(毫秒)
swipeThreshold: 手指滑动多少像素才触发一个 swipe 手势事件. 默认 = 50
swipeTimeThreshold: 定义触发swipe(滑动)手势的最大毫秒数,太慢了则不会触发滑动,只会拖动当前照片的位置. 默认 = 250
slideTimingFunction: 滑动时的 Easing function . 默认 = "ease-out"
zIndex: 初始的zIndex值. 默认 = 1000
enableUIWebViewRepositionTimeout: 检查设备的方向是否改变。默认 = false
uiWebViewResetPositionDelay: 定时检查设备的方向是否改变的时间 默认 = 500(毫秒)
preventDefaultTouchEvents: 阻止默认的touch事件,比如页面滚动。 默认 = true
target: 必须是一个合法的DOM元素(如DIV)。默认是window(全页面)。而如果是某个低级别的DOM,则在DOM内显示,可能非全屏。
如果不需要展示第一个页面直接展示第二个页面,可以这样设置:
$(document).ready(function(){ // Set up PhotoSwipe, setting "preventHide: true" var thumbEls = Code.photoSwipe('a', '#Gallery', { preventHide: true }); Code.PhotoSwipe.Current.show(0); });
当然这个插件还有很多其他的监听函数:
document.addEventListener('DOMContentLoaded',function(){ //onBeforeShow 在gallery将要展示之前调用该方法 Code.PhotoSwipe.Current.addEventListener(Code.PhotoSwipe.EventTypes.onBeforeShow,function(e){ console.log("onBeforeShow"); }); // onshow 在gallery展示的时候调用 Code.PhotoSwipe.Current.addEventListener(Code.PhotoSwipe.EventTypes.onShow,function(e){ console.log("onShow"); }); // onBeforeHide 在gallery隐藏之前 Code.PhotoSwipe.Current.addEventListener(Code.PhotoSwipe.EventTypes.onBeforeHide, function(e){ console.log('onBeforeHide'); }); // onHide 在Gallery隐藏的时候 Code.PhotoSwipe.Current.addEventListener(Code.PhotoSwipe.EventTypes.onHide, function(e){ console.log('onHide'); }); // onShowNext 在展示下一个的时候 Code.PhotoSwipe.Current.addEventListener(Code.PhotoSwipe.EventTypes.onShowNext, function(e){ console.log('onShowNext'); }); // onShowPrevious 在展示上一个的时候 Code.PhotoSwipe.Current.addEventListener(Code.PhotoSwipe.EventTypes.onShowPrevious, function(e){ console.log('onShowPrevious'); }); // onDisplayImage 在图片展示 Code.PhotoSwipe.Current.addEventListener(Code.PhotoSwipe.EventTypes.onDisplayImage, function(e){ console.log('onDisplayImage'); }); // onResetPosition 当Gallery的大小和位置发生变化时或者设备的方向或者窗口大小改变时,出发该方法 Code.PhotoSwipe.Current.addEventListener(Code.PhotoSwipe.EventTypes.onResetPosition, function(e){ console.log('onResetPosition'); }); // onSlideshowStart 当gallery开始滑动展示的时候(此方法可能是我理解有误,实验过程中一直没有触发过 的),原文是:When the gallery has started the slideshow Code.PhotoSwipe.Current.addEventListener(Code.PhotoSwipe.EventTypes.onSlideshowStart, function(e){ console.log('onSlideshowStart'); }); // onSlideshowStop 当Gallery活动结束的时候 Code.PhotoSwipe.Current.addEventListener(Code.PhotoSwipe.EventTypes.onSlideshowStop, function(e){ console.log('onSlideshowStop'); }); // onBeforeCaptionAndToolbarShow 在顶部状态栏和底部的工具栏展示之前触发 Code.PhotoSwipe.Current.addEventListener(Code.PhotoSwipe.EventTypes.onBeforeCaptionAndToolbarShow, function(e){ console.log('onBeforeCaptionAndToolbarShow'); }); // onBeforeCaptionAndToolbarHide 在顶部状态栏和底部的工具栏隐藏之前触发 Code.PhotoSwipe.Current.addEventListener(Code.PhotoSwipe.EventTypes.onBeforeCaptionAndToolbarHide, function(e){ console.log('onBeforeCaptionAndToolbarHide'); }); // onViewportClick 在gallery中点击屏幕的时候触发,此时一般会触发onBeforeCaptionAndToolbarShow 或者onBeforeCaptionAndToolbarHide 方法 Code.PhotoSwipe.Current.addEventListener(Code.PhotoSwipe.EventTypes.onViewportClick, function(e){ console.log('onViewportClick'); }); },false);
由于在photoSwipe官网中没有发现api接口的调用方式,且现在的js水平也不咋地,所以它的一些api接口基本上不是很了解,但是我在查看它的例子的时候发现有个变量会经常出现,Code.PhotoSwipe或者Code.PhotoSwipe.Current,所有我就在控制台中进行了一些实验,当我输入Code.PhotoSwipe的时候,出现了如下内容:
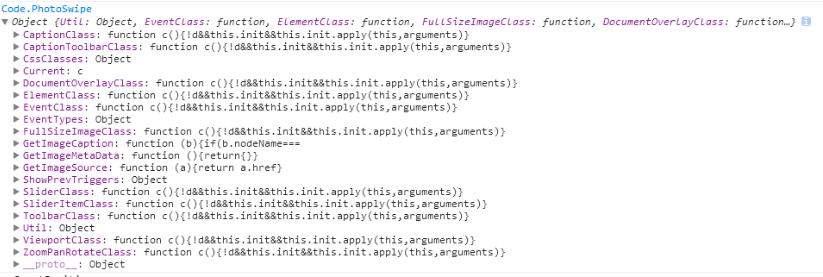
虽然不能完全看懂里面是什么,但是能看到其中有Current这个元素,接着在控制台输入Code.PhotoSwipe.Current,得到下面的内容:
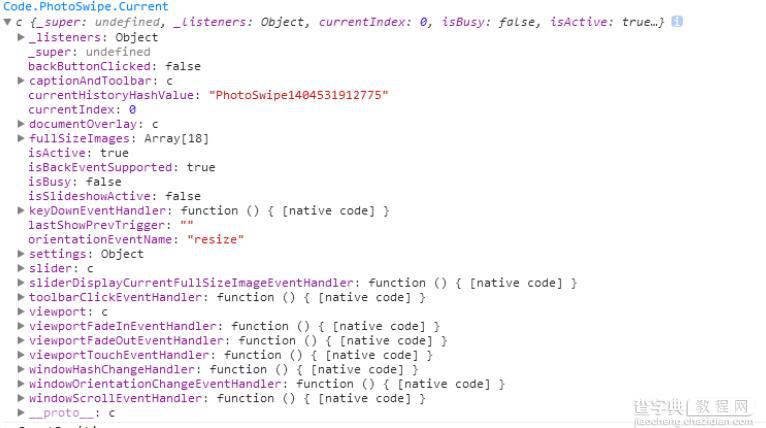
在这里面可以发现更多的信息,比如:currentIndex表明当前所处的图片是在列表中的索引位置,整个连接起来就是 Code.PhotoSwipe.Current.currentIndex 代表当前图片所处的索引位置,这个信息对我来说很重要,我们可以通过这个信息在不同的页面中展示不同的页面信息。
以上就是本文的全部内容,希望对大家的学习有所帮助,也希望大家多多支持查字典教程网。