一,开篇分析
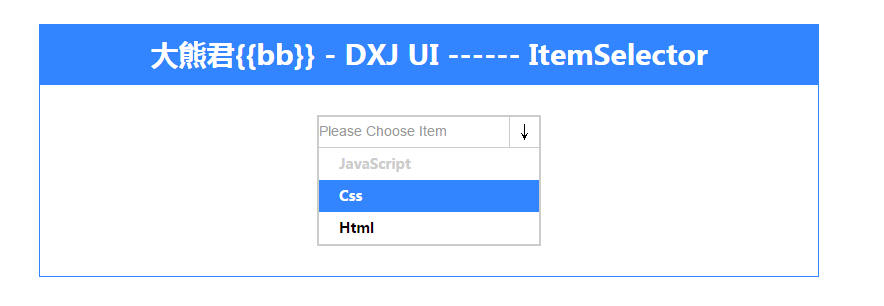
Hi,大家好!前两篇文章我们主要讲述了以“jQuery的方式如何开发插件”,以及过程化设计与面向对象思想设计相结合的方式是如何设计一个插件的,两种方式各有利弊取长补短,嘿嘿嘿,废话少说,进入正题。直接上实际效果图:

大家看到了吧,这是一个下拉菜单插件,在我们日常开发中,系统提供的可能有时让我们觉得不是很美观并且功能有限,造成用户
的体验形式以及用户的可交互性不是很好,所以今天模拟一个嘿嘿嘿。下面就具体分析一下吧。
(二),实例分析
(1),首先确定这个插件做什么事。下面看一下插件的调用方式,以及配置参数说明。如下代码:
复制代码 代码如下:
$(function(){
var itemSelector = new ItemSelector($("#item-selector"),{
currentText : "Please Choose Item" ,
items : [
{
text : "JavaScript" ,
value : "js" ,
disabled : "1"
} ,
{
text : "Css" ,
value : "css" ,
disabled : "0"
} ,
{
text : "Html" ,
value : "html" ,
disabled : "0"
}
] ,
mode : "0" , // 为"1"时支持checkbox多选模式
change : function(value){
// put your code here
}
}) ;
itemSelector.init() ;
setTimeout(function(){
console.log(itemSelector.getCurrentValue()) ; // 测试 获取当先选中项
},2000) ;
“var itemSelector = new ItemSelector()”里面包含两个参数,第一个是dom节点对象,第二个是插件参数选项,"currentText"代表“ItemSelector“插件中,选中文本显示区域的文字描述。
”items“是一个数组,里面包含的是“ItemSelector”项目的属性,包括文字描述,选项值,”disabled“代表列表条目的可显度,0代表显示,1代表不可显示。
”change“代表选中时的操作回调函数,选项数据会以参数的形式进行回传。
(2),所涉的功能有哪些
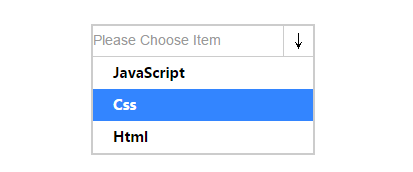
可显的效果图如下:

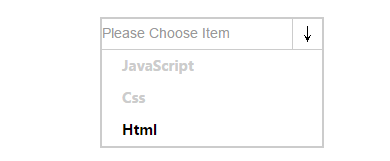
不可显的效果图如下:

二者的区别是:不可现状态数据不会回传,悬浮上去不会有任何效果。
三),完整代码以供学习,本代码已经过测试,包括目录结构以及相关的文件。
(1),html
复制代码 代码如下:
<body>
<div>
大熊君{{bb}} - DXJ UI ------ ItemSelector
</div>
<div>
<div id="item-selector">
<div>
<div></div><span>↓</span>
</div>
<div>
<div>
</div>
</div>
</div>
</div>
</body>
(2),css
复制代码 代码如下:
/* item-selector */
#item-selector {
margin : 0 auto;
width : 220px ;
overflow:hidden;
border:2px solid #ccc;
}
#item-selector .title {
border-bottom:1px solid #ccc;
overflow:hidden;
}
#item-selector .title div {
width:190px;
border:0px ;
color:#999;
font-family: arial ;
font-size: 14px;
height:28px;
line-height:28px;
float:left;
cursor:pointer;
}
#item-selector .title span {
display:block;
height:30px;
line-height:30px;
width:29px;
float:left;
text-align:center;
border-left:1px solid #ccc;
cursor:pointer;
}
#item-selector .content {
width : 220px ;
overflow:hidden;
}
#item-selector .content .items {
overflow:hidden;
}
#item-selector .content .items div {
padding-left:20px;
width : 200px ;
height:32px;
line-height:32px;
font-family: "微软雅黑" ;
font-size: 14px;
font-weight:bold;
cursor:pointer;
}
.item-hover {
background:#3385ff;
color:#fff;
}
(3),"ItemSelector.js"
复制代码 代码如下:
function ItemSelector(elem,opts){
this.elem = elem ;
this.opts = opts ;
} ;
var ISProto = ItemSelector.prototype ;
ISProto.getElem = function(){
return this.elem ;
} ;
ISProto.getOpts = function(){
return this.opts ;
} ;
/* data manip*/
ISProto._setCurrent = function(current){
this.getOpts()["current"] = current ;
} ;
ISProto.getCurrentValue = function(current){
return this.getOpts()["current"] ;
} ;
/* data manip*/
ISProto.init = function(){
var that = this ;
this.getOpts()["current"] = null ; // 数据游标
this._setItemValue(this.getOpts()["currentText"]) ;
var itemsElem = that.getElem().find(".content .items") ;
this.getElem().find(".title div").on("click",function(){
itemsElem.toggle() ;
}) ;
this.getElem().find(".title span").on("click",function(){
itemsElem.toggle() ;
}) ;
$.each(this.getOpts()["items"],function(i,item){
item["id"] = (new Date().getTime()).toString() ;
that._render(item) ;
}) ;
} ;
ISProto._setItemValue = function(value){
this.getElem().find(".title div").text(value)
} ;
ISProto._render = function(item){
var that = this ;
var itemElem = $("<div></div>")
.text(item["text"])
.attr("id",item["id"]) ;
if("0" == item["disabled"]){
itemElem.on("click",function(){
var onChange = that.getOpts()["change"] ;
that.getElem().find(".content .items").hide() ;
that._setItemValue(item["text"]) ;
that._setCurrent(item) ;
onChange && onChange(item) ;
})
.mouseover(function(){
$(this).addClass("item-hover") ;
})
.mouseout(function(){
$(this).removeClass("item-hover") ;
}) ;
}
else{
itemElem.css("color","#ccc").on("click",function(){
that.getElem().find(".content .items").hide() ;
that._setItemValue(item["text"]) ;
}) ;
}
itemElem.appendTo(this.getElem().find(".content .items")) ;
} ;
(四),最后总结
(1),面向对象的思考方式合理分析功能需求。
(2),以类的方式来组织我们的插件逻辑。
(3),不断重构上面的实例,如何进行合理的重构那?不要设计过度,要游刃有余,推荐的方式是过程化设计与面向对象思想设计相结合。
(4),下篇文章中会扩展相关功能,比如“mode”这个属性,为"1"时支持checkbox多选模式,现在只是默认下拉模式。
本文先到这里了,后续我们再继续讨论,希望小伙伴们能够喜欢本系列文章。


