

spring和mybatis整合
整合思路
需要spring通过单例方式管理SqlSessionFactory。
spring和mybatis整合生成代理对象,使用SqlSessionFactory创建SqlSession。(spring和mybatis整合自动完成)
持久层的mapper都需要由spring进行管理。
整合环境
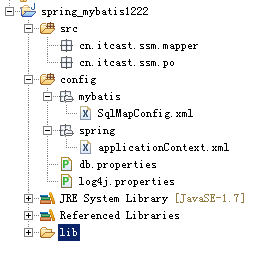
创建一个新的java工程(接近实际开发的工程结构)
jar包:
mybatis3.2.7的jar包
spring3.2.0的jar包
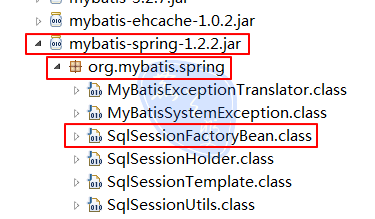
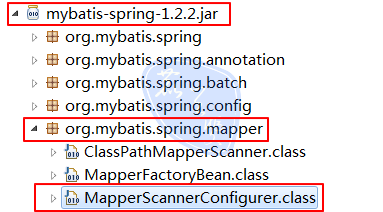
mybatis和spring的整合包:早期ibatis和spring整合是由spring官方提供,现在mybatis和spring整合由mybatis提供。
全部jar包(含springmvc)

工程结构
第一步:整合配置sqlSessionFactory
在applicationContext.xml配置sqlSessionFactory和数据源
sqlSessionFactory在mybatis和spring的整合包下。
<> <context:property-placeholder location="classpath:db.properties" /> <> <bean id="dataSource" destroy-method="close"> <property name="driverClassName" value="${jdbc.driver}" /> <property name="url" value="${jdbc.url}" /> <property name="username" value="${jdbc.username}" /> <property name="password" value="${jdbc.password}" /> <property name="maxActive" value="10" /> <property name="maxIdle" value="5" /> </bean> <> <bean id="sqlSessionFactory"> <> <property name="configLocation" value="mybatis/SqlMapConfig.xml" /> <> <property name="dataSource" ref="dataSource" /> </bean>
原始dao开发(和spring整合后)
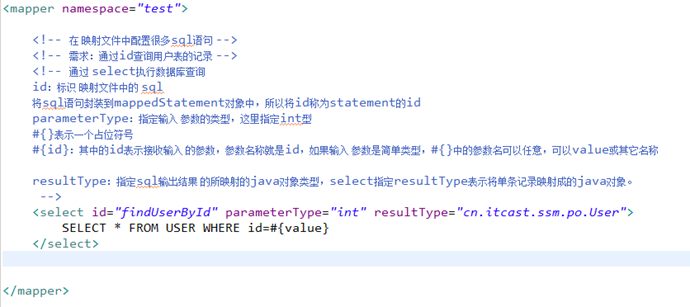
sqlmap/User.xml
在SqlMapconfig.xml中加载User.xml

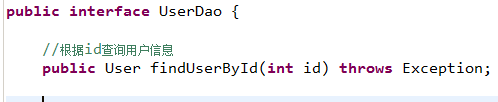
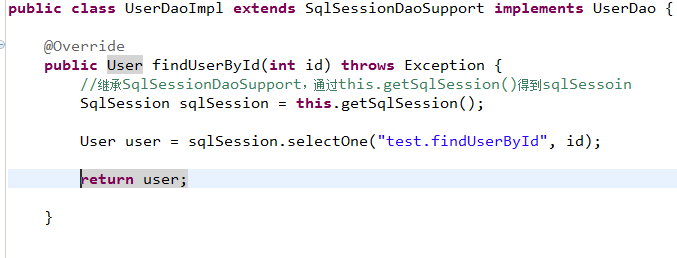
dao(实现类继承SqlSessionDaoSupport)
之前dao接口实现类需要注入SqlSessoinFactory,通过spring进行注入。
这里使用spring声明配置方式,配置dao的bean:
让UserDaoImpl实现类继承SqlSessionDaoSupport
配置dao
在applicationContext.xml中配置dao接口
<> <bean id="userDao"> <property name="sqlSessionFactory" ref="sqlSessionFactory"/> </bean>
测试程序
source_folder/UserDaoImplTest.java public class UserDaoImplTest { private ApplicationContext applicationContext; //在setUp这个方法得到spring容器 @Before public void setUp() throws Exception { applicationContext = new ClassPathXmlApplicationContext("classpath:spring/applicationContext.xml"); } @Test public void testFindUserById() throws Exception { UserDao userDao = (UserDao) applicationContext.getBean("userDao"); //调用userDao的方法 User user = userDao.findUserById(1); System.out.println(user); } }
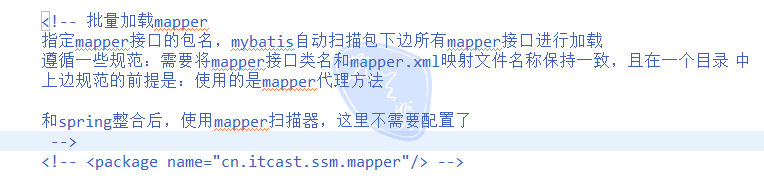
mapper代理开发
Usermapper.xml和Usermapper.java
将之前工程中拷贝过来删改包路径即可。
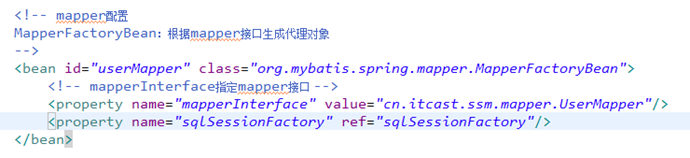
通过MapperFactoryBean创建代理对象
因为UserMapper不是接口类型,所以要用MapperFactoryBean来生成接口类型
此方法问题:
需要针对每个mapper进行配置,麻烦。
通过MapperScannerConfigurer进行mapper扫描(建议使用)
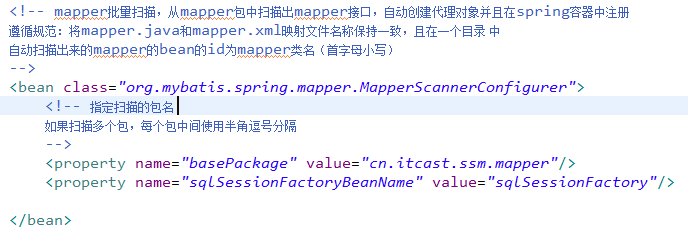
* 这里通过basePackage属性配置了mapper的扫描路径后,在SqlMapperConfig.xml中就不用配置扫描路径了。
这里使用sqlSessionFactoryBeanName属性是因为如果配置的是sqlSessionFactory属性,将不会先加载数据库配置文件及数据源配置(db.properties)
测试代码

逆向工程
mybaits需要程序员自己编写sql语句,mybatis官方提供逆向工程 可以针对单表自动生成mybatis执行所需要的代码(mapper.java,mapper.xml、po..)
企业实际开发中,常用的逆向工程方式:由于数据库的表生成java代码。
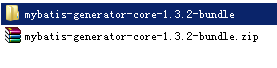
下载逆向工程
使用方法(会用)运行逆向工程
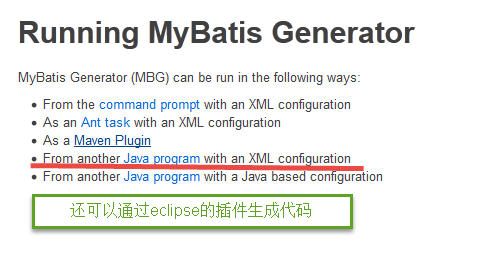
建议使用java程序方式,不依赖开发工具。
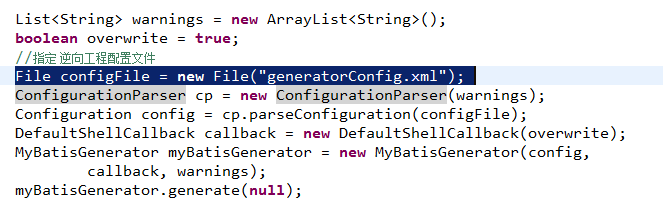
生成代码配置文件(有4处需要修改的地方)
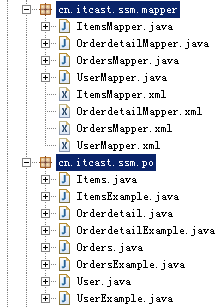
生成PO类的位置 : cn.itcast.ssm.po
mapper映射文件生成的位置 : cn.itcast.ssm.mapper
mapper接口生成的位置 : cn.itcast.ssm.mapper
指定数据库表:
<table tableName="items"></table> <table tableName="orders"></table> <table tableName="orderdetail"></table> <table tableName="user"></table> <"1.0" encoding="UTF-8"?> <!DOCTYPE generatorConfiguration PUBLIC "-//mybatis.org//DTD MyBatis Generator Configuration 1.0//EN" "http://mybatis.org/dtd/mybatis-generator-config_1_0.dtd"> <generatorConfiguration> <context id="testTables" targetRuntime="MyBatis3"> <commentGenerator> <> <property name="suppressAllComments" value="true" /> </commentGenerator> <> <jdbcConnection driverClass="com.mysql.jdbc.Driver" connectionURL="jdbc:mysql://localhost:3306/mybatis" userId="root" password="mysql"> </jdbcConnection> <!-- <jdbcConnection driverClass="oracle.jdbc.OracleDriver" connectionURL="jdbc:oracle:thin:@127.0.0.1:1521:yycg" userId="yycg" password="yycg"> </jdbcConnection> --> <!-- 默认false,把JDBC DECIMAL 和 NUMERIC 类型解析为 Integer,为 true时把JDBC DECIMAL 和 NUMERIC 类型解析为java.math.BigDecimal --> <javaTypeResolver> <property name="forceBigDecimals" value="false" /> </javaTypeResolver> <> <javaModelGenerator targetPackage="cn.itcast.ssm.po" targetProject=".src"> <> <property name="enableSubPackages" value="false" /> <> <property name="trimStrings" value="true" /> </javaModelGenerator> <> <sqlMapGenerator targetPackage="cn.itcast.ssm.mapper" targetProject=".src"> <> <property name="enableSubPackages" value="false" /> </sqlMapGenerator> <> <javaClientGenerator type="XMLMAPPER" targetPackage="cn.itcast.ssm.mapper" targetProject=".src"> <> <property name="enableSubPackages" value="false" /> </javaClientGenerator> <> <table tableName="items"></table> <table tableName="orders"></table> <table tableName="orderdetail"></table> <table tableName="user"></table> </context> </generatorConfiguration>
执行生成程序
生成后的代码
使用生成的代码
需要将生成工程中所生成的代码拷贝到自己的工程中。
测试ItemsMapper中的方法
//自定义条件查询 @Test public void testSelectByExample() { ItemsExample itemsExample = new ItemsExample(); //通过criteria构造查询条件 ItemsExample.Criteria criteria = itemsExample.createCriteria(); criteria.andNameEqualTo("笔记本3"); //可能返回多条记录 List<Items> list = itemsMapper.selectByExample(itemsExample); System.out.println(list); } //根据主键查询 @Test public void testSelectByPrimaryKey() { Items items = itemsMapper.selectByPrimaryKey(1); System.out.println(items); } //插入 @Test public void testInsert() { //构造 items对象 Items items = new Items(); items.setName("手机"); items.setPrice(999f); itemsMapper.insert(items); } //更新数据 @Test public void testUpdateByPrimaryKey() { //对所有字段进行更新,需要先查询出来再更新 Items items = itemsMapper.selectByPrimaryKey(1); items.setName("水杯"); itemsMapper.updateByPrimaryKey(items); //如果传入字段不空为才更新,在批量更新中使用此方法,不需要先查询再更新 //itemsMapper.updateByPrimaryKeySelective(record); }
以上所述是小编给大家介绍的浅析Spring和MyBatis整合及逆向工程,希望对大家有所帮助,如果大家有任何疑问请给我们留言,小编会及时回复大家的。在此也非常感谢大家对查字典教程网的支持!