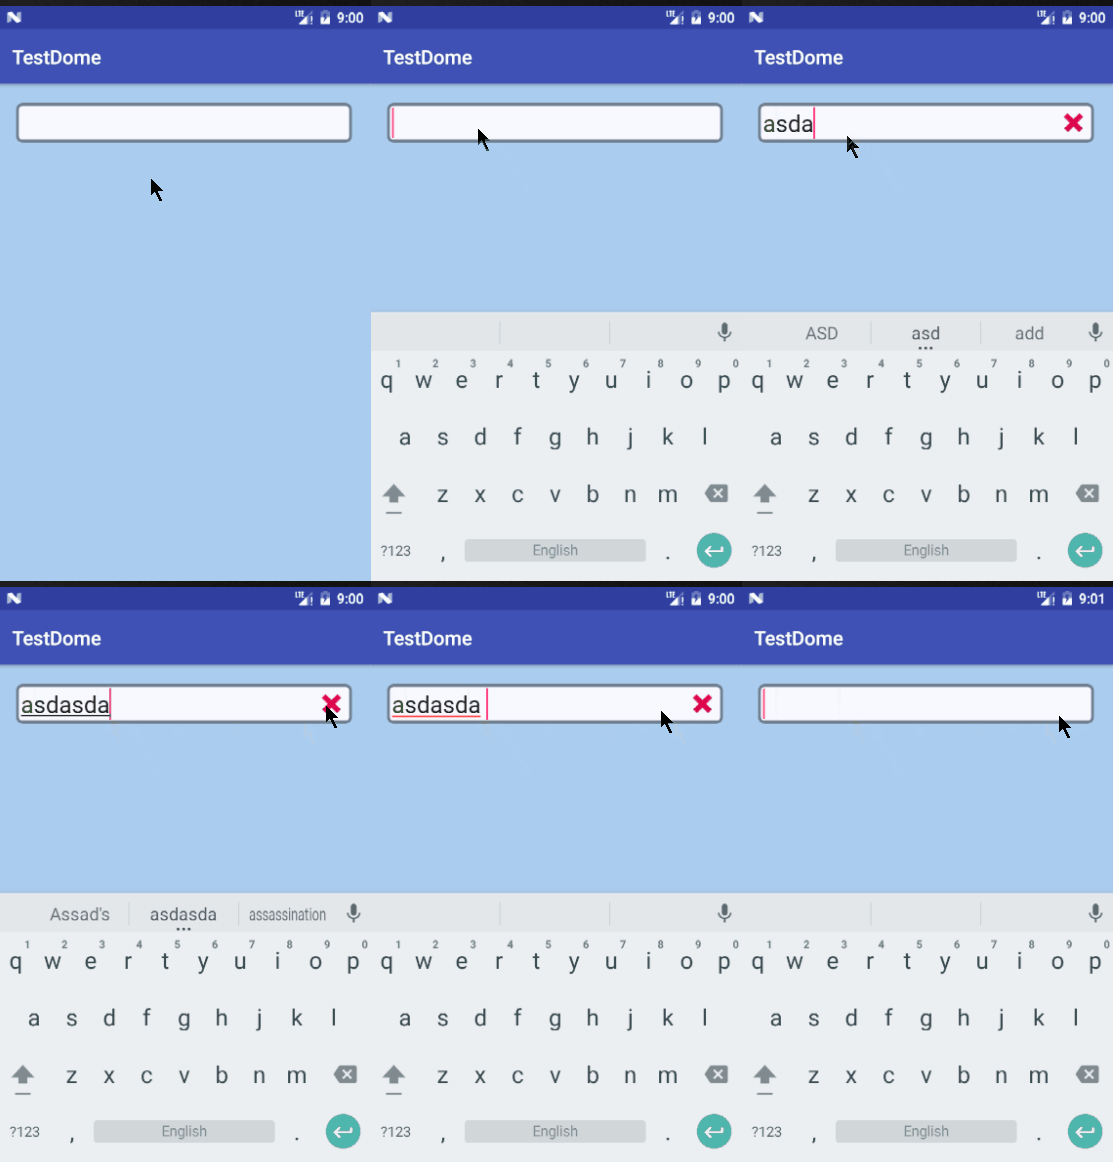
一、首先来看看效果

这是一个带有删除按钮的输入文本框, 需要新建一个类继承自EditText, 先把代码贴出来, 然后在解释:
示例代码如下:
public class EditTextWithDel extends EditText { private final static String TAG = "EditTextWithDel"; private Drawable imgInable; private Context mContext; public EditTextWithDel(Context context) { this(context, null, 0); } public EditTextWithDel(Context context, AttributeSet attrs) { this(context, attrs, 0); } public EditTextWithDel(Context context, AttributeSet attrs, int defStyleAttr) { super(context, attrs, defStyleAttr); mContext = context; init(); } private void init() { imgInable = mContext.getResources().getDrawable(android.R.drawable.ic_delete); addTextChangedListener(new TextWatcher() { @Override public void beforeTextChanged(CharSequence charSequence, int i, int i1, int i2) { } @Override public void onTextChanged(CharSequence charSequence, int i, int i1, int i2) { } @Override public void afterTextChanged(Editable editable) { setDrawable(); } }); setDrawable(); } // 设置删除图片 private void setDrawable() { if (length() < 1) { setCompoundDrawablesWithIntrinsicBounds(null, null, null, null); } else { setCompoundDrawablesWithIntrinsicBounds(null, null, imgInable, null); } } // 处理删除操作 @Override public boolean onTouchEvent(MotionEvent event) { if (imgInable != null && event.getAction() == MotionEvent.ACTION_UP) { int eventX = (int) event.getRawX(); int eventY = (int) event.getRawY(); Log.d(TAG, "(" + eventX + ", " + eventY + ")"); Rect rect = new Rect(); getGlobalVisibleRect(rect); rect.left = rect.right - 70; Log.d(TAG, rect.toString()); if (rect.contains(eventX, eventY)) { setText(""); } } return super.onTouchEvent(event); } @Override protected void finalize() throws Throwable { super.finalize(); } }
解释如下
首先看一下setCompoundDrawablesWithIntrinsicBounds(Drawable left, Drawable top, Drawable right, Drawable bottom)这个名字贼长的方法, 虽然名字很长, 其实这个方法用起来和简单, 就是设置左上右下的图片, 这个dome只需要设置右边的就行了, 可以看一下全部设置的效果
接着就是还要监听Touch, 这里要说一下getRawX()和getX()的区别, getRawX()或者getRawY()方法是以屏幕为参考, getX()和getY()方法是以容器为参考, 所以二者得到的值可能不一样. 之后在利用getGlobalVisibleRect()方法得到视图的位置, 存放到rect中, 这里是以屏幕左上角为起点的, 所以前面用的是getRaw方法.
当然也可以 使用getLocalVisibleRect方法, 这个方法是以View的左上角为起点的, 所以用这个方法的话, 就得使用getX()和getY()方法来或获取触摸点的x和y值了.
总结
以上就是这篇文章的全部内容了,希望本文的内容对各位Android开发者们能有所帮助,如果有疑问大家可以留言交流。


