

本文实例讲述了Android编程单选项框RadioGroup用法。分享给大家供大家参考,具体如下:
今天介绍的是RadioGroup 的组事件.RadioGroup 可将各自不同的RadioButton ,设限于同一个Radio 按钮组,同一个RadioGroup 组里的按钮,只能做出单一选择(单选题).
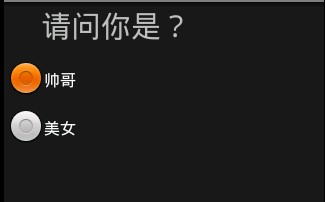
首先,我们先设计一个TextView Widget ,以及一个RadioGroup ,并将该RadioGroup 内放置两个RadioButton ,默认为都不选择,在程序运行阶段,利用onCheckedChanged 作为启动事件装置,让User选择其中一个按钮,显示被选择的内容,最的将RadioButton 的选项文字显示于TextView 当中.
下面我们看一下效果图:

下面是涉及的相关代码:
string.xml:
<"1.0" encoding="utf-8"?> <resources> <string name="hello">Hello World, RadioGroupDemo</string> <string name="app_name">RadioGroupDemo</string> <string name="tr_radio_op1">帅哥</string> <string name="tr_radio_op2">美女</string> <string name="str_radio_question1">请问你是?</string> </resources>
主布局main.xml:
<"1.0" encoding="utf-8"?> <LinearLayout xmlns:Android="http://schemas.android.com/apk/res/android" android:orientation="vertical" android:layout_width="fill_parent" android:layout_height="fill_parent" > <> <TextView android:id="@+id/myTextView" android:layout_width="228px" android:layout_height="49px" android:text="@string/str_radio_question1" android:textSize="30sp" /> <> <RadioGroup android:id="@+id/myRadioGroup" android:layout_width="137px" android:layout_height="216px" android:orientation="vertical" > <> <RadioButton android:id="@+id/myRadioButton1" android:layout_width="wrap_content" android:layout_height="wrap_content" android:text="@string/tr_radio_op1" /> <> <RadioButton android:id="@+id/myRadioButton2" android:layout_width="wrap_content" android:layout_height="wrap_content" android:text="@string/tr_radio_op2" /> </RadioGroup> </LinearLayout>
最后是主控制程序RadioGroupDemo.Java:
package com.android.test; import android.app.Activity; import android.os.Bundle; import android.widget.RadioButton; import android.widget.RadioGroup; import android.widget.TextView; public class RadioGroupDemo extends Activity { public TextView mTextView1; public RadioGroup mRadioGroup1; public RadioButton mRadio1,mRadio2; public void onCreate(Bundle savedInstanceState) { super.onCreate(savedInstanceState); setContentView(R.layout.main); /*取得 TextView、RadioGroup、RadioButton对象*/ mTextView1 = (TextView) findViewById(R.id.myTextView); mRadioGroup1 = (RadioGroup) findViewById(R.id.myRadioGroup); mRadio1 = (RadioButton) findViewById(R.id.myRadioButton1); mRadio2 = (RadioButton) findViewById(R.id.myRadioButton2); /*RadioGroup用OnCheckedChangeListener来运行*/ mRadioGroup1.setOnCheckedChangeListener(mChangeRadio); } private RadioGroup.OnCheckedChangeListener mChangeRadio = new RadioGroup.OnCheckedChangeListener() { @Override public void onCheckedChanged(RadioGroup group, int checkedId) { // TODO Auto-generated method stub if(checkedId==mRadio1.getId()) { /*把mRadio1的内容传到mTextView1*/ mTextView1.setText(mRadio1.getText()); } else if(checkedId==mRadio2.getId()) { /*把mRadio2的内容传到mTextView1*/ mTextView1.setText(mRadio2.getText()); } } }; }
运行RadioGroupDemo.java ,将得到以上效果。
希望本文所述对大家Android程序设计有所帮助。