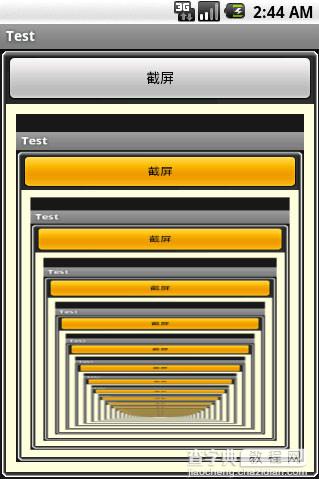
本文实例讲述了Android实现的截屏小程序。分享给大家供大家参考,具体如下:
先看截图,不过这个截屏还不够完整,头上的statusbar没有,呈黑色。

多按了几次,就成这样了,呵呵。
package com.test; import android.app.Activity; import android.graphics.Bitmap; import android.graphics.Canvas; import android.graphics.Bitmap.Config; import android.os.Bundle; import android.view.View; import android.widget.Button; import android.widget.ImageView; import android.widget.ImageView.ScaleType; public class ScreenPrinter extends Activity { /** Called when the activity is first created. */ boolean customTitleSupported; public void onCreate(Bundle savedInstanceState) { super.onCreate(savedInstanceState); setContentView(R.layout.screen_printer); Button btn = (Button)findViewById(R.id.btn); btn.setOnClickListener(new Button.OnClickListener(){ public void onClick(View arg0) { ImageView im = (ImageView)findViewById(R.id.img); Bitmap bmp = Bitmap.createBitmap(320, 480, Config.ARGB_8888); View cv = getWindow().getDecorView(); cv.draw(new Canvas(bmp)); im.setScaleType(ScaleType.FIT_XY); im.setImageBitmap(bmp); }}); } }
资源文件:
<"1.0" encoding="utf-8"?> <LinearLayout xmlns:android="http://schemas.android.com/apk/res/android" android:layout_width="fill_parent" android:layout_height="fill_parent" android:orientation="vertical" android:background="@drawable/border"> <Button android:layout_width="fill_parent" android:layout_height="wrap_content" android:id="@+id/btn" android:text="截屏"/> <LinearLayout android:layout_width="fill_parent" android:layout_height="fill_parent" android:layout_weight="1" android:padding="10dip" android:background="#ffffdd"> <ImageView android:id="@+id/img" android:layout_width="fill_parent" android:layout_height="fill_parent"/> </LinearLayout> </LinearLayout>
希望本文所述对大家Android程序设计有所帮助。


