

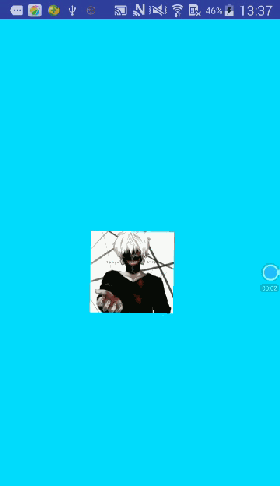
先来看看要实现的效果图
在讲解中,需要大家提前了解一些关于图片绘制的原理的相关知识。
关于实现的流程
1、自定义View
2、获得操作图片的Bitmap
3、复写View的onTouchEvent()方法中的ACTION_DOWN,ACTION_POINTER_DOWN,ACTION_MOVE,ACTION_POINTER_UP以及ACTION_UP事件。
4、定义相应图片变化的Matrix矩阵,通过手势操作的变化来设置相应的Matrix。
5、完成最终的Matrix设置时,通过invalidate()方法重新绘制页面。
那么接下来我们根据以上流程一步一步实现代码。
代码演示
/** * 作者:ZhouYou * 日期:2016/8/23. */ public class TouchImageView extends View { // 绘制图片的边框 private Paint paintEdge; // 绘制图片的矩阵 private Matrix matrix = new Matrix(); // 手指按下时图片的矩阵 private Matrix downMatrix = new Matrix(); // 手指移动时图片的矩阵 private Matrix moveMatrix = new Matrix(); // 资源图片的位图 private Bitmap srcImage; // 多点触屏时的中心点 private PointF midPoint = new PointF(); // 触控模式 private int mode; private static final int NONE = 0; // 无模式 private static final int TRANS = 1; // 拖拽模式 private static final int ZOOM = 2; // 缩放模式 // 是否超过边界 private boolean withinBorder; public TouchImageView(Context context) { this(context, null); } public TouchImageView(Context context, AttributeSet attrs) { this(context, attrs, 0); } public TouchImageView(Context context, AttributeSet attrs, int defStyleAttr) { super(context, attrs, defStyleAttr); init(); } private void init() { paintEdge = new Paint(); paintEdge.setColor(Color.BLACK); paintEdge.setAlpha(170); paintEdge.setAntiAlias(true); } @Override protected void onSizeChanged(int w, int h, int oldw, int oldh) { super.onSizeChanged(w, h, oldw, oldh); srcImage = BitmapFactory.decodeResource(getResources(), R.mipmap.ic_avatar_1); } @Override protected void onDraw(Canvas canvas) { super.onDraw(canvas); float[] points = getBitmapPoints(srcImage, matrix); float x1 = points[0]; float y1 = points[1]; float x2 = points[2]; float y2 = points[3]; float x3 = points[4]; float y3 = points[5]; float x4 = points[6]; float y4 = points[7]; // 画边框 canvas.drawLine(x1, y1, x2, y2, paintEdge); canvas.drawLine(x2, y2, x4, y4, paintEdge); canvas.drawLine(x4, y4, x3, y3, paintEdge); canvas.drawLine(x3, y3, x1, y1, paintEdge); // 画图片 canvas.drawBitmap(srcImage, matrix, null); } // 手指按下屏幕的X坐标 private float downX; // 手指按下屏幕的Y坐标 private float downY; // 手指之间的初始距离 private float oldDistance; // 手指之间的初始角度 private float oldRotation; @Override public boolean onTouchEvent(MotionEvent event) { int action = MotionEventCompat.getActionMasked(event); switch (action) { case MotionEvent.ACTION_DOWN: mode = TRANS; downX = event.getX(); downY = event.getY(); downMatrix.set(matrix); break; case MotionEvent.ACTION_POINTER_DOWN: // 多点触控 mode = ZOOM; oldDistance = getSpaceDistance(event); oldRotation = getSpaceRotation(event); downMatrix.set(matrix); midPoint = getMidPoint(event); break; case MotionEvent.ACTION_MOVE: // 缩放 if (mode == ZOOM) { moveMatrix.set(downMatrix); float deltaRotation = getSpaceRotation(event) - oldRotation; float scale = getSpaceDistance(event) / oldDistance; moveMatrix.postScale(scale, scale, midPoint.x, midPoint.y); moveMatrix.postRotate(deltaRotation, midPoint.x, midPoint.y); withinBorder = getMatrixBorderCheck(srcImage, event.getX(), event.getY()); if (withinBorder) { matrix.set(moveMatrix); invalidate(); } } // 平移 else if (mode == TRANS) { moveMatrix.set(downMatrix); moveMatrix.postTranslate(event.getX() - downX, event.getY() - downY); withinBorder = getMatrixBorderCheck(srcImage, event.getX(), event.getY()); if (withinBorder) { matrix.set(moveMatrix); invalidate(); } } break; case MotionEvent.ACTION_POINTER_UP: case MotionEvent.ACTION_UP: mode = NONE; break; default: break; } return true; } /** * 获取手指的旋转角度 * * @param event * @return */ private float getSpaceRotation(MotionEvent event) { double deltaX = event.getX(0) - event.getX(1); double deltaY = event.getY(0) - event.getY(1); double radians = Math.atan2(deltaY, deltaX); return (float) Math.toDegrees(radians); } /** * 获取手指间的距离 * * @param event * @return */ private float getSpaceDistance(MotionEvent event) { float x = event.getX(0) - event.getX(1); float y = event.getY(0) - event.getY(1); return (float) Math.sqrt(x * x + y * y); } /** * 获取手势中心点 * * @param event */ private PointF getMidPoint(MotionEvent event) { PointF point = new PointF(); float x = event.getX(0) + event.getX(1); float y = event.getY(0) + event.getY(1); point.set(x / 2, y / 2); return point; } /** * 将matrix的点映射成坐标点 * * @return */ protected float[] getBitmapPoints(Bitmap bitmap, Matrix matrix) { float[] dst = new float[8]; float[] src = new float[]{ 0, 0, bitmap.getWidth(), 0, 0, bitmap.getHeight(), bitmap.getWidth(), bitmap.getHeight() }; matrix.mapPoints(dst, src); return dst; } /** * 检查边界 * * @param x * @param y * @return true - 在边界内 | false - 超出边界 */ private boolean getMatrixBorderCheck(Bitmap bitmap, float x, float y) { if (bitmap == null) return false; float[] points = getBitmapPoints(bitmap, moveMatrix); float x1 = points[0]; float y1 = points[1]; float x2 = points[2]; float y2 = points[3]; float x3 = points[4]; float y3 = points[5]; float x4 = points[6]; float y4 = points[7]; float edge = (float) Math.sqrt(Math.pow(x1 - x2, 2) + Math.pow(y1 - y2, 2)); if ((2 + Math.sqrt(2)) * edge >= Math.sqrt(Math.pow(x - x1, 2) + Math.pow(y - y1, 2)) + Math.sqrt(Math.pow(x - x2, 2) + Math.pow(y - y2, 2)) + Math.sqrt(Math.pow(x - x3, 2) + Math.pow(y - y3, 2)) + Math.sqrt(Math.pow(x - x4, 2) + Math.pow(y - y4, 2))) { return true; } return false; } }
我已经在代码中针对可能遇到的问题做了详细的注释。
1. Matrix
// 绘制图片的矩阵 private Matrix matrix = new Matrix(); // 手指按下时图片的矩阵 private Matrix downMatrix = new Matrix(); // 手指移动时图片的矩阵 private Matrix moveMatrix = new Matrix();
首先我定义了三个Matrix变量,目的在于通过不同手势的操控图片的Matrix最终由绘制图片的Matrix所接收,因此需要在不同的操作中使用不同的Matrix进行图形变换的数据传递,从而在渲染页面的时候将最终的Matrix再传递回绘图的Matrix。
2. PointF
// 多点触屏时的中心点 private PointF midPoint = new PointF();
因为如果是针对图片的旋转和放大操作,需要通过两个手指进行控制,因此我们需要知道在多个手指触摸屏幕时的中心点坐标。
3. 触控模式
// 触控模式 private int mode; private static final int NONE = 0; // 无模式 private static final int TRANS = 1; // 拖拽模式 private static final int ZOOM = 2; // 缩放模式
在onTouchEvent()事件中,会根据不同的事件变换触控的模式,从而进行不同图片变换的操作。
4. onTouchEvent()
首先,我们是自定义的View,因此如果要对该事件进行消费的话,需要将返回值设置为true。
(1)ACTION_DOWN - 该事件是单点触屏的事件,也就是说如果一个手指按下屏幕的时候就会回调这个事件。那么我们在该事件中就将触控模式设置为拖拽模式(TRANS),记录下按下屏幕的xy坐标,并在这个事件中将绘图的Matrix复制给按下屏幕的Matrix。
case MotionEvent.ACTION_DOWN: mode = TRANS; downX = event.getX(); downY = event.getY(); downMatrix.set(matrix); break;
(2)ACTION_POINTER_DOWN - 这个事件发生在超过一个手指触摸屏幕的时候。我们在这个事件中即可针对多点触屏的操作进行初始化设置。在该事件中,我们将触控模式重新设置为(ZOOM),初始化两指之间触摸屏幕的距离以及两指之间的旋转角度,初始化两指之间的中心点坐标。最后把绘图的Matrix复制给按下屏幕的Matrix。
case MotionEvent.ACTION_POINTER_DOWN: // 多点触控 mode = ZOOM; oldDistance = getSpaceDistance(event); oldRotation = getSpaceRotation(event); midPoint = getMidPoint(event); downMatrix.set(matrix); break;
(3)ACTION_MOVE - 到了移动的事件中,根据之前的触控模式进行判断。首先,将按下事件的Matrix复制给移动事件的Matrix。如果是(ZOOM)模式,我们将会根据事件获得手指旋转角度的差值,以及手指之间距离的差值。根据这两个差值,以及在ACTION_DOWN事件中获得的中点坐标,我们即可设置MOVE事件的缩放和旋转。(TRANS)模式也是如此。最后通过获取图片变换的边界值来判断是否进行绘图渲染。
case MotionEvent.ACTION_MOVE: // 缩放 if (mode == ZOOM) { moveMatrix.set(downMatrix); float deltaRotation = getSpaceRotation(event) - oldRotation; float scale = getSpaceDistance(event) / oldDistance; moveMatrix.postScale(scale, scale, midPoint.x, midPoint.y); moveMatrix.postRotate(deltaRotation, midPoint.x, midPoint.y); withinBorder = getMatrixBorderCheck(srcImage, event.getX(), event.getY()); if (withinBorder) { matrix.set(moveMatrix); invalidate(); } } // 平移 else if (mode == TRANS) { moveMatrix.set(downMatrix); moveMatrix.postTranslate(event.getX() - downX, event.getY() - downY); withinBorder = getMatrixBorderCheck(srcImage, event.getX(), event.getY()); if (withinBorder) { matrix.set(moveMatrix); invalidate(); } } break;
(4)ACTION_POINTER_UP和ACTION_UP - 在这两个事件中,重新将触屏的模式设置会NONE。
5. 边界判断
以下即为边界判断的逻辑是针对正方形的图片来说的。首先通过原图片相对自己四个坐标映射成为Matrix对应屏幕的点坐标。通过得到4个点的坐标,我们即可根据手指触摸图片时的坐标与图片的4个点坐标进行关联。
边界判断的逻辑是手指触摸图片的点到4个顶点的距离之和如果小于(2+根号2倍)的斜边长度,即视为不超过边界。
/** * 将matrix的点映射成坐标点 * * @return */ protected float[] getBitmapPoints(Bitmap bitmap, Matrix matrix) { float[] dst = new float[8]; float[] src = new float[]{ 0, 0, bitmap.getWidth(), 0, 0, bitmap.getHeight(), bitmap.getWidth(), bitmap.getHeight() }; matrix.mapPoints(dst, src); return dst; } /** * 检查边界 * * @param x * @param y * @return true - 在边界内 | false - 超出边界 */ private boolean getMatrixBorderCheck(Bitmap bitmap, float x, float y) { if (bitmap == null) return false; float[] points = getBitmapPoints(bitmap, moveMatrix); float x1 = points[0]; float y1 = points[1]; float x2 = points[2]; float y2 = points[3]; float x3 = points[4]; float y3 = points[5]; float x4 = points[6]; float y4 = points[7]; float edge = (float) Math.sqrt(Math.pow(x1 - x2, 2) + Math.pow(y1 - y2, 2)); if ((2 + Math.sqrt(2)) * edge >= Math.sqrt(Math.pow(x - x1, 2) + Math.pow(y - y1, 2)) + Math.sqrt(Math.pow(x - x2, 2) + Math.pow(y - y2, 2)) + Math.sqrt(Math.pow(x - x3, 2) + Math.pow(y - y3, 2)) + Math.sqrt(Math.pow(x - x4, 2) + Math.pow(y - y4, 2))) { return true; } return false; }
总结
好了,本文的内容到这就结束了,完成了以上的步骤,即可完成针对图片在屏幕上的放大、平移和旋转的操作。是不是还是很简单的。有兴趣的可以自己动手操作起来,希望这篇文章对大家的学习和工作能有所帮助,如果有疑问可以留言交流,谢谢大家对查字典教程网的支持。