

本文实例讲述了Android中Service用法。分享给大家供大家参考,具体如下:
关于Service的讲解网上已经很多了,这里是关于自己通过写代码Service的一点体会 还有结合其他人对Service的一点总结
Service可以理解为一个隐形的Activity 但它又与Activity有些不同,首先Service是没界面,用户看不到 可交互的组件 级别是与Activity是差不多的
Service中定义了一系列和自身声明周期相关的方法:
onBind(...)是必须实现的方法,返回一个绑定接口给Service
onCreate(); 当Service第一次被创建时 由系统调用
onStart(...)当通过startService()方法调用启动Service时被调用
onDestroy();当Service不再使用,系统调用该方法....
本次代码分别有MainActivity,Java,MyService.java main.xml这几个重要文件 下面通过这几个文件对Service进行理解 见注释
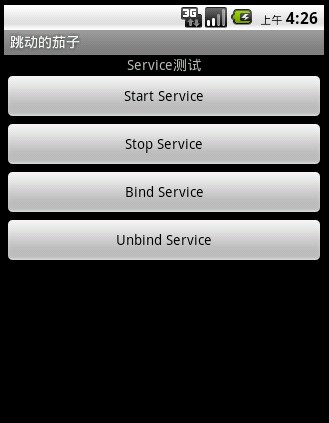
老规矩 先开始布局 挺简单的 就是几个Button
<"1.0" encoding="utf-8"?> <LinearLayout xmlns:android="http://schemas.android.com/apk/res/android" android:orientation="vertical" android:layout_width="fill_parent" android:layout_height="fill_parent" > <TextView android:layout_width="fill_parent" android:layout_height="wrap_content" android:text="Service测试" android:gravity="center_horizontal" /> <Button android:id="@+id/startButton" android:layout_width="fill_parent" android:layout_height="wrap_content" android:text="Start Service" /> <Button android:id="@+id/stopButton" android:layout_width="fill_parent" android:layout_height="wrap_content" android:text="Stop Service" /> <Button android:id="@+id/bindButton" android:layout_width="fill_parent" android:layout_height="wrap_content" android:text="Bind Service" /> <Button android:id="@+id/unBindButton" android:layout_width="fill_parent" android:layout_height="wrap_content" android:text="Unbind Service" /> </LinearLayout>
布局效果图:
开始服务文件, MyService继承Service
public class MyService extends Service { final static String TAG = "MyService"; @Override public IBinder onBind(Intent intent) { Log.i(TAG,"OnBind()......"); showInfo("Onbind()......"); return null; } // Setvice创建时被调用 @Override public void onCreate() { Log.i(TAG,"onCreate()......"); showInfo("onCreate()......"); super.onCreate(); } //当客户调用startService()启动Service时被调用 @Override public void onStart(Intent intent, int startId) { Log.i(TAG,"onStart()........"); showInfo("onStart()........"); super.onStart(intent, startId); } @Override public void onDestroy() { Log.i(TAG,"onDestroy()........"); showInfo("onDestroy()........"); super.onDestroy(); } @Override public boolean onUnbind(Intent intent) { Log.i(TAG,"onUnbind()........"); showInfo("onUnbind()........"); return super.onUnbind(intent); } public void showInfo(String str) { Toast.makeText(this, str, Toast.LENGTH_SHORT).show(); } }
上面主要是Service中几个周期函数 这个MyService代表一个服务,当然在这里面我们在里面加什么实质性的东西,例如可以在
Onstart(...)函数里创建一个音乐播放器MediaPlayer 当服务被启动时播放音乐.....
你创建了Service 就跟你创建Activity一样 必须在Manifest里注册 下面开始注册
<> <service android:name=".MyService"> <intent-filter > <action android:name="com.study.android.action.MY_SERVICE"/> </intent-filter> </service>
服务就这样 注册成功。光注册成功还没有完成任务哦...... 还有启动服务,停止服务,绑定服务,解除绑定的服务
package com.study.android; import android.app.Activity; import android.app.Service; import android.content.ComponentName; import android.content.Intent; import android.content.ServiceConnection; import android.os.Bundle; import android.os.IBinder; import android.util.Log; import android.view.View; import android.view.View.OnClickListener; import android.widget.Button; import android.widget.Toast; public class MainActivity extends Activity { final static String ACTION = "com.study.android.action.MY_SERVICE"; private Button startButton,stopButton; private Button bindButton,unbindButton; @Override public void onCreate(Bundle savedInstanceState) { super.onCreate(savedInstanceState); setContentView(R.layout.main); startButton = (Button)findViewById(R.id.startButton); stopButton = (Button)findViewById(R.id.stopButton); bindButton = (Button)findViewById(R.id.bindButton); unbindButton = (Button)findViewById(R.id.unBindButton); // 开启服务 startButton.setOnClickListener(new OnClickListener() { @Override public void onClick(View v) { // 启动服务 startService(buildIntent()); } }); //startButton按下后 周期函数执行顺序 onCreate()----->onStart() /******************************************/ // 停止服务 stopButton.setOnClickListener(new OnClickListener() { @Override public void onClick(View v) { stopService(buildIntent()); } }); //stopButton按下后 周期函数执行顺序 onDestroy() /******************************************/ // 绑定服务 bindButton.setOnClickListener(new OnClickListener() { @Override public void onClick(View v) { bindService(buildIntent(),conn,Service.BIND_AUTO_CREATE); /*第三个参数:如何创建service 一般是制定绑定时自动创建*/ } }); // bindButton 被按下后(当前服务已经stop掉)周期函数执行顺序 onCreate()------->onBind() /******************************************/ // 接触绑定Service unbindButton.setOnClickListener(new OnClickListener() { @Override public void onClick(View v) { unbindService(conn); } }); //unbindButton按下后 周期函数执行顺序onUnbind()------->onDestroy() } // 连接对象 private ServiceConnection conn = new ServiceConnection() { @Override public void onServiceConnected(ComponentName name, IBinder service) { Log.i("SERVICE","连接服务成功!"); showInfo("连接服务成功!"); } @Override public void onServiceDisconnected(ComponentName name) { Log.i("SERVICE","服务连接断开!"); showInfo("服务连接断开!"); } }; public Intent buildIntent() { Intent intent = new Intent(); // 设置Intent属性 注意:这里action属性要与Manifest里服务对应 intent.setAction(ACTION); return intent; } public void showInfo(String str) { Toast.makeText(this, str, Toast.LENGTH_SHORT).show(); } }
希望本文所述对大家Android程序设计有所帮助。