

微博上都在说东北暴雪咯,大家注意添暖加衣,那么今天分享一个应景的pS教程。教您创建一个超炫的冰霜字体。特效真的很棒哟,过程很详细,童鞋们赶紧来学习吧。
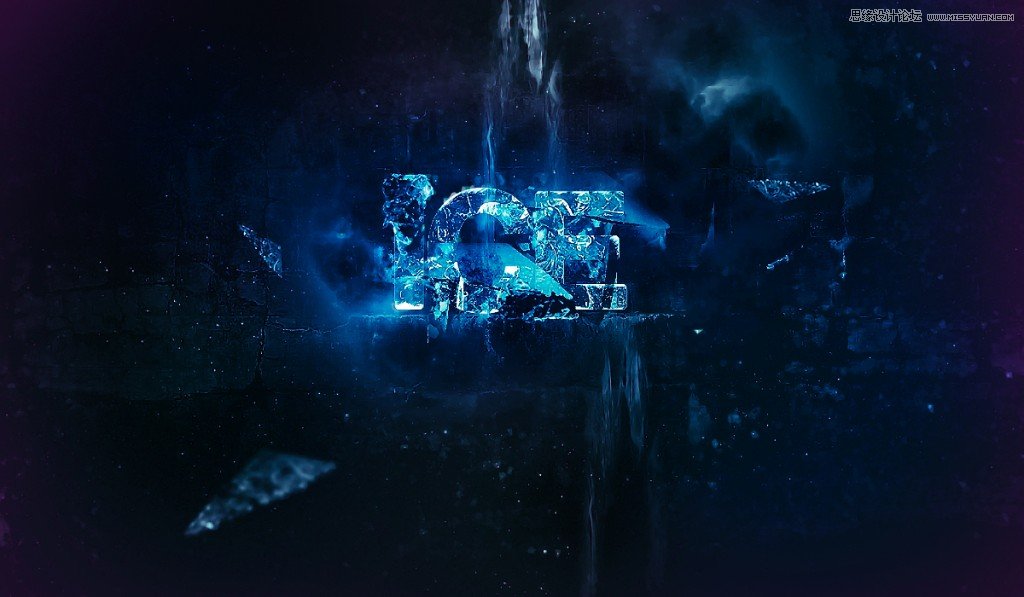
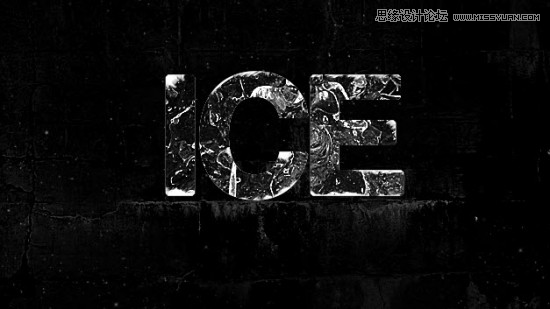
这是完成后的效果图:
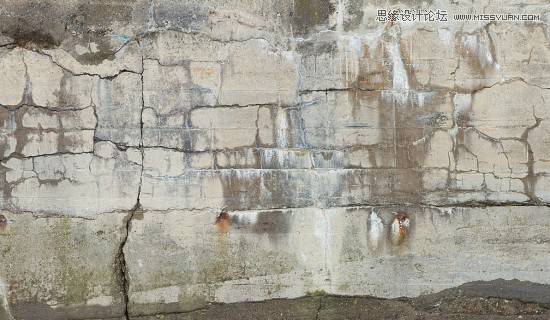
第一步:创建一个大小为1200px*700px的文件,填充黑色背景。把下载的墙壁背景复制过来,Ctrl + T 调整好大小,如图:
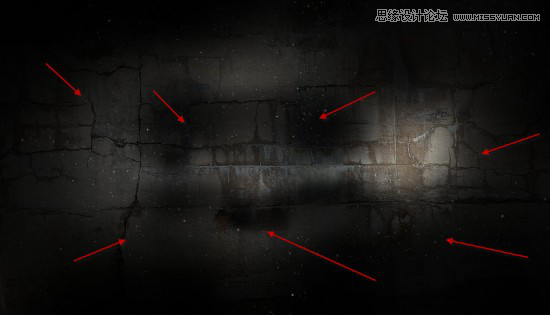
使用柔边橡皮擦,擦掉一部分。其实柔边画笔也可以,新建一个图层加蒙版比较好修改。效果如下:
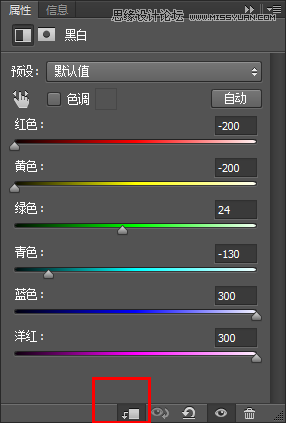
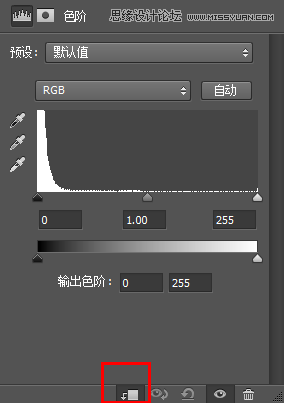
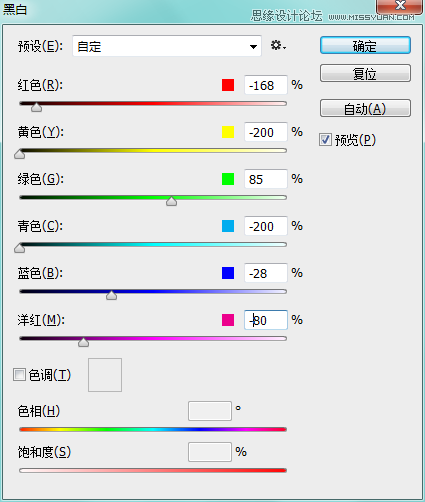
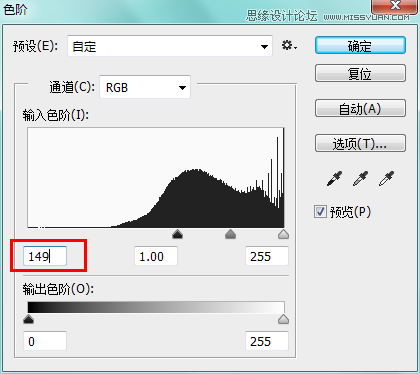
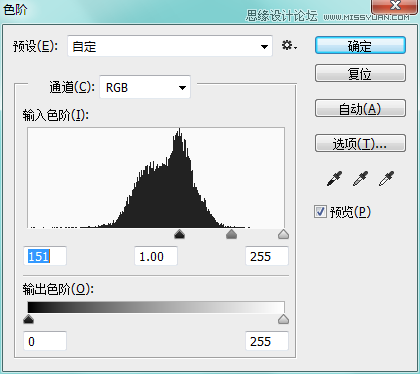
大致效果完成后,创建「黑白」与「色阶」剪切蒙版,调整如下:
黑白
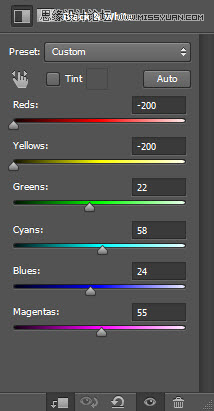
色阶
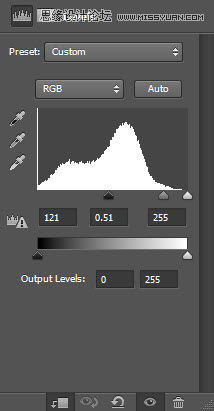
到此效果如下,通过调整图层,使中间部分比较明显。
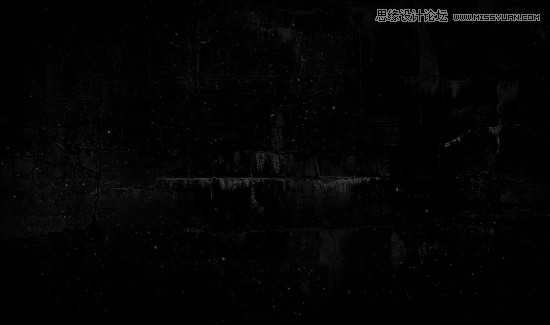
现在我们的背景已经完成了,来创造字体吧。
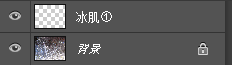
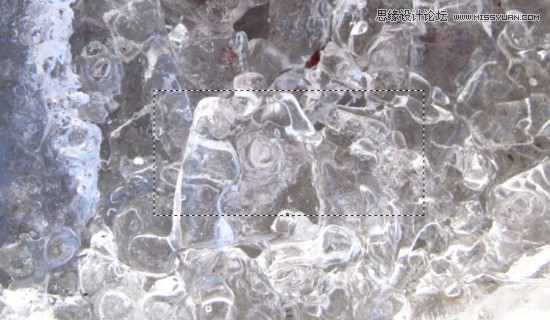
第二步:把下载的字体,打几个英文出来,例如:ICE,打开「冰肌①」图像,选择文字选区(Ctrl + 单击图层缩略图选中),粘贴到图像中,「Delete」切换到”冰肌”图层,复制。
如图:

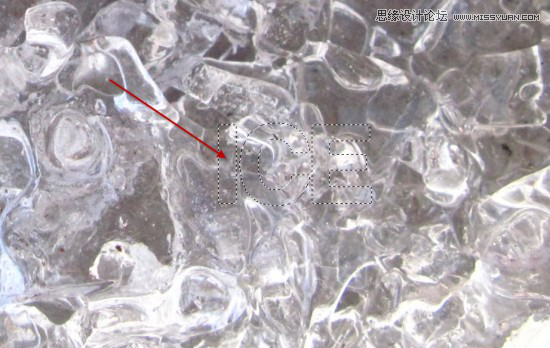
粘贴到原来的图像,覆盖掉原来的文字层,如图:
为冰肌理图层创建「黑白」与「色阶」剪切蒙版,调整如下:
黑白
色阶
Levels
然后到「冰肌①」图像选择另外一片区域
粘贴后继续重复上一个步骤,即创建剪切蒙版
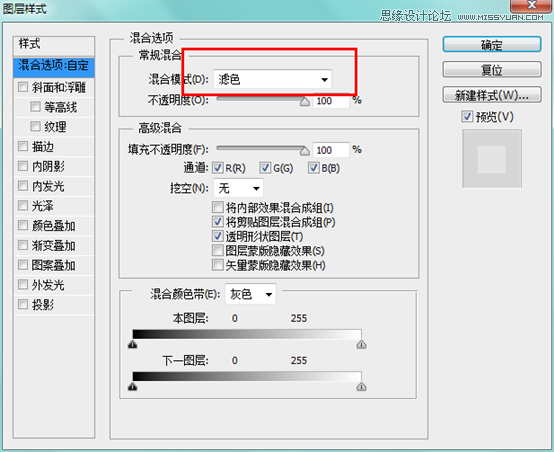
然后把这个图层混合模式改为「强光」,点击 图像 → 调整 ,选择「黑白」和「色阶」
注意,这里不是剪切蒙版,而是对整个图层的调整。
色阶
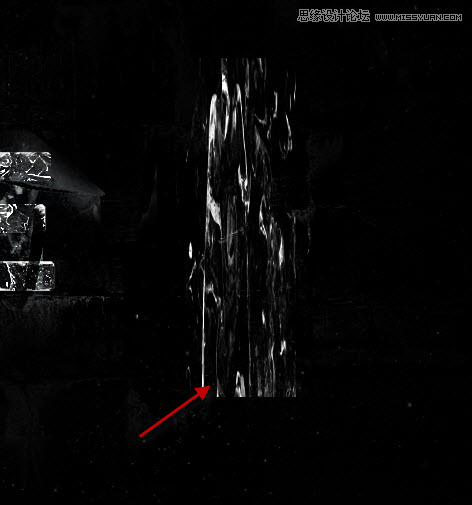
这是效果:(根据截取图像,显示效果不同,建议截取时不要选太暗的,容易一片漆黑)
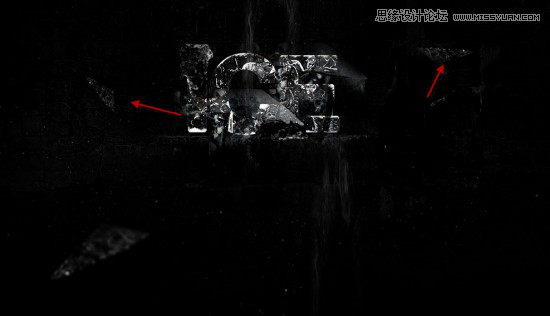
第三步:下面来添加一点碎冰片效果,打开”碎冰片”图像,抠出一片三角形。
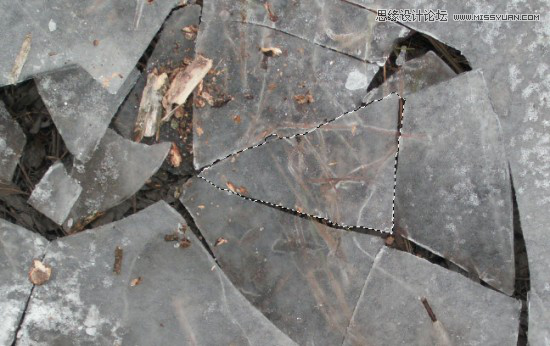
粘贴到文字层后面,把尺寸变小,也可以通过摁住Ctrl 拖动边角改变形状,像这样:
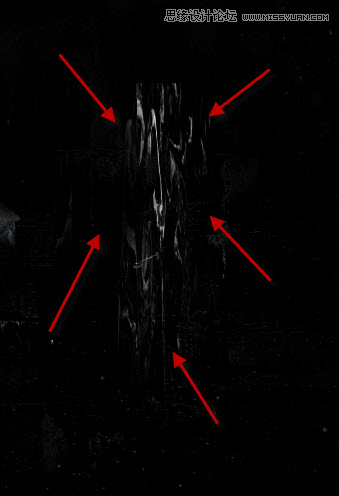
再重复一次,顺便添加点小点的碎冰片
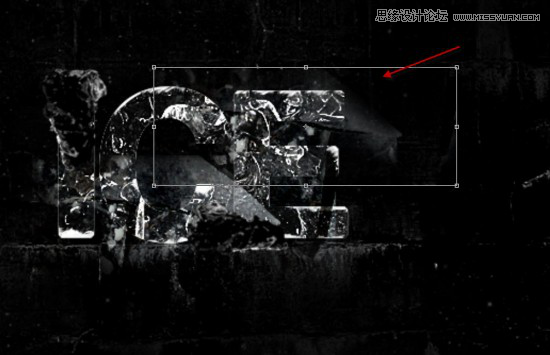
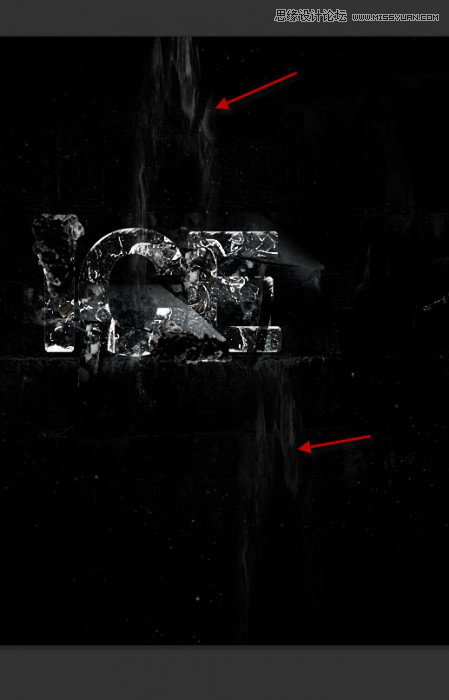
第四步:添加点飘渺的效果,继续从「碎冰片」图像里抠一片,复制过来,改变形状,类似这样:注意,这次图层在文字前边,挑方正点的抠。
现在我们来调整一下图层,点击 图像 → 调整 ,选择「黑白」和「色阶」

双击图层,改变混合选项为”滤色”:
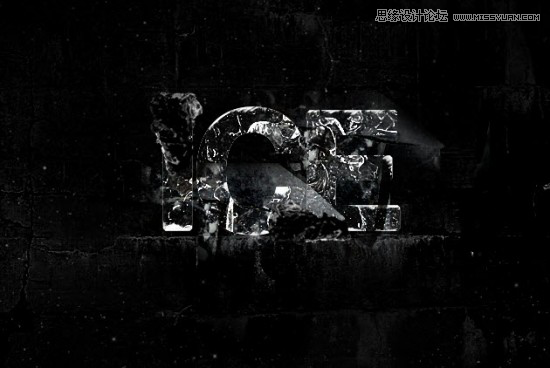
效果如下:
用柔边橡皮擦工具擦掉边缘,如图:
你也可以复制图层,使烟雾浓一点,然后得到这样的效果:
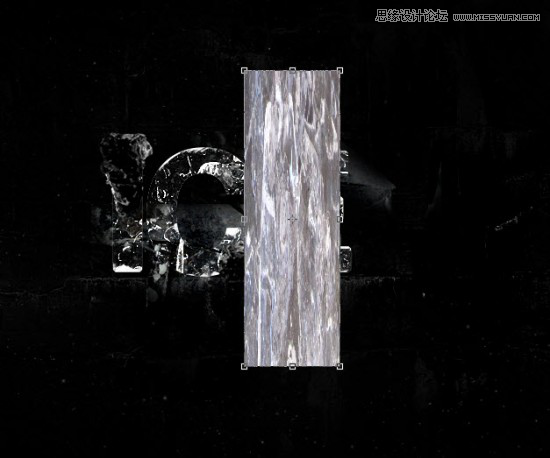
第五步:添加碎片飘飞的效果,同样从「碎冰片」图像里抠一片,复制过来,改变形状,如图:
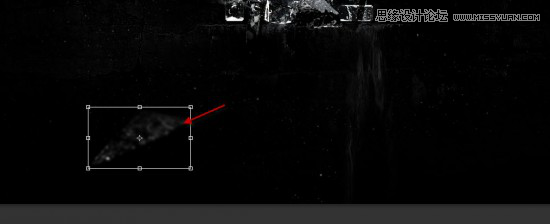
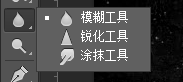
使用模糊工具为碎片涂抹,使之有动感的感觉
多次重复这一步,确保有多个方向都有碎冰,如图:
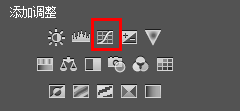
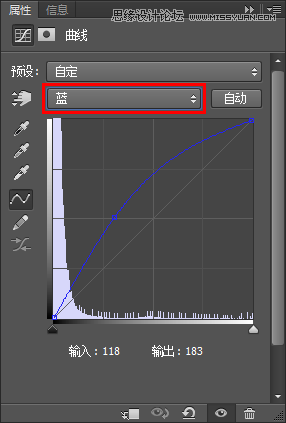
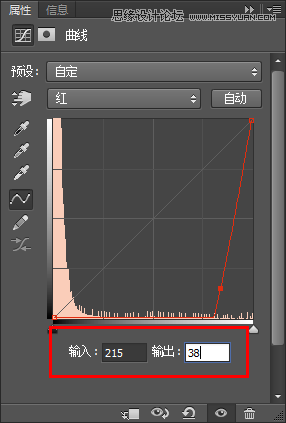
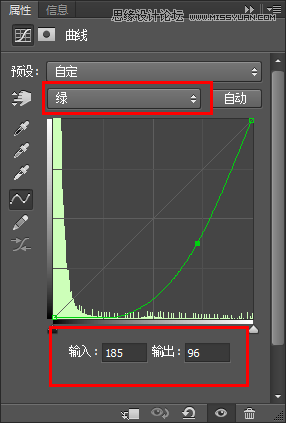
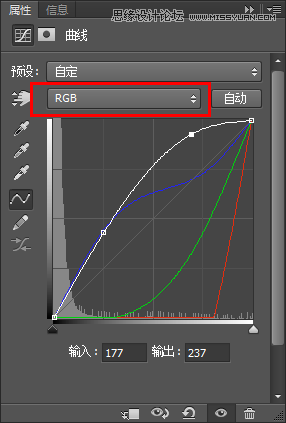
第六步:成功在望,兄弟加油。现在我们创建一个曲线剪切蒙版,如下:(可根据自己图像进行小调整)
我用云彩笔刷加了一点云雾效果,这是最后的作品。
注:更多精彩教程请关注三联photoshop教程栏目,三联PS群:182958314欢迎你的加入