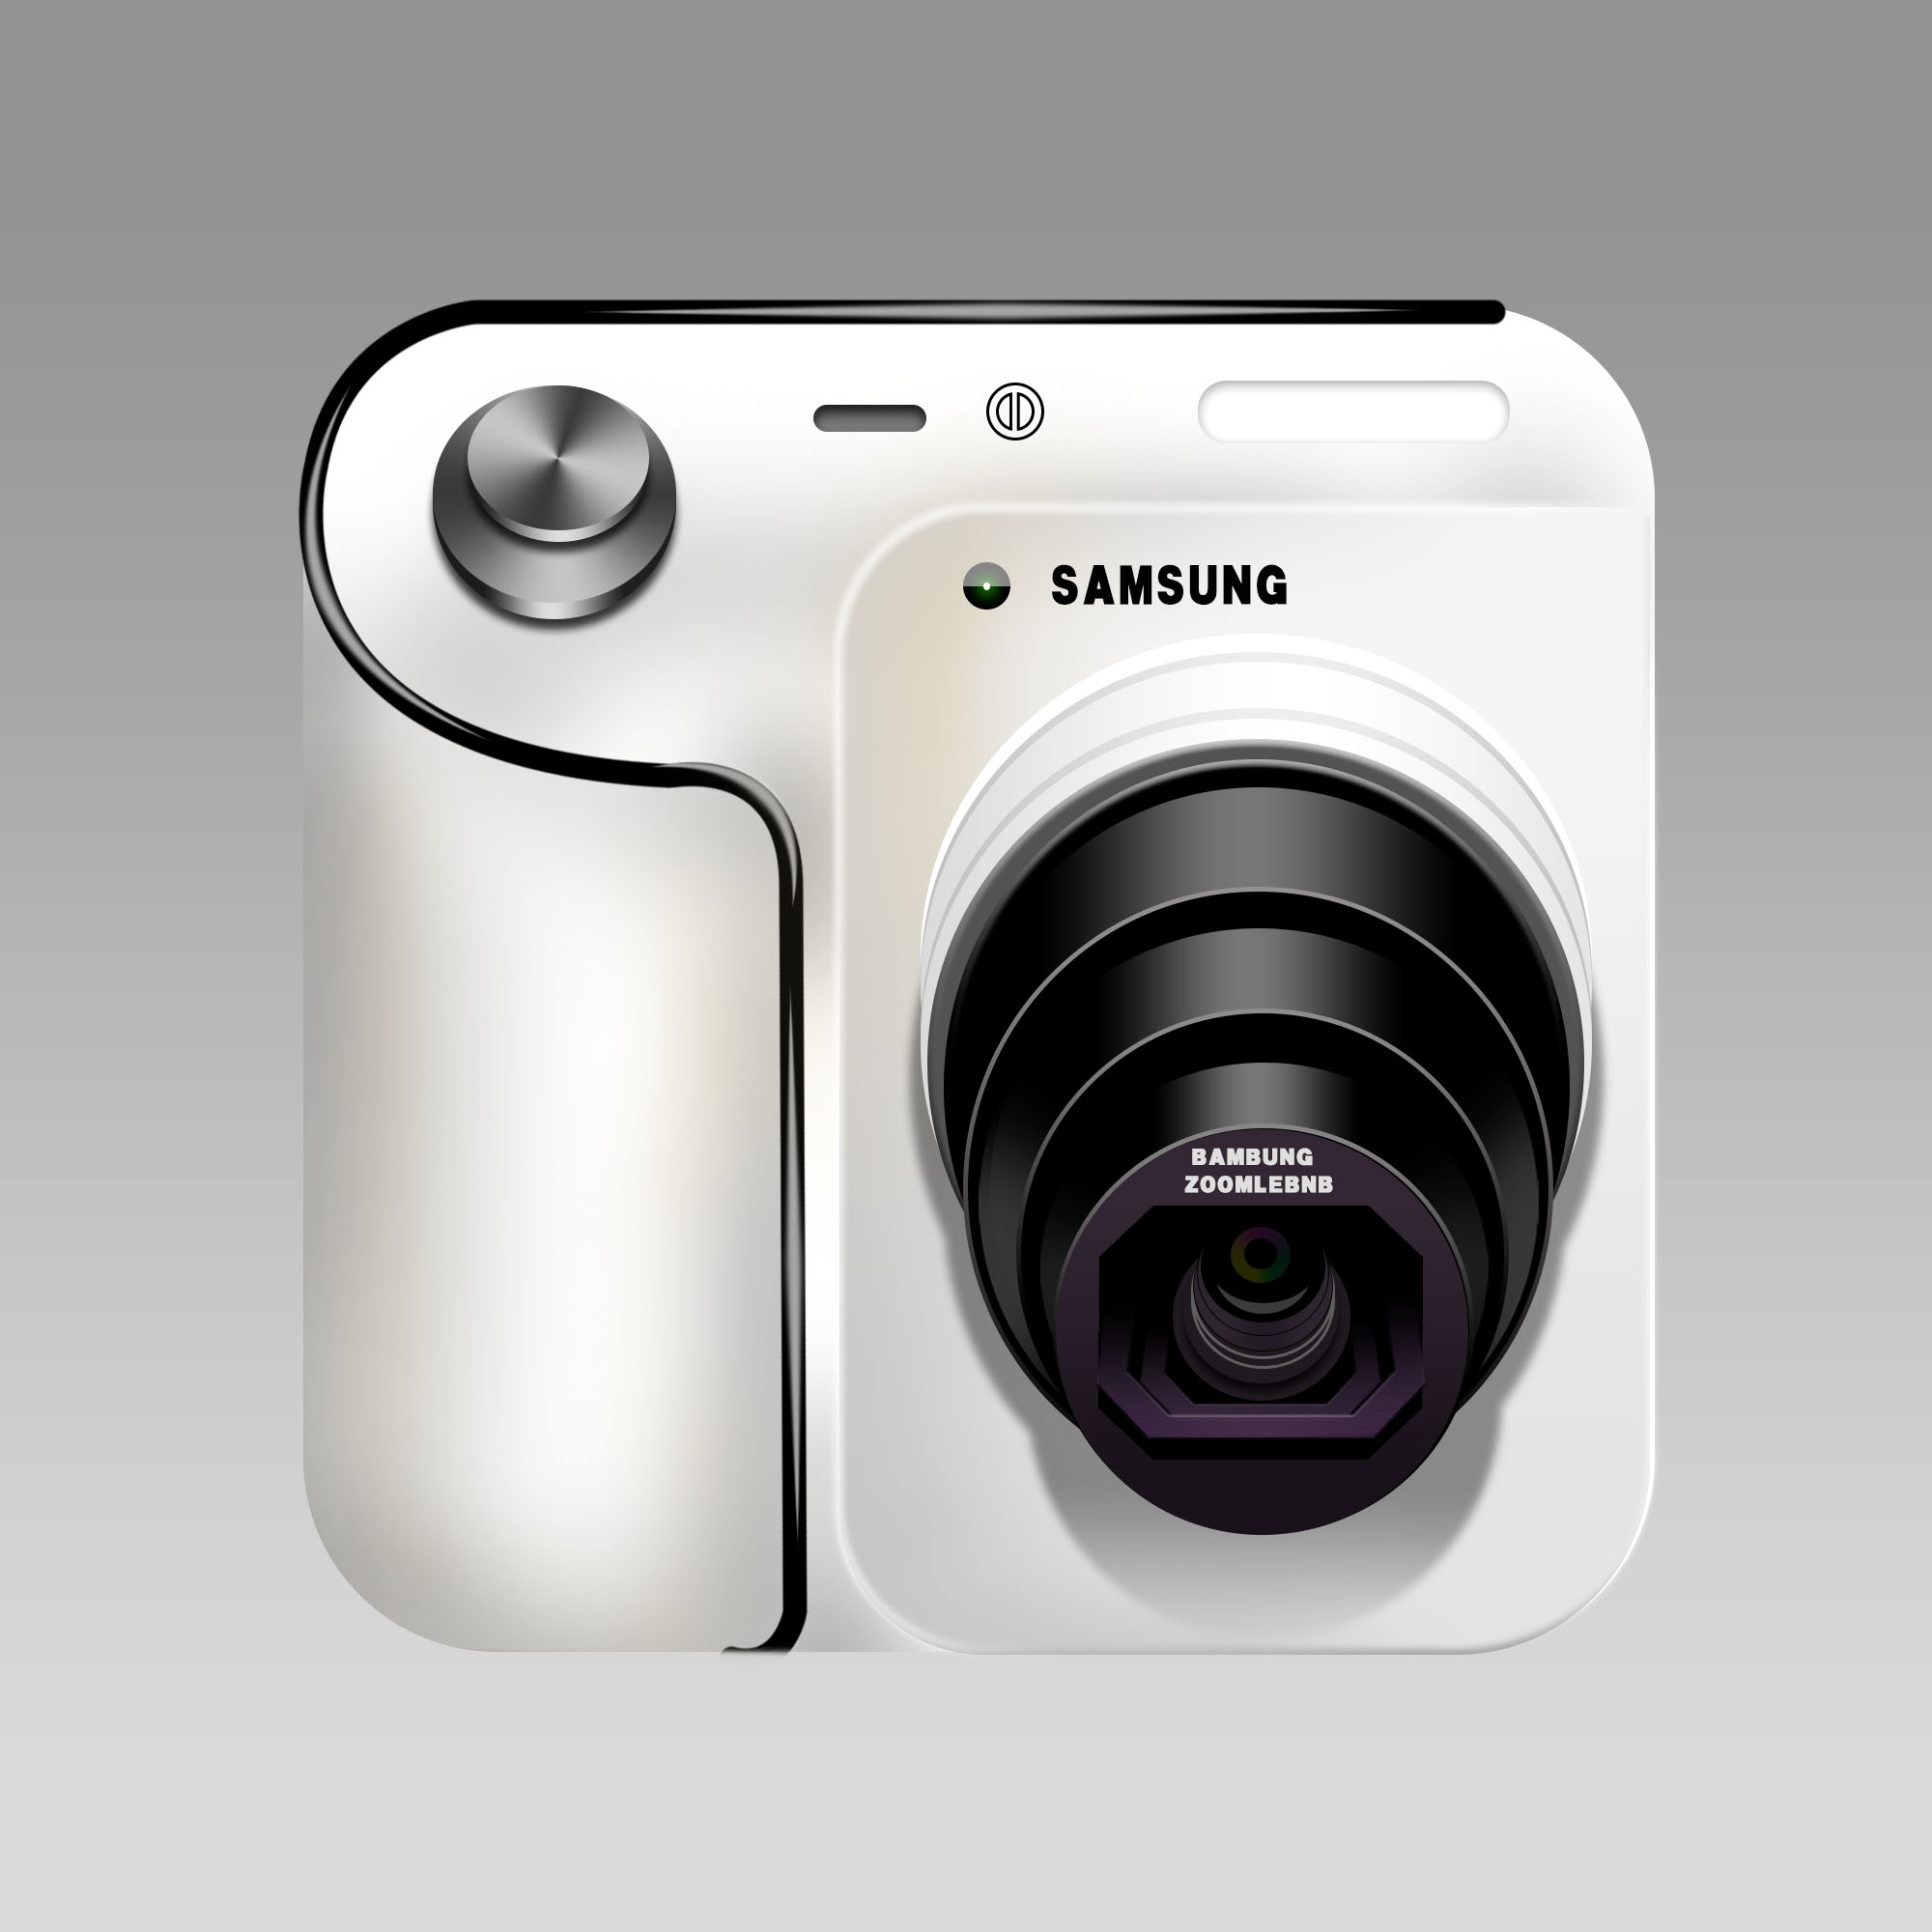
最终效果:
1,新建一个2000*2000的画布
(因为之后需要设置一些参数是根据画布大小而定的,所以不想自己调参数的话就跟我设置同样大小的画布吧)

2,新建一个图层,然后随便填充一个颜色(太简单不上图了)
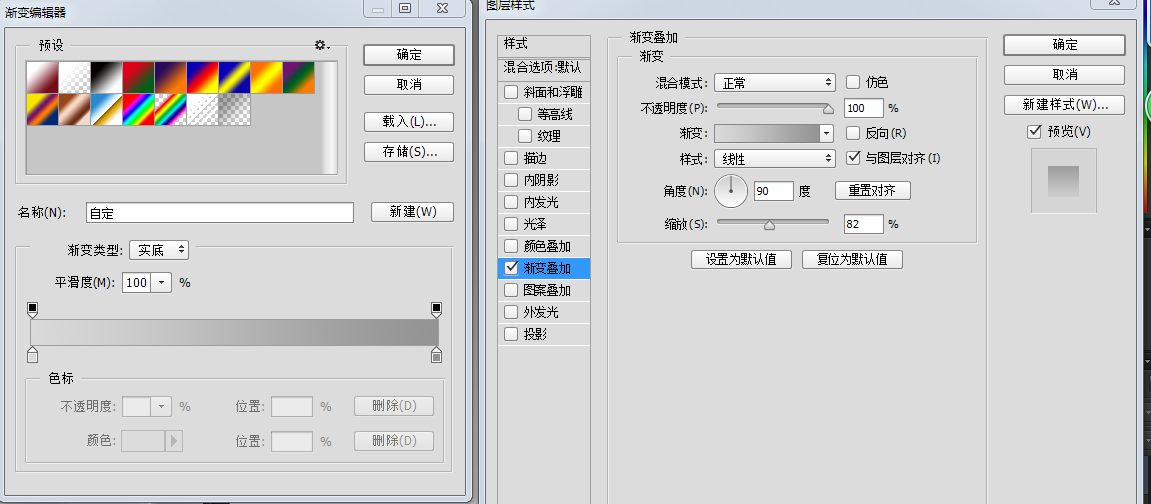
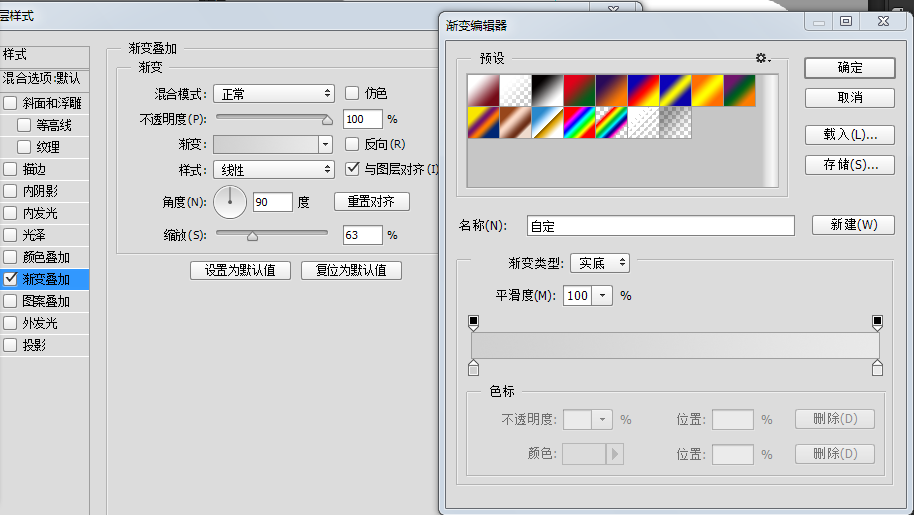
3,双击图层一,打开图层样式,使用渐变叠加。
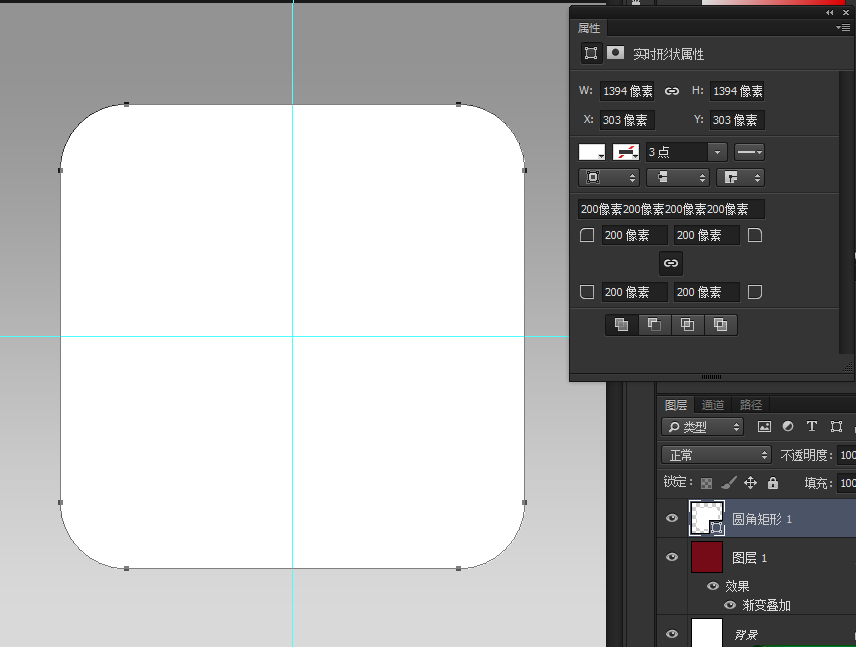
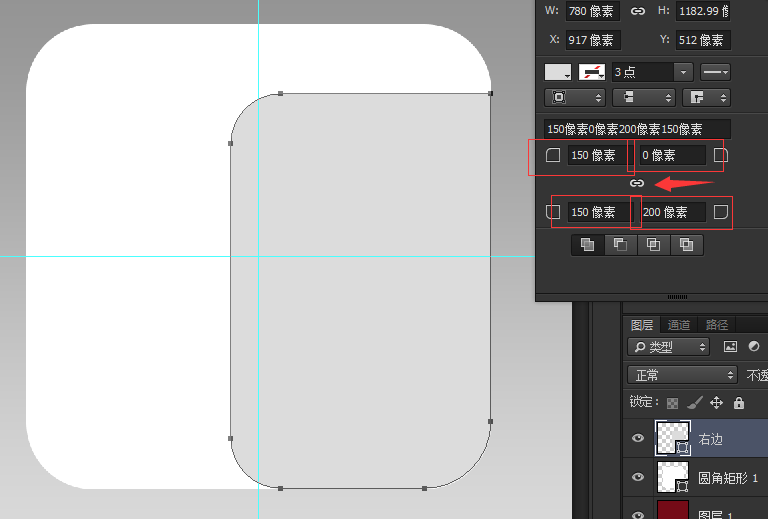
4、拉好参考线,画出一个圆角矩形。
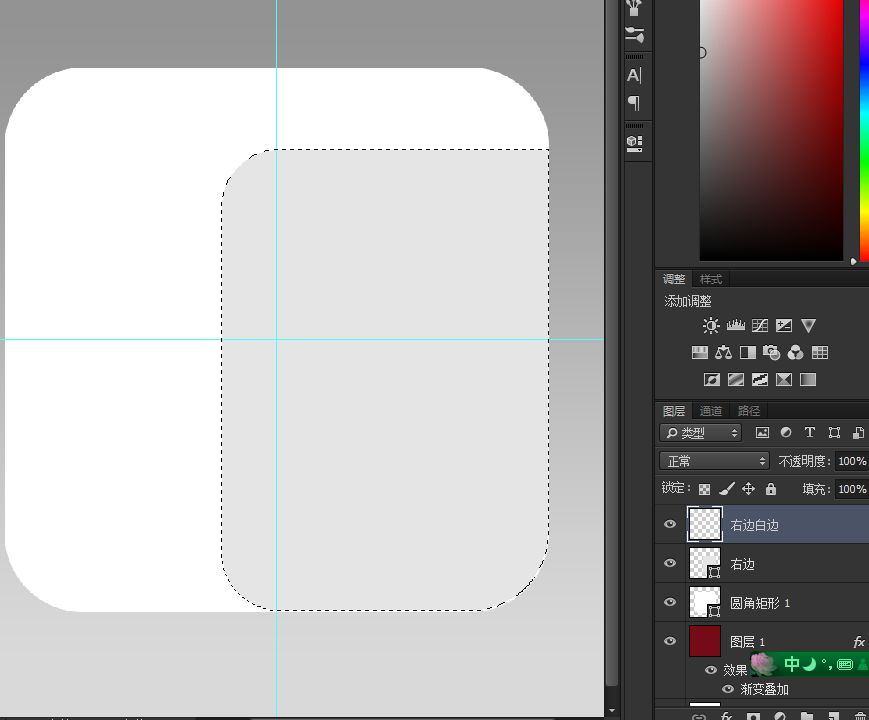
5、再画一个圆角矩形,圆角半径设置如图,颜色设置为灰色。将图层取名为右边。
6、按住Ctrl点击“右边”图层的缩略图,得到此图层的选区,并且新建一个图层取名为“右边白边”。
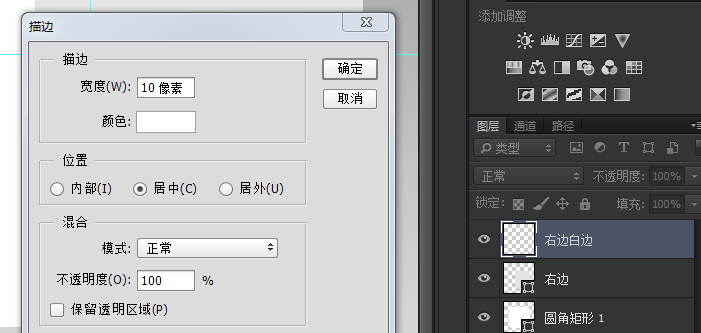
7、选择选框工具,然后在图上右建单击一下选择“描边”,设置如图,然后确定。
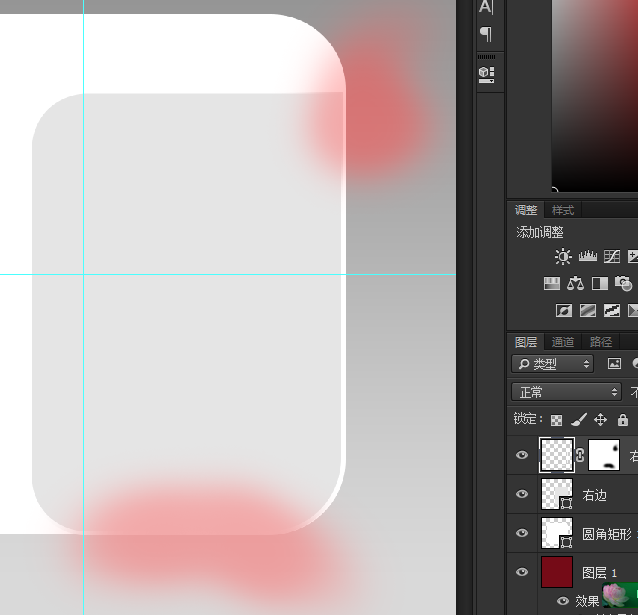
8、给“右边白边”的图层建立个白蒙板,用黑色画笔涂抹图中红色区域。
9、双击“右边”图层,打开图层样式,使用渐变叠加,然后确定。
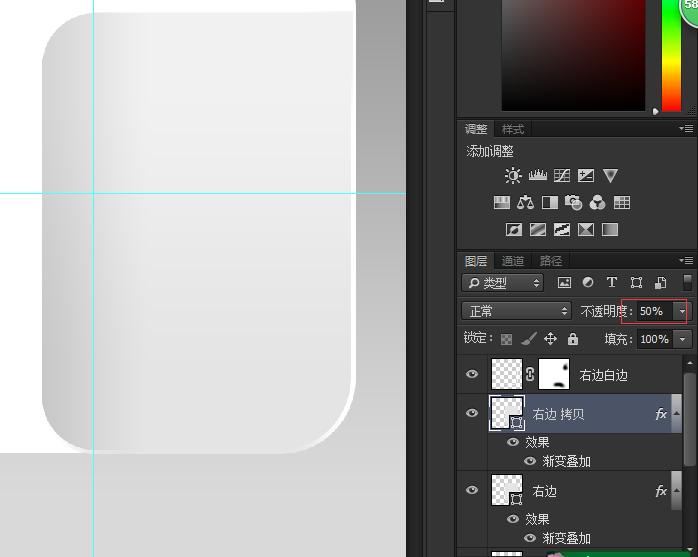
10、然后将“右边”复制一层,并且双击打开图层样式,更改下渐变设置。然后确定,然后更改图层不透明度为50%。
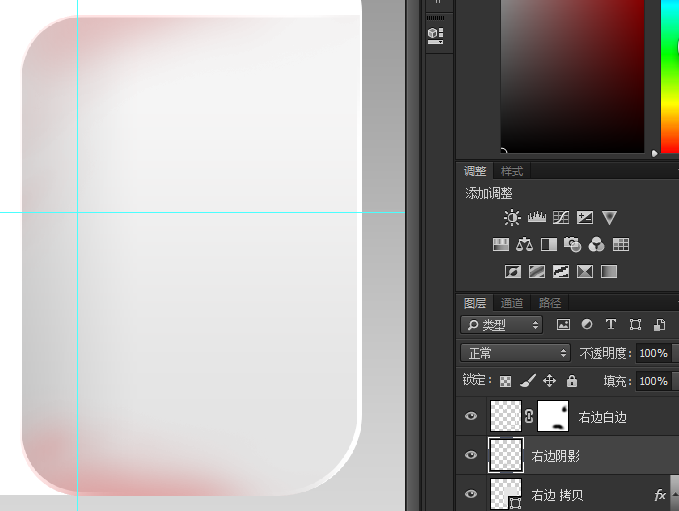
11、再新建一个图层,取名为右边阴影,按住alt点击“右边 拷贝”图层缩略图,得到图层的选区。
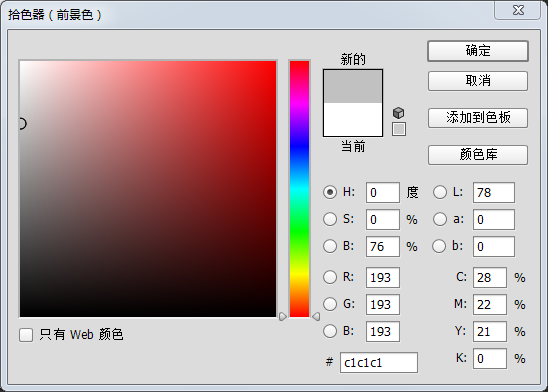
12、将前景色改为灰色,再将画笔设置为软角画笔。
13,设置好画笔大小和流量,给左边两个角添加一些阴影,红色区域。
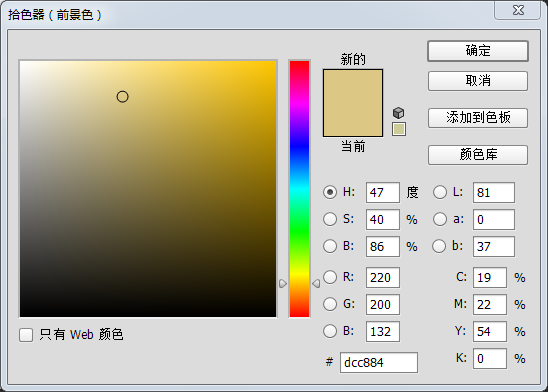
14、将前景色设置为一个屎黄色。
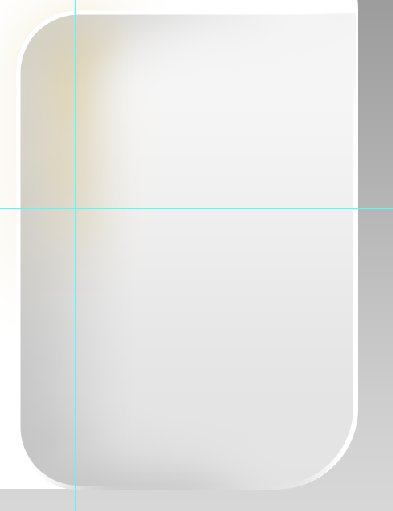
15、用画笔画出这样。
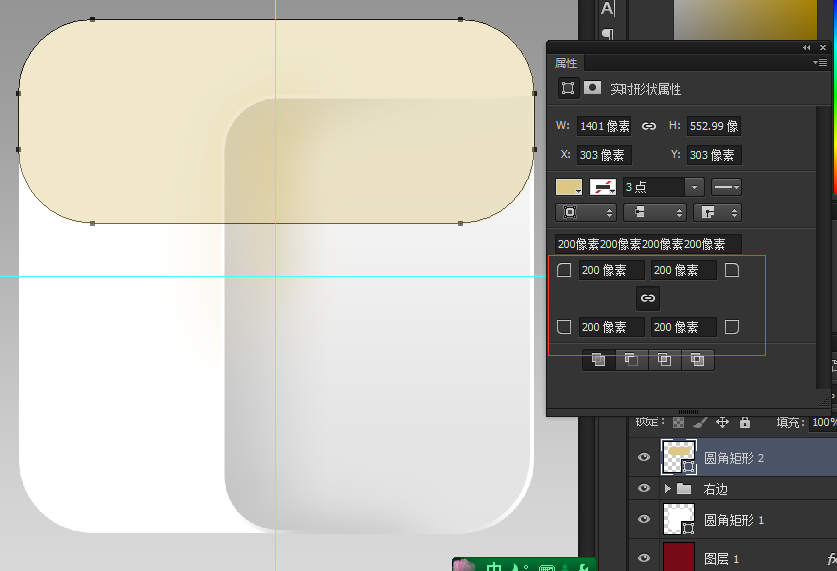
16、画一个圆角矩形,圆角半径为200。并且降低不透明度,要对齐好来。
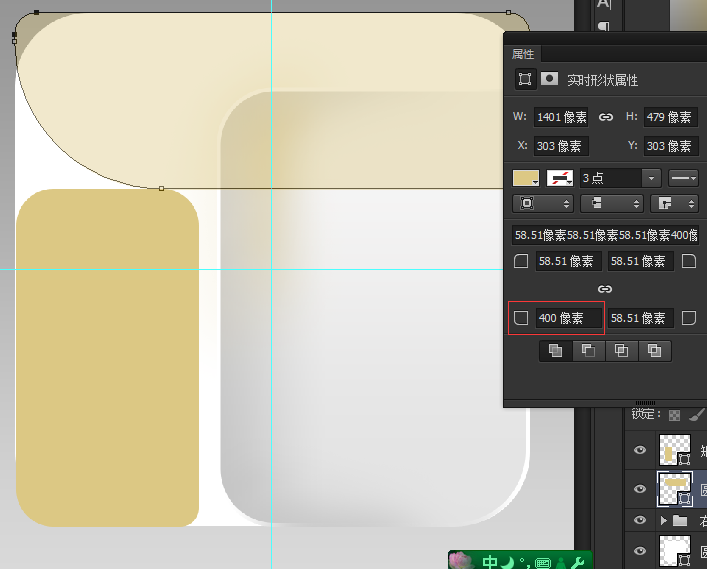
17、再画一个圆角矩形,设置如图。
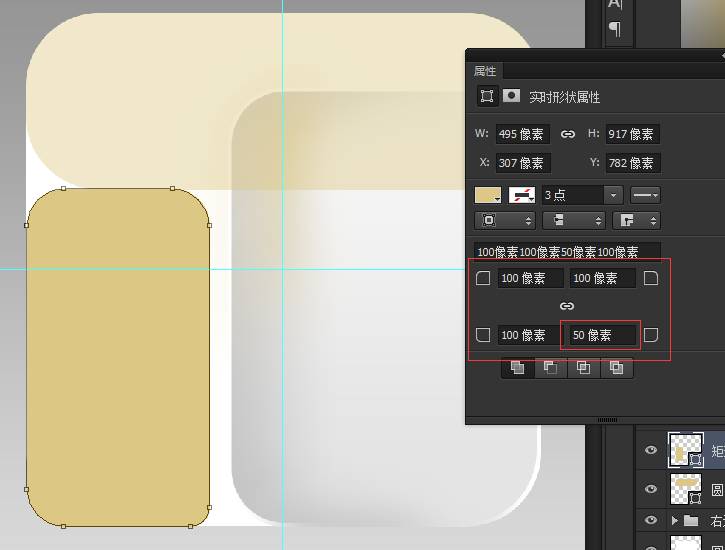
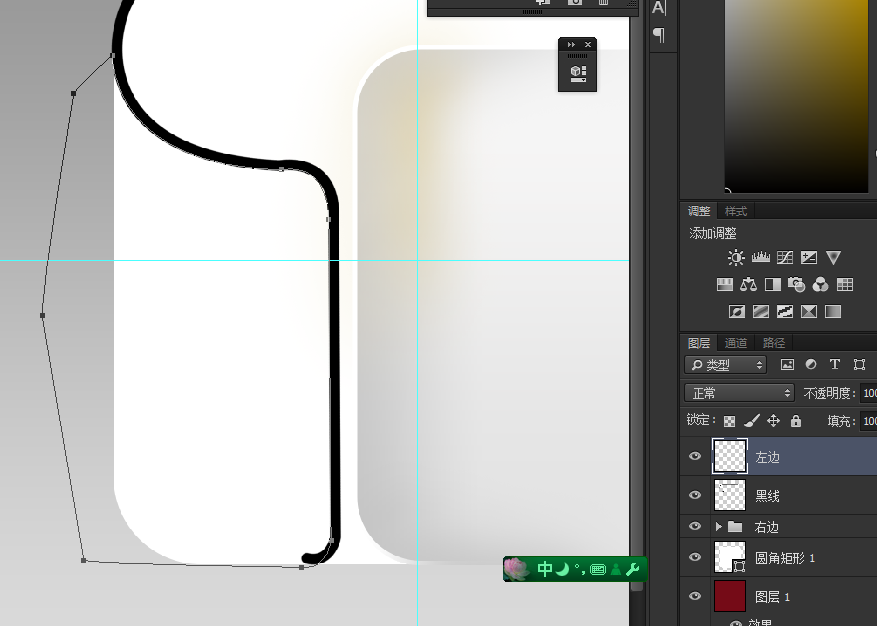
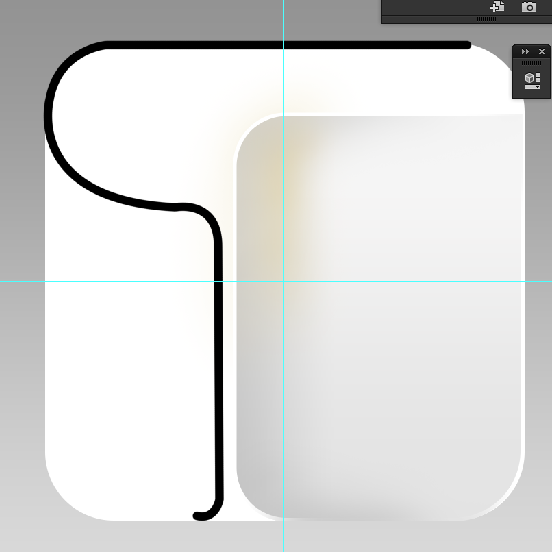
18、将上面这个圆角矩形的左下角的半径设置为400,其他三只角不用管了。
19、新建一个图层取名为“黑线”,并且用钢笔工具沿着边勾出这么一条路径。
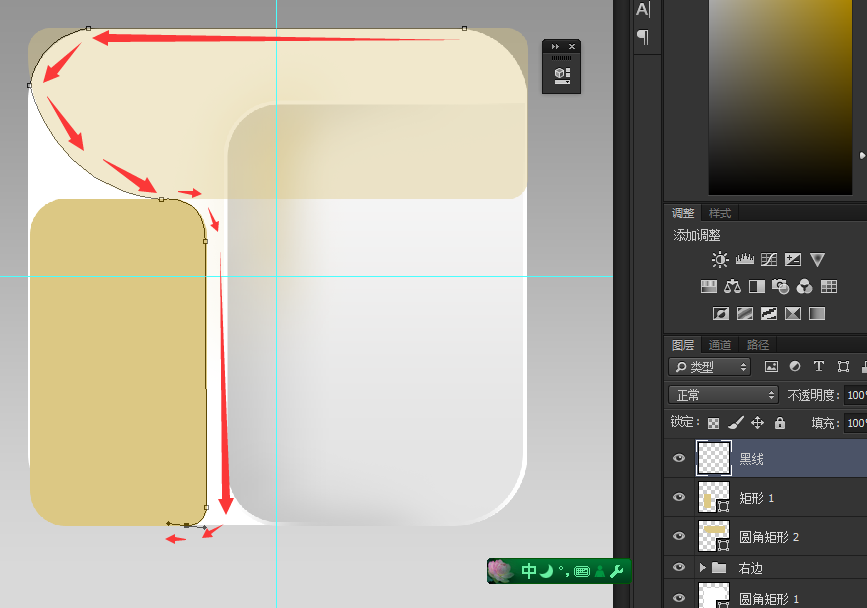
20、我们还需要对这条路径做一点修改,用钢笔工具来控制这个控制柄,使这一段路径变的更圆。
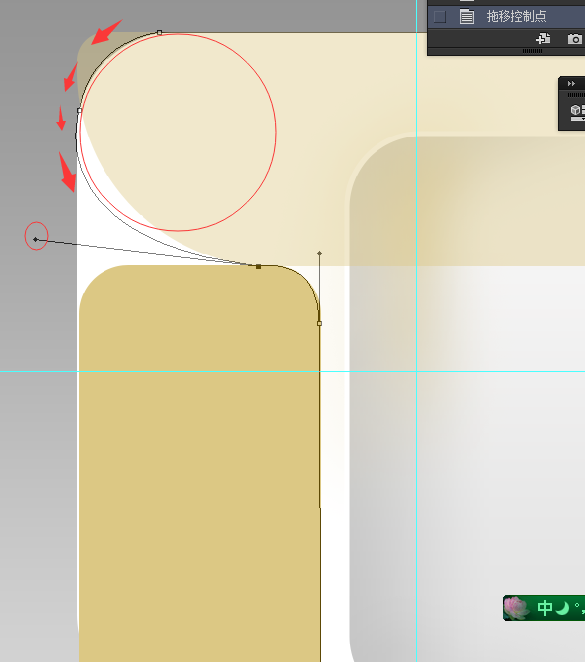
21、接下来就是描边了,前景色设置为纯黑色,画笔大小设置为25。
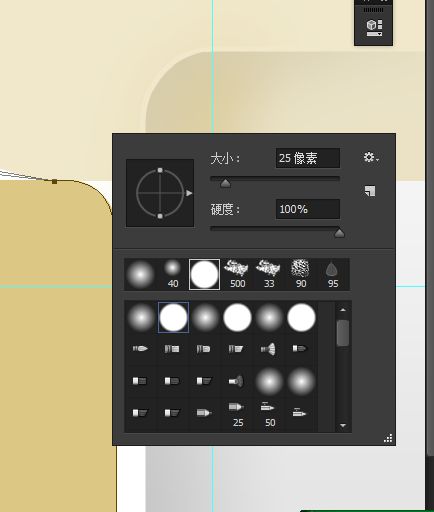
22、选择钢笔工具,在图上右键点击一下选择“描边路径”,设置如图,然后确定。

效果如图。
23、新建一个图层取名为“左边”,用钢笔勾出如图路径,并且转化为选区,把“左边”图层放到最大的圆角矩形图层上面,然后给“左边”图层建立剪切蒙板。