

Photoshop制作玉雕质感的字体
发布时间:2015-06-06 来源:查字典编辑
摘要:本文将为大家介绍Photoshop制作玉雕质感的字体方法,希望能对大家有所帮助!方法/步骤1、我们打开一个以宽1000像素,高500像素,分...
本文将为大家介绍Photoshop制作玉雕质感的字体方法,希望能对大家有所帮助!

方法/步骤
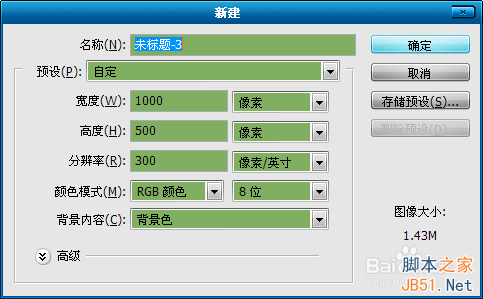
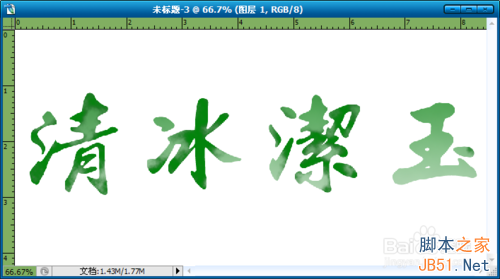
1、我们打开一个以宽1000像素,高500像素,分辨率为300的白色文档。

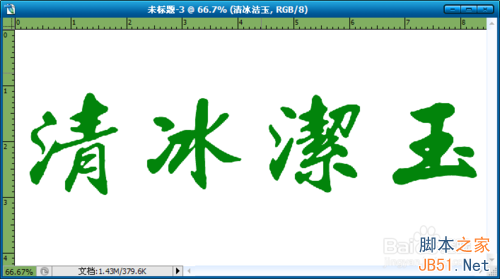
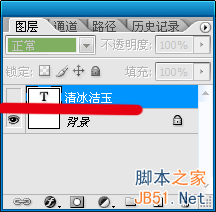
2、输入文字。(什么颜色的不重要),关闭文字层的小眼睛。
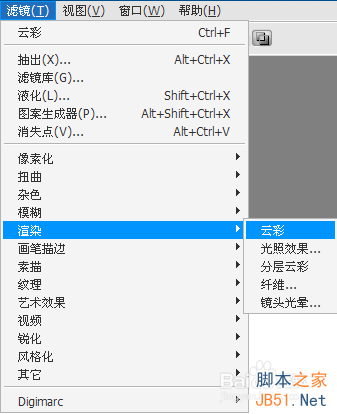
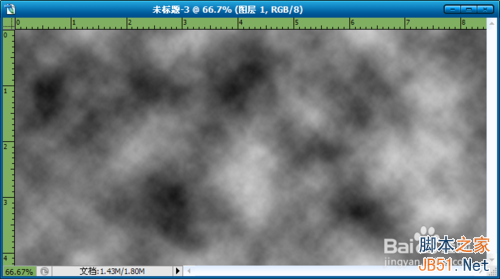
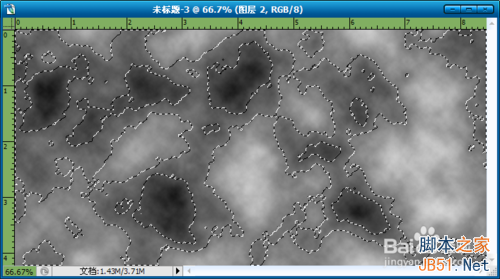
3、在文字图层上,新建一个图层,前景色为黑,背景色为白,执行“滤镜”—“渲染”—“云彩”命令。(不满意可以重复执行)


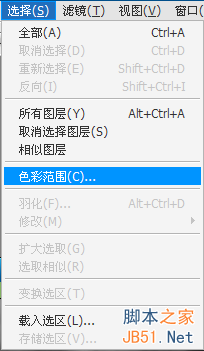
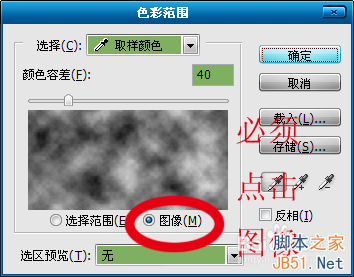
4、再点击“选择”—“色彩范围”,用取样笔,点击灰色部分。按“Ctrl+J”复制到新图层。
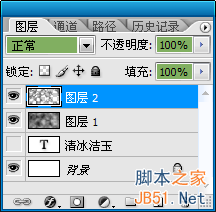
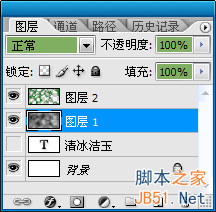
5、按住“Ctrl”键,同时鼠标点击“图层2”的缩略图,得到“图层2”的选区。
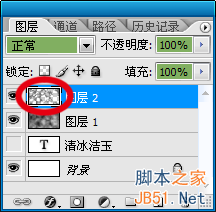
6、填充绿色。然后按“Ctrl+D”取消选区。点击“图层1”。


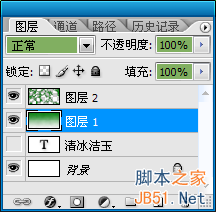
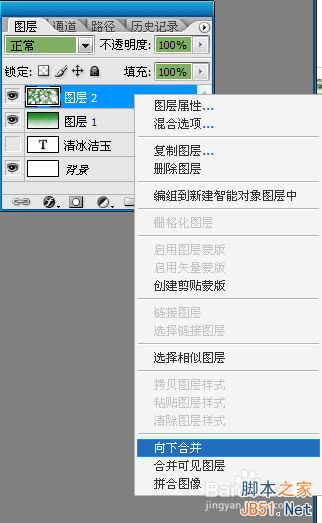
7、在“图层1”中使用“渐变工具”,从上到下拉一个绿到白的渐变色。右键“图层2”向下合并“图层1”。


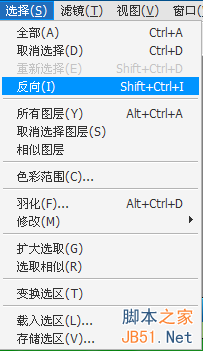
8、再点击文字图层的缩略图,得到文字选区,(如何得到选区请看第5步骤),然后反向,按“Ctrl+X”剪切。

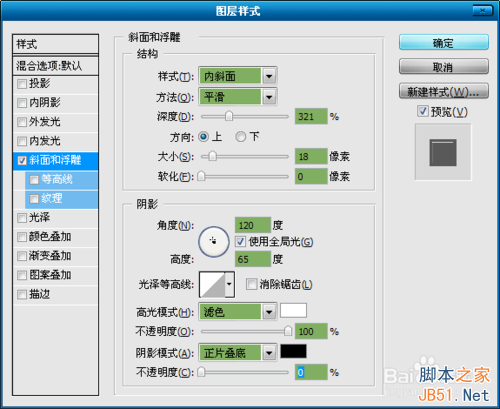
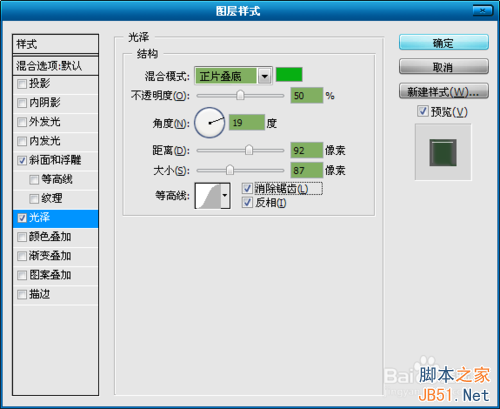
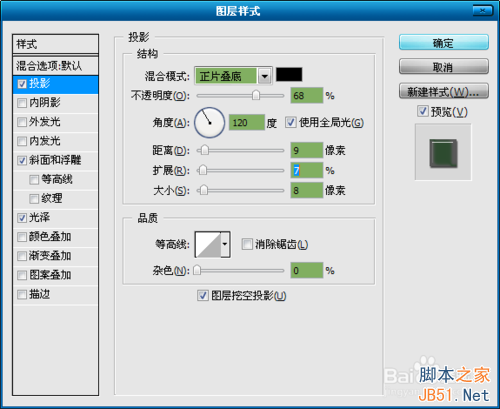
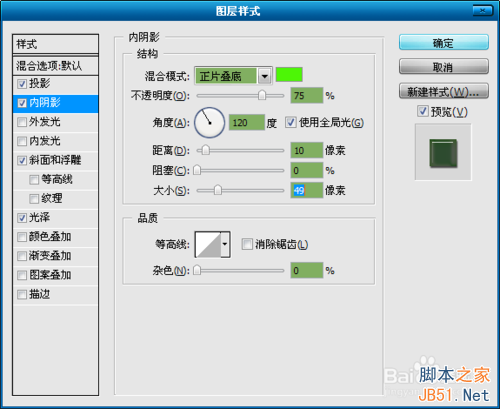
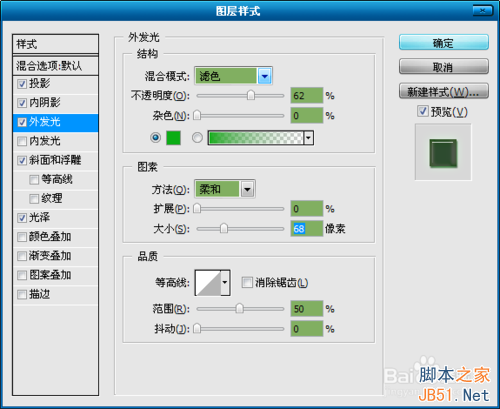
9、双击“图层1”编辑图层样式。
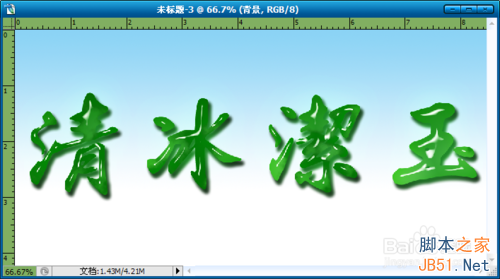
10、点击背景层,用“渐变工具”从上到下拉一个淡蓝到白的背景。保存即可。
以上就是Photoshop制作玉雕质感的字体方法介绍,希望能对大家有所帮助!