本教程主要使用Photoshop合成美女头像抽象的水彩装饰效果,利用水彩渲染的素材和树枝花朵蝴蝶等,通过蒙板蒙板、剪切蒙板、正片叠底、叠加、柔光、强光等工具把他们融合在一起并加以调色让整体更加有艺术品的气息。
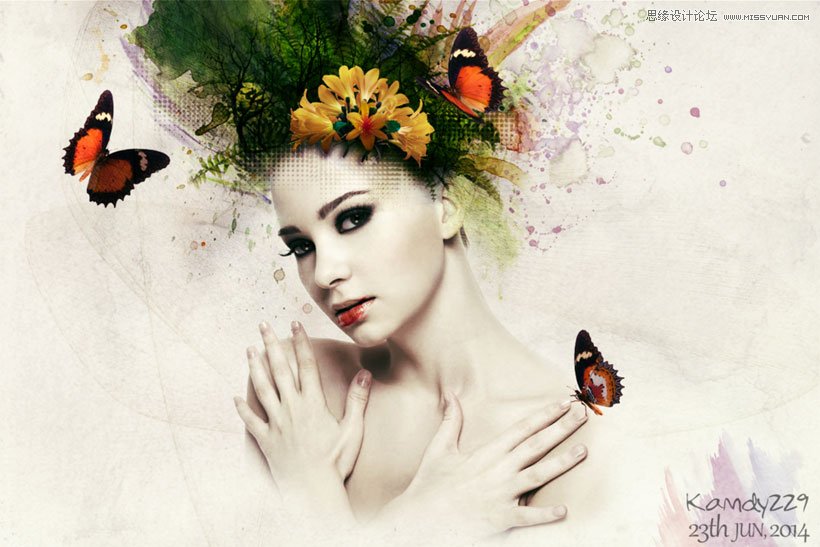
先看看效果图:
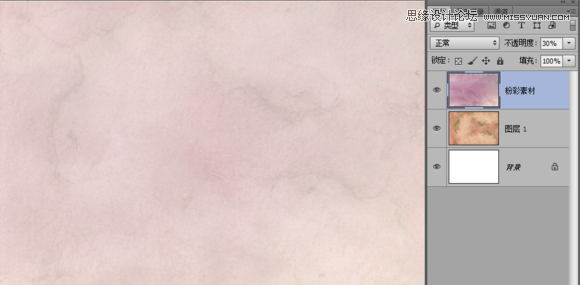
1、先来制作纸张的背景,新建一个1200×800的文档,拖入素材复制多2层出来,变形工具调整好位置。
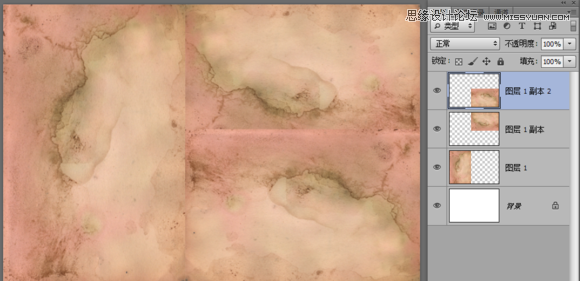
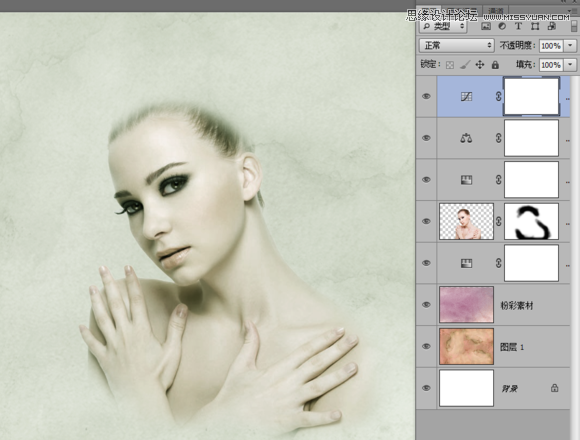
然后把3个图层Ctrl+E 合并成一个图层,把图层不透明度设置为 30%,拖入粉彩素材,然后调整好大小把它的不透明度也设置为30%
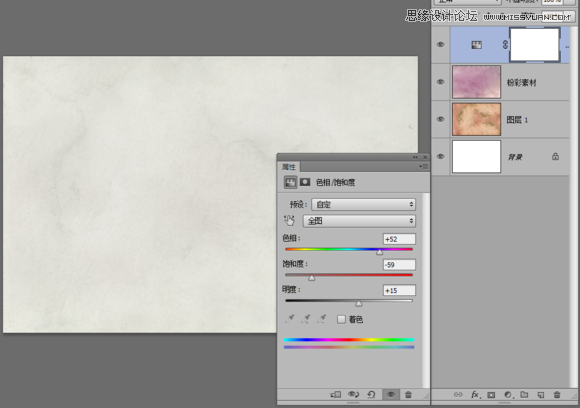
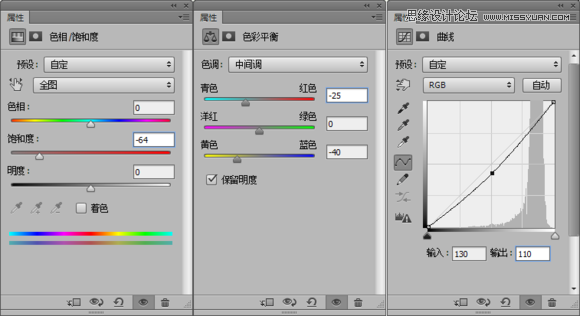
添加可调整图层---色相/饱和度,参数如图
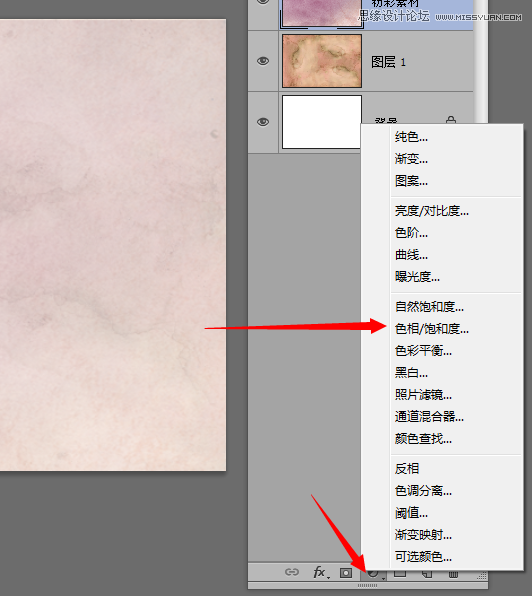
可能有人会问为什么要搞成这个颜色,好吧那是因为要把白色的画布做成像被弄湿之后又晾干的那种水彩渲染过的纸的效果。
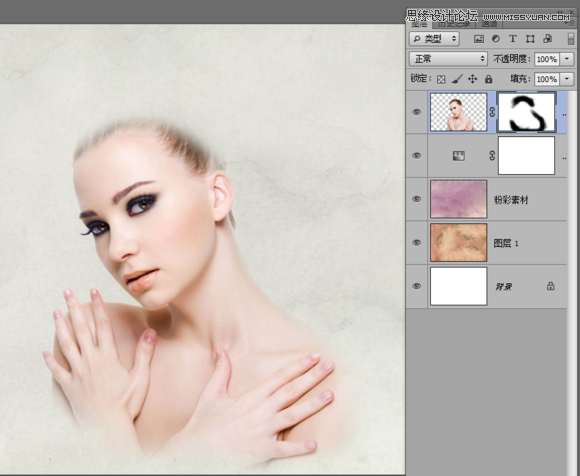
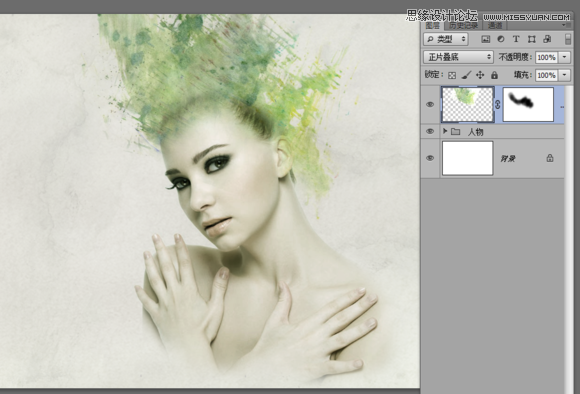
2、拖入美女素材,放在中间调整好大小,别太小也别太大。大了一会添加其它素材不方便,小了做出来的作品太小也不好看。

然后把美女抠出来,怎么抠方法很多随便这里不限。自己就用了RGB通道滤色+反相+选区相减+填充白底抠出来的。抠出来之后,添加蒙板 用柔边画笔(CS6里面的3号画笔,不透明度60%),把它擦成这个效果
3、调色 添加3种可调整图层分别是【色相/饱和度】、【色彩平衡】、【曲线】,然后参数如下:
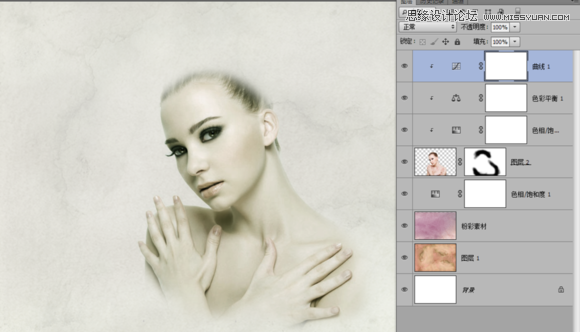
调好之后效果是这样的
但是这样把背面的纸都变色的,这样不是我们要的效果。所以我们要把这3个可调整图层添加剪切蒙板,让这3个效果只在美女图层上发挥作用而不是整个画面都变色,创建剪切蒙板的方法很简单:
只要按住Alt键鼠标移到美女图层上面的色相图层之间的地方,就会出现一个白色方块下面带个向下箭头的指针就对了,按一下鼠标左键,就创建了剪切蒙板了。把3个图层都添加剪切蒙板,如图:
4、为了方便管理可以把现在这些图层都组合在一起。现在拖入水彩素材1 ,调整不透明度为55% 这样做是为了方便看清楚下面的图层,这样调整位置就不会错
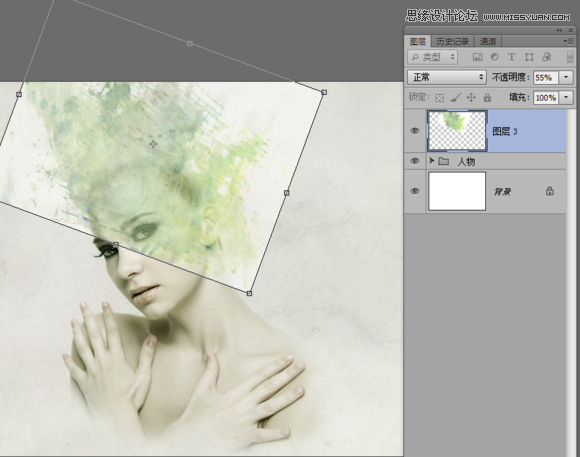
调整好位置之后把不透明度设置回100%,混合图层为 【正片叠底】,然后添加蒙板把多余的部分擦除
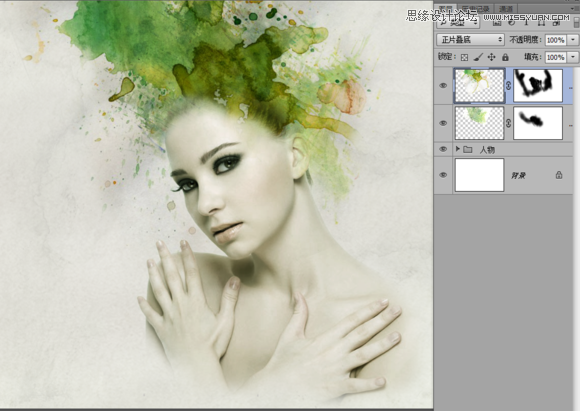
然后拖入 水彩素材2 用上面的方法调整好位置,混合效果为【正片叠底】
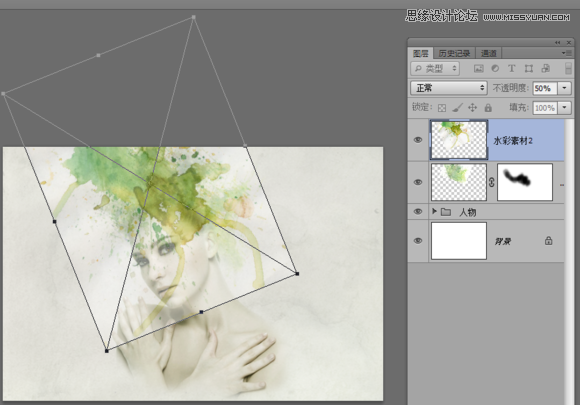
一样也是添加蒙板,擦除多余的部分
然后拖入树枝素材,正片叠底 调整好位置
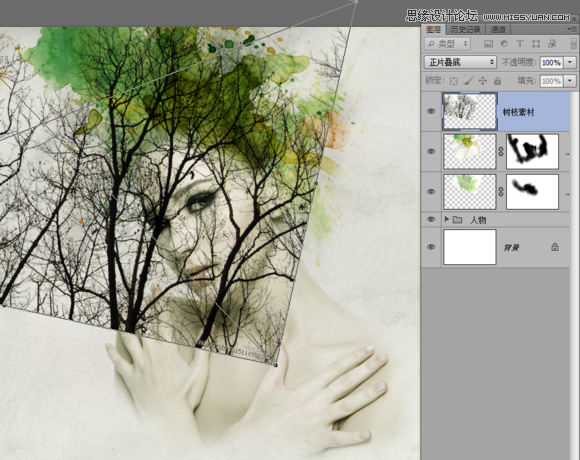
添加蒙板,擦除多余部分,如果遇到部分树枝角度不是很好的话,可以框选要调整的部分,Alt+E 选择 【操控变形】,工具来修改一下
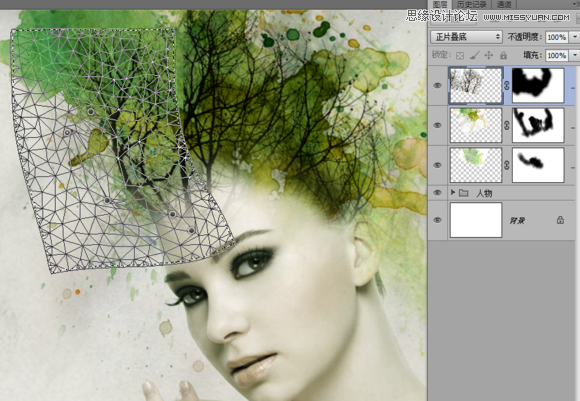
变形之后如果中间如果有缝隙的话可以,框选有缝隙的部分 Shift+F5,使用 内容识别 来智能填充缝隙的部分。然后在蒙板里面修饰一下差不多就可以了
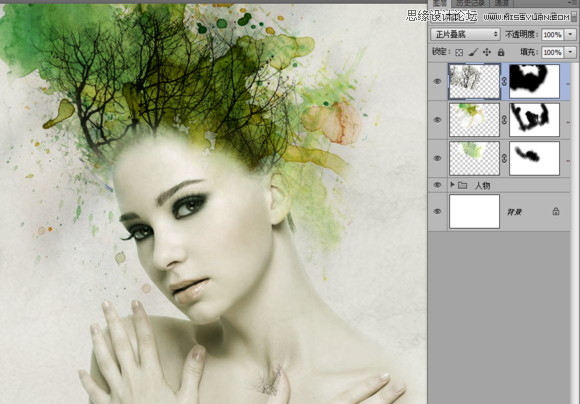
然后 Ctrl+M 曲线工具修改一下亮度

拖入肾蕨素材,调整好位置,正片叠底,擦除多余部分,并曲线工具调整加点亮度
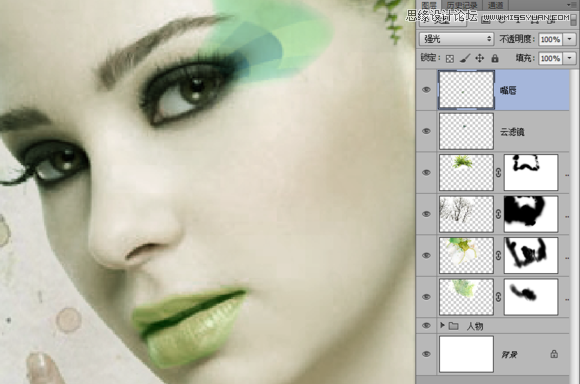
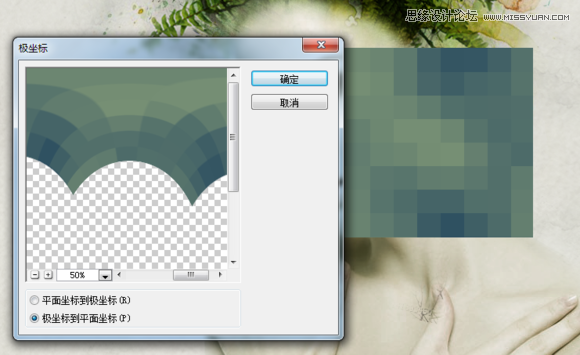
5、新建一个空白图层,命名云滤镜,设置前景色为 #A8BA81 背景色 #012955,然后按M 框选工具,画一个选区出来。按Alt+T ----【 渲染 】--- 【 云彩 】
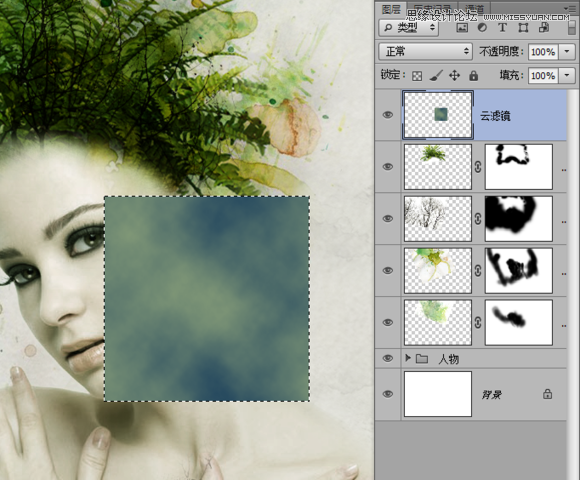
然后 继续滤镜---像素化---马赛克

取消选区,滤镜---扭曲----极坐标
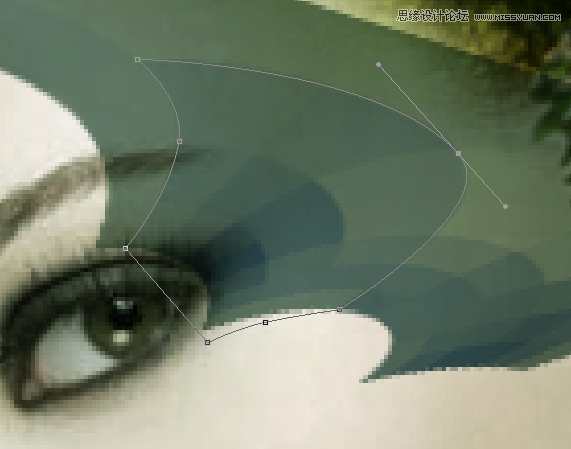
完成后Ctrl+T 缩小尺寸,然后左下角、右下角两个顶点,鼠标往里边拖动,让他有一种透视感觉
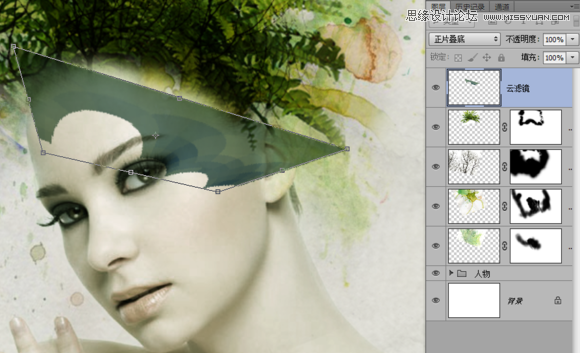
用钢笔工具把多余的部分勾勒出来然后转为选区羽化1.5像素
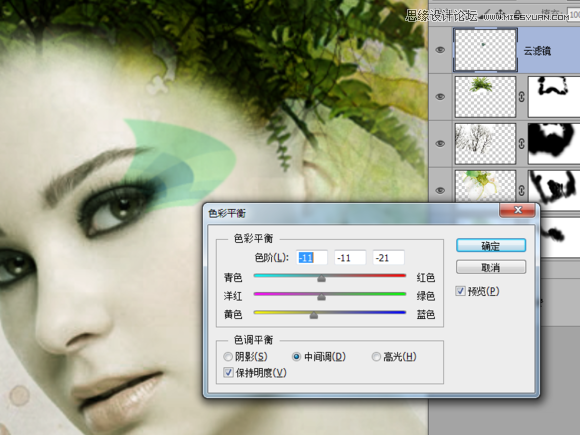
然后图层混合模式为【强光】观察到颜色跟整体有点不太搭调,可以用Ctrl+B 色彩平衡 调节一下颜色让它跟主体的色调融合更恰当一些
6、新建一个空白图层,命名 嘴唇,用钢笔描绘嘴唇,转为路径 羽化1.5像素 并填充颜色#779370,然后图层混合模式为【强光】