

本教程主要介绍如何原生地去制作设计素材,虽然不含很多技巧,但是它是很好用的一个方法。可以用在很多地方,关键是麻麻再也不担心版权问题了。
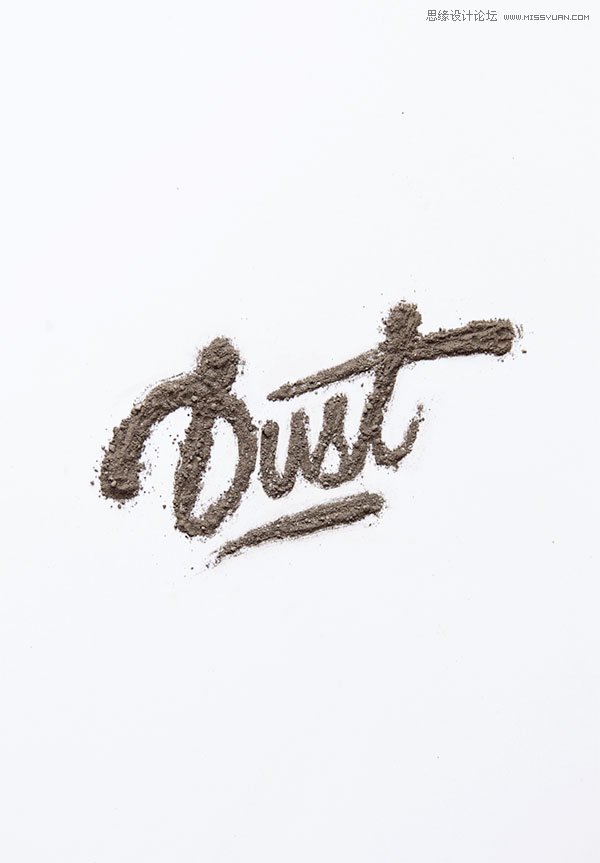
今天我们和你聊聊如何有B格的做素材,大家都知道,设计师平常要找到非常完美的素材会花掉很多时间,一不小心可能还会侵权,那么最好的方法是什么呢?没错啦,自己创造。今天这个教程教你如何利用相机与Photoshop去创建一个原汁原味的尘土字体,学会之后,妈妈就再也不用担心侵权咯。
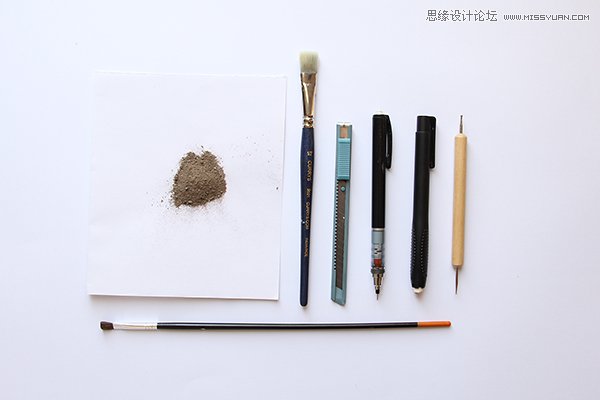
这是一个整体略高端、方法很简单的技术活,结合了实际生活取材,所以需要的工具如下:
相机
镜头
三脚架
纸张
铅笔
灰尘,粉末,污垢
Exacto刀
画笔1/2 “
画笔1/4 “
橡皮擦
用于压花的折笔
一、组装
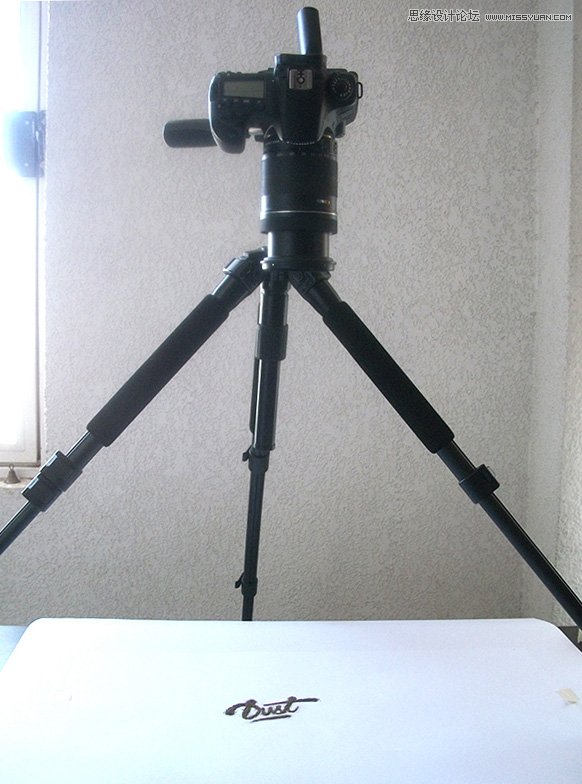
1、组装相机。为了审核采光呢,你得把三脚架放在合宜的位置,所谓合宜的位置,就是面向自然光充足的地方。
按照下图的方式把屏幕转向合宜的位置旋转调整相机使得牌照对象效果最佳。
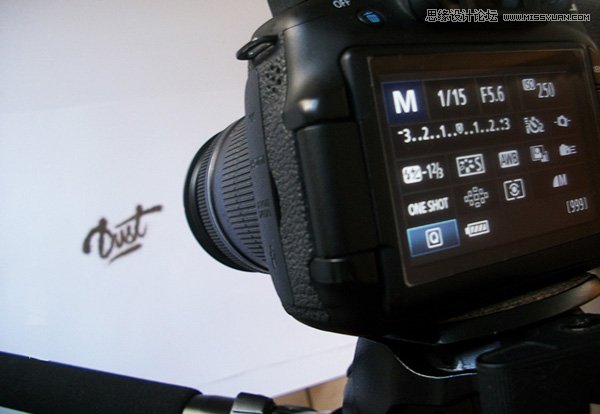
2、部件组装好了以后,开始设置相机。我一般直接拍摄成JPG,但或许你会喜欢RAW~
注意:如果你采用JPG,那么选择最大格式质量最高的设置!
光的设置取决于你的环境。一般你会在室内,但是如果你是在一个非常明亮的环境中,那么可以设置为:
快门速度:1/15
孔径:F 5.6
ISO:250
在拍摄的时候,多拍摄几个样本,选择出最佳的一个。
二、开始艺术工作并拍摄
1、在纸上绘制文字的线稿。尽量保持线稿细而轻,只需要你自己看的清楚就OK了。
画好线稿后开始给线稿上尘土。可以使用美工刀一点一点地放上去。
字体做好后拍摄之,取出最好的样本。
三、导入图片并编辑之
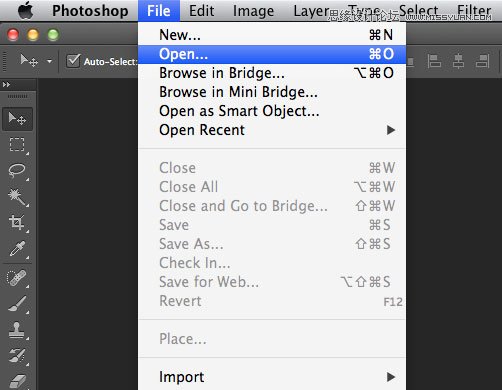
1、打开ps,导入你想编辑的图片。
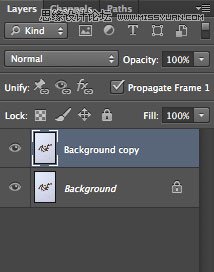
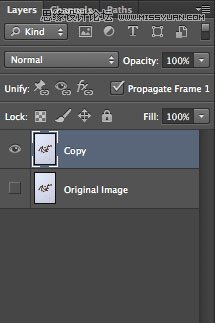
2、复制一层该图层并重命名之。

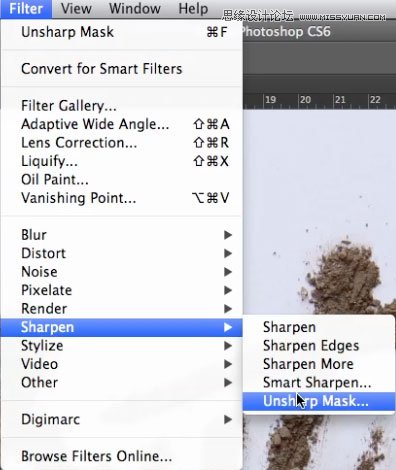
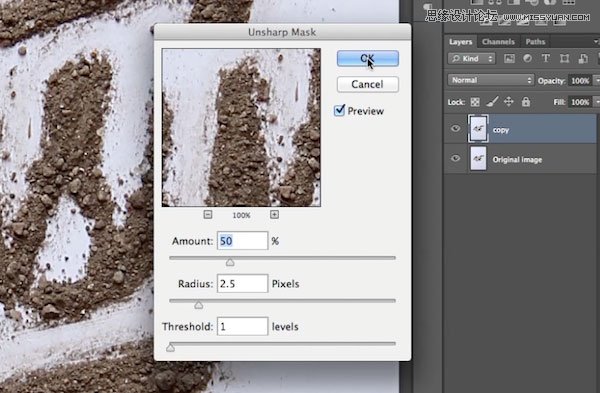
3、为新复制的图层进行一个USM锐化,数据如下:
数量:50%
半径:2.5像素
阙值:1色阶
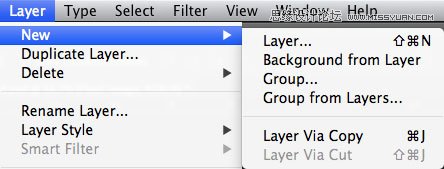
4、新建”clean up”图层。
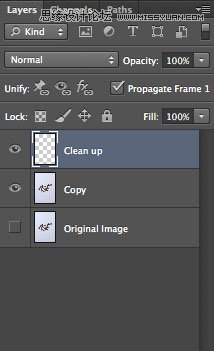
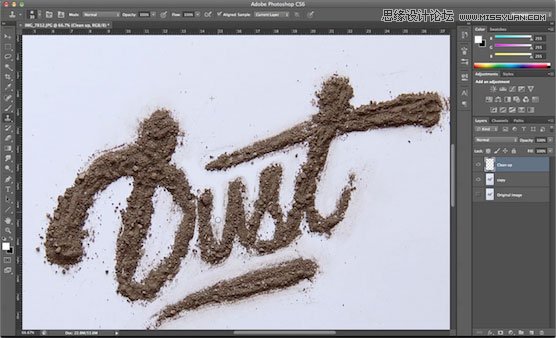
5、使用仿制图章工具擦掉字体周边的干扰元素。
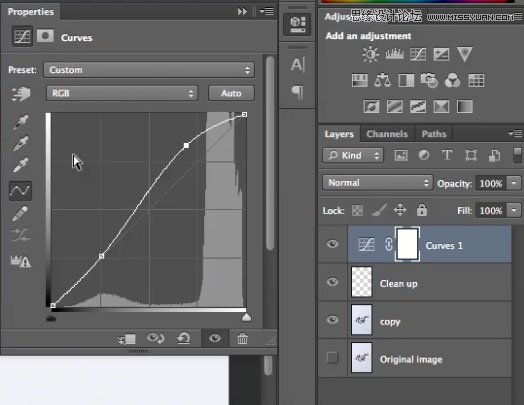
6、清理干净后,新建一个曲线调整图层,数据设置与下图相仿即可。曲线调整的优点不仅在于可以提高亮度,还可以清晰化主体。
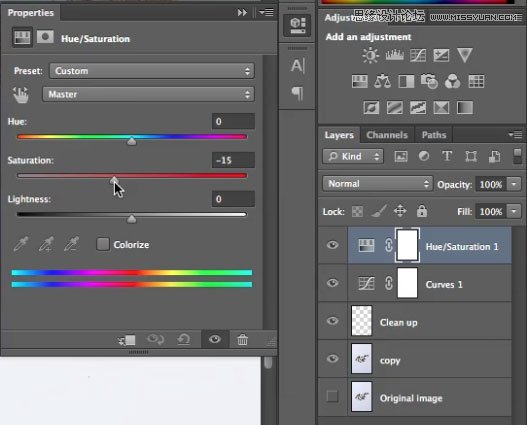
7、新建色相/饱和度调整图层,殊绝设置如下:
8、Command/Ctrl-Shift-Alt-E 盖印所有图层。
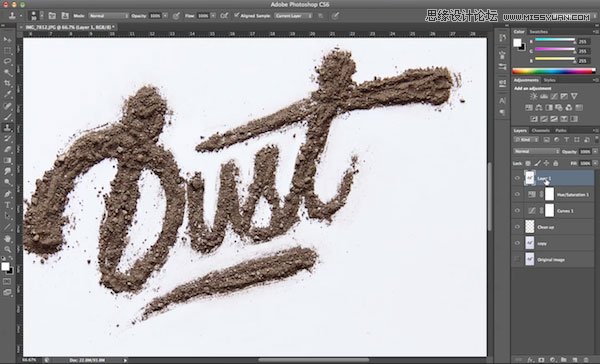
最终效果图
注:更多精彩教程请关注三联photoshop教程栏目,三联PS群:182958314欢迎你的加入